Weekend Projects

It would just be a pic of a led strip :). Like this.

2018020513381626-1102997.jpg
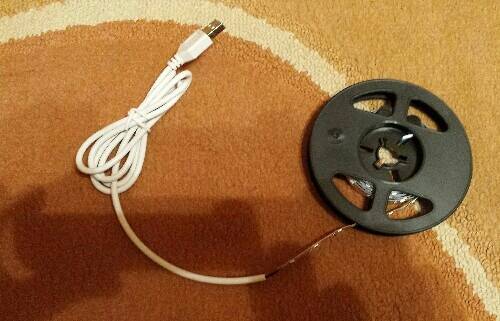
My son's father in law has five of those lights from a cut up strip light in each room of his house all coupled to a battery in a cupboard that is charged often. They are on a switch. He turns then on during night power failures and apparently you can see throughout the house. Never seen them working.
Great idea.
 
If you live near Roodepoort. At Hillfox where Metro cash and Carry was, about the 4th shop theres a oke that sell them for almost nothing

Editor's Note: This was 6 months ago. I cant confirm if the relevant Flea Shop Owner still trades in said LED light.
 
After a weekend of redesigns and improvements I have arrived at Dremel homogenizer V2. Frankly a 200mm long 3mm dia shaft was ambitious to say the least.
I discovered a 3mm ID bearing is exactly that, but a M3 threaded rod varies from 2.5 to 2.85mm and that contributed to shaft whip even with another bearing in the middle.
The only way to get everything concentric was the lathe, my 3D printer isnt the most accurate producer of results.
I found the top hole introduced too much air and blocking it off increased the flow through the bottom one, which is what I wanted to lube the bottom bearing.
main cork.jpg

Tesla style head made from delrin.
tesla head.JPG

No matter how long you stir oil and water on the mag plate, they dont mix.
stirred oil water.jpg

Enter the Dremel and some serious mixing takes place, this after 2min and no separation after 2 hrs, just some layering.
mixed layers.JPG

I found speed 4 on my Dremel worked the best and at 8 the output from the discharge holes was noticeably reduced.
Edit: this was for the oil water mix, ejuice is considerably thicker and loads the motor more, so I cut a disc off the 4 disc rotor which should help reduce the strain on the Dremel.

In closing, if you can afford Nico Lubbe's pro version that @KZOR demo'ed, go for it, its def's a game changer for mixing and if you can, maybe ask for a custom tesla turbine style head.
 
Last edited:
After a weekend of redesigns and improvements I have arrived at Dremel homogenizer V2. Frankly a 200mm long 3mm dia shaft was ambitious to say the least.
I discovered a 3mm ID bearing is exactly that, but a M3 threaded rod varies from 2.5 to 2.85mm and that contributed to shaft whip even with another bearing in the middle.
The only way to get everything concentric was the lathe, my 3D printer isnt the most accurate producer of results.
I found the top hole introduced too much air and blocking it off increased the flow through the bottom one, which is what I wanted to lube the bottom bearing.
View attachment 210795

Tesla style head made from delrin.
View attachment 210803

No matter how long you stir oil and water on the mag plate, they dont mix.
View attachment 210796

Enter the Dremel and some serious mixing takes place, this after 2min and no separation after 2 hrs, just some layering.
View attachment 210797

I found speed 4 on my Dremel worked the best and at 8 the output from the discharge holes was noticeably reduced.
Edit: this was for the oil water mix, ejuice is considerably thicker and loads the motor more, so I cut a disc off the 4 disc rotor which should help reduce the strain on the Dremel.

In closing, if you can afford Nico Lubbe's pro version that @KZOR demo'ed, go for it, its def's a game changer for mixing and if you can, maybe ask for a custom tesla turbine style head.

Nice upgrade's bro. Well probably be seeing V3 soon. Keep it up!
 
At last got round to fixing the sagging paving behind the pool. Then ran out of cement. Next weekend, more of the same.
6263969C-F05E-4B00-87B4-B3B9431A84BD.jpeg AF5C990C-14A8-4286-9CD3-C8FDC59C97A9.jpeg FCEEA06C-5EC7-4E29-9F2B-BD435BA192C8.jpeg 9B90ABFE-41C4-47C4-AB21-0C8FBBBADD40.jpeg
Sun fried me and mixing cement broke that which was not already painful from working on my knees.

Regards
 
At last got round to fixing the sagging paving behind the pool. Then ran out of cement. Next weekend, more of the same.
Sun fried me and mixing cement broke that which was not already painful from working on my knees.

Regards
Big project. Luckily I have old age and a messed back as an excuse not to do big jobs like that anymore.
 
Not the weekend yet but this has been bothering me for a long time. My main pulsar was still working but the button had lost its click sound.

Original button.
C061EA25-8AB3-46CB-892D-F7F2DADA5A73.jpeg

After removing the original button and preparing the surface with solder paste.
0CD5E171-4085-4125-8065-982DEF9EB387.jpeg C4E4A29A-B353-40F1-A02C-A3CBE30BEA01.jpeg

Final pic with new button before cleaning the surface.
05883B57-62C7-4716-9853-646182EBCCBC.jpeg
pleased to say the click is back and the button is working again :D
 
Not the weekend yet but this has been bothering me for a long time. My main pulsar was still working but the button had lost its click sound.

Original button.
View attachment 211296

After removing the original button and preparing the surface with solder paste.
View attachment 211297 View attachment 211299

Final pic with new button before cleaning the surface.
View attachment 211298
pleased to say the click is back and the button is working again :D
Nice. I am not into electronics so take my hat off to you.
 
Not the weekend yet but this has been bothering me for a long time. My main pulsar was still working but the button had lost its click sound.

Original button.
View attachment 211296

After removing the original button and preparing the surface with solder paste.
View attachment 211297 View attachment 211299

Final pic with new button before cleaning the surface.
View attachment 211298
pleased to say the click is back and the button is working again :D

Nice .the repair looks great. Did you use an iron or air ?
 
Not the weekend yet but this has been bothering me for a long time. My main pulsar was still working but the button had lost its click sound.

Original button.
View attachment 211296

After removing the original button and preparing the surface with solder paste.
View attachment 211297 View attachment 211299

Final pic with new button before cleaning the surface.
View attachment 211298
pleased to say the click is back and the button is working again :D

mad skills !!
 
I'm in the same boat,but have to replace my iron soon and fit a reostat.
Look at the magnum range. I have one where I can change the tips and a small potentiometer to change the heat settings depending on the application required.
 
Look at the magnum range. I have one where I can change the tips and a small potentiometer to change the heat settings depending on the application required.

That's a lot of ching for a soldering iron! But then again, I solder very very very little. I have a 100w Topline jobby
 
That's a lot of ching for a soldering iron! But then again, I solder very very very little. I have a 100w Topline jobby
I need interchangeable tips depending on the size of the component etc. R500 is still better than R5000 and I really want a weller but let’s not talk about those prices!
 
I need interchangeable tips depending on the size of the component etc. R500 is still better than R5000 and I really want a weller but let’s not talk about those prices!

If you are using a tool often enough, one can always justify the costs. Currently looking at getting myself a R2k 3-chisel set for my woodwork hobby :facepalm:
 
I can always justify the cost of tools. LOL.
I was saving to buy a hammer. Every month I came to the shop with the cash, the price increased.
I eventually screwed that idea.Screenshot_20201021-214932~2.png I needed a scarce weight of 28oz. Not a size needed alot.
 
Back
Top