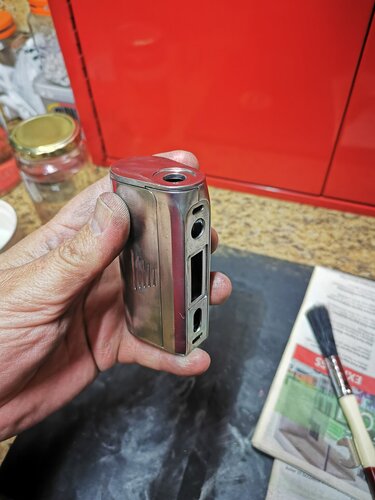
Mod restoration

You just need the oven to be hot enough and loose heat gradually over time.

When you open the door you loose heat so basically the oven stays hot after insertion of said parts.
50⁰ is what you need and baking it at 180⁰ won't do any good.
Like I said you need the oven hot. Same as baking a cake. The oven needs to be hot before you place the cake batter inside otherwise the cake would flop.
Same with the parts your curing in the oven. Even heat distribution so you don't get hard and soft surface on the same part.
You also don't have to bake it. But then you'd have to give it enough coats to counter ear and tear.

It's a good thing I'm not into baking cakes with the way I understand instructions :-D

Maybe ill just heat up the oven to 70 degrees it can go and wait for the thermostat to switch off. Then add the parts leave for 10 minutes and then cut the power. It's the best my brain can do right now, lol. I had nightmares about vape gear all night after breaking that 510 and really didn't get much rest and was up at the crack of dawn again this morning.
Check if the spraycan has a heat rating on the tin. Then set the temperature at that limit.
 
Check if the spraycan has a heat rating on the tin. Then set the temperature at that limit.

Seems like at this stage the paint is the least of my worries. Can't find the spares I want and am happy with. Did get a hold of a 510, but aside from being 22mm, the threaded part is way bigger in OD than the ID on the mod is. Also having a tough time of removing all the old paint, and I want it ALL off. I'll never be happy if the inside is still red and the outside is new. Would have been great to have a mini sandblast thingy. At this point I'm feeling like I should have saved the money I spent on the spray paint, acetone and thinners and just bought a new mod. With shipping of parts and those costs I could easily have bought a new mod. Not to mention the two new 26650's I bought. Sorry, I know this post really doesn't say much about the restoration process, but just feeling down and out. What was supposed to be a fun project is turning into a bloody nerve wrecking expidition.
 
Seems like at this stage the paint is the least of my worries. Can't find the spares I want and am happy with. Did get a hold of a 510, but aside from being 22mm, the threaded part is way bigger in OD than the ID on the mod is. Also having a tough time of removing all the old paint, and I want it ALL off. I'll never be happy if the inside is still red and the outside is new. Would have been great to have a mini sandblast thingy. At this point I'm feeling like I should have saved the money I spent on the spray paint, acetone and thinners and just bought a new mod. With shipping of parts and those costs I could easily have bought a new mod. Not to mention the two new 26650's I bought. Sorry, I know this post really doesn't say much about the restoration process, but just feeling down and out. What was supposed to be a fun project is turning into a bloody nerve wrecking expidition.

Been there too. 1632950589948.jpg
It can still be fun and a fun project.
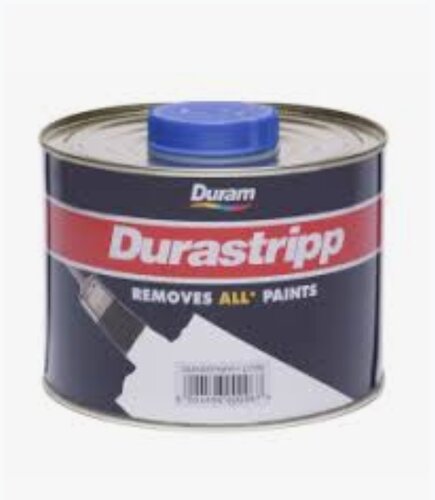
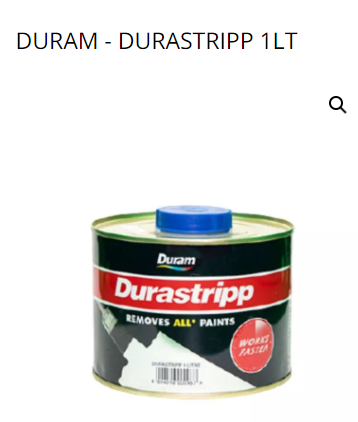
Get some Duram paint stripper, Drill out the hole to size and make it work and let's get started.
(Don't overthink it anymore)

And remember... Pics or it didn't happen!
 
Success lies just the other side of the toughest battles ... and I agree with @Resistance ...
Use the Duram paint stripper, and if that fails ... I have some industrial stuff that you can use, (used by electroplating companies to get EVERYTHING other than metal off metals), which I've successfully removed powder coating on a mod using it, internally and externally, and without damaging the metal underneath!
In the highly unlikely event that you cant get all the internal paint or powder coating off, you could always over spray it black or ... send it to Resistance or to me, and we'll get the paint or powder coating off for you ;)

As to the the 510 ... drilling the hole a little larger, and trimming the 510 by a mm or two on diameter is an easy enough exercise ... persevere young man ... success awaits you :number_one: ... along with a modified mod that'll probably outlast all of us.
 
@Viper_SA I was also in the exact same bout recently. I wanted a unique mod so I decided to 3D print my own. I spent way more than I should of designing and buying paints and a DNA board. I made the biggest mistake of not preparing the plastic shell before paint and now it has started to peel.
I took it as a learning curve and have plans for a V2 as soon as I get back from a work trip.
My late dad always used to say to me- "hard work pays off" when it is done it will be your favourite mod.

P.S. thanks for the ideas on the crackle paint.

Sent from my vivo 2006 using Tapatalk

I have to agree, any mod that you've invested time and effort in and on is going to become a favourite :number_one:
 
Been there too. View attachment 240573
It can still be fun and a fun project.
Get some Duram paint stripper, Drill out the hole to size and make it work and let's get started.
(Don't overthink it anymore)

And remember... Pics or it didn't happen!

Any chance you got a pic of the container for that Duram paint stripper?
 
@Viper_SA I was also in the exact same bout recently. I wanted a unique mod so I decided to 3D print my own. I spent way more than I should of designing and buying paints and a DNA board. I made the biggest mistake of not preparing the plastic shell before paint and now it has started to peel.
I took it as a learning curve and have plans for a V2 as soon as I get back from a work trip.
My late dad always used to say to me- "hard work pays off" when it is done it will be your favourite mod.

P.S. thanks for the ideas on the crackle paint.

Sent from my vivo 2006 using Tapatalk

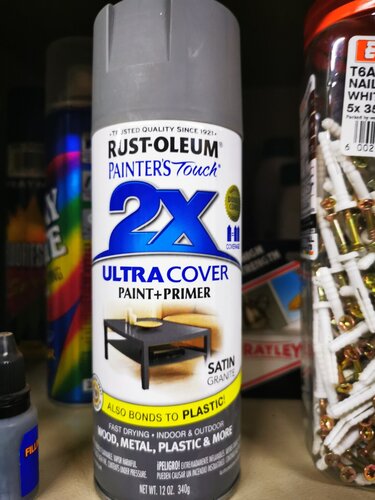
From a couple of camouflage paint jobs on my airguns I'd recommend this brand. The best for plastics in my opinion. Or at least try do the undercoat with their brand. Haven't tried the crackle finish on a different brand unfortunately.... but I'm pretty sure these guys sell a stand alone primer that you could use first and then carry on with the other brand.

IMG_20211002_153059.jpg
 
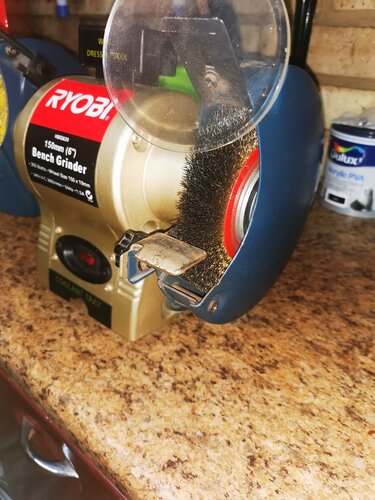
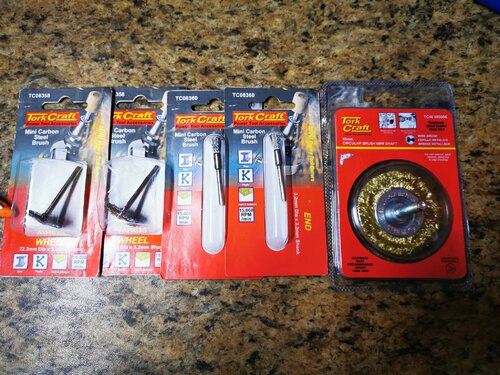
Okay, so after a long soak in acetone (witch usually removes any paint for me) and then in thinners, I'll really need to get that paint stripper. With some help from my "little friend" I got the stubborn stuff off almost all of the parts that will be visible.

IMG_20211002_160252.jpg

IMG_20211002_160646.jpg

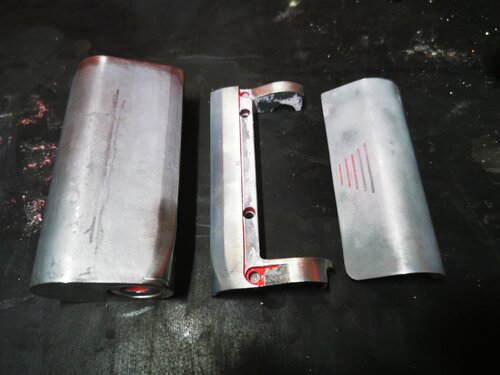
It's these parts where I'm struggling. All the good paint was on the inside of this mod :rofl:

IMG_20211002_160633.jpg
 
upload_2021-10-2_20-8-28.png

The good news about using a wire brush on zinc, is that you have a lovely rough surface for the primer to hold on to :)
 
View attachment 240632

The good news about using a wire brush on zinc, is that you have a lovely rough surface for the primer to hold on to :)

After taking those photos I did a once over with a bit of a Scotchbrite pad. Used to do that to my raw tumbled Reos every now and then. The wire brush makes it very very smooth actually, so I plan to Scotchbrite the whole mod very well before putting the primer on. Will be sure to post pics of the progress. The good news is that a very awesome gentleman is helping me source a 510 that will fit in there perfectly. Learning a lot now so doing the black one later should be a breeze.
 
After taking those photos I did a once over with a bit of a Scotchbrite pad. Used to do that to my raw tumbled Reos every now and then. The wire brush makes it very very smooth actually, so I plan to Scotchbrite the whole mod very well before putting the primer on. Will be sure to post pics of the progress. The good news is that a very awesome gentleman is helping me source a 510 that will fit in there perfectly. Learning a lot now so doing the black one later should be a breeze.

Interesting that you get a smooth finish on a soft metal, (zinc), with a wire brush :rolleyes: ... I would have thought it would be very rough and possibly even require multiple layers of primer / undercoat ... and glad you have a, (Scotchbrite pad) solution :headbang:

Mark my words ... your black and red mods will be your new favourites once complete, and they'll have one helluva story behind them to boot ... beginning with something along the lines of; "I walked barefoot across the desert for 40 days ... ;)
Enjoy the experience! :) ... I'm looking forward to seeing the end result.
 
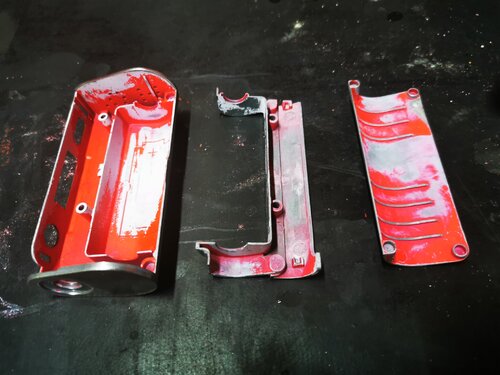
Eish, this stuff is on to stay! This is after the first application of the Duram paint stripper and a scrub with a toothbrush

IMG_20211003_115336.jpg
 
Eish, this stuff is on to stay! This is after the first application of the Duram paint stripper and a scrub with a toothbrush

View attachment 240679

I think you may have some kind of powdercoat on there ... it chips like crazy, and yet when you really do want the $%&* off, it's like turd on a blanket :rolleyes:
I had a similar experience with Aryanto's Double Barrel, and resorted to some "everything remover" I got from a mate in the electroplating business ... and even then I still had to scrub, wipe down and repeat three or four times before I got all the $%&* off ... persevere! ... You're almost there ;)

 
Eish, this stuff is on to stay! This is after the first application of the Duram paint stripper and a scrub with a toothbrush

View attachment 240679

Major improvement from what it was before. Scuff it again and lather with the Duram again. Let it sit till tonight or tomorrow .
That stuff works wonders otherwise I wouldn't recommend it.
 
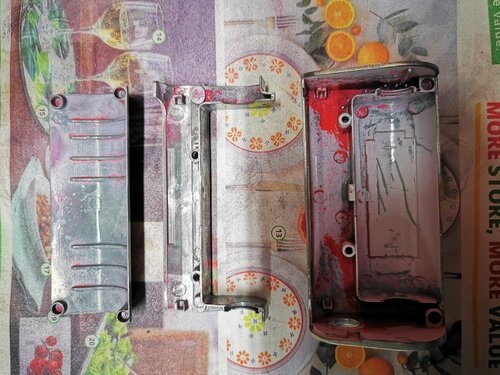
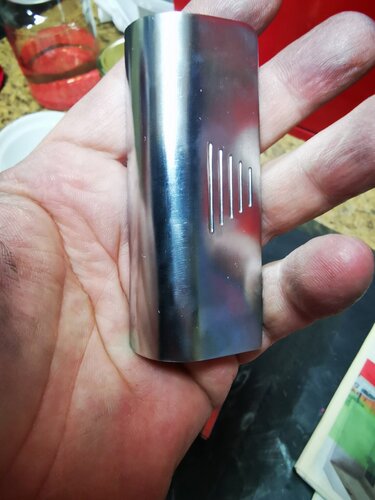
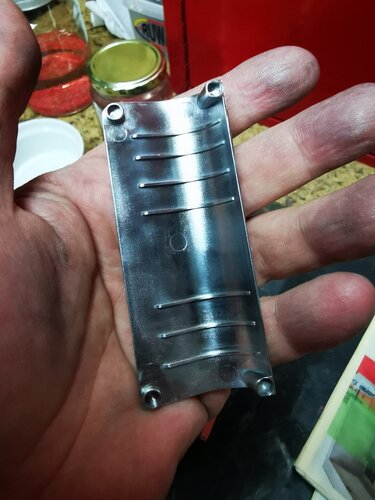
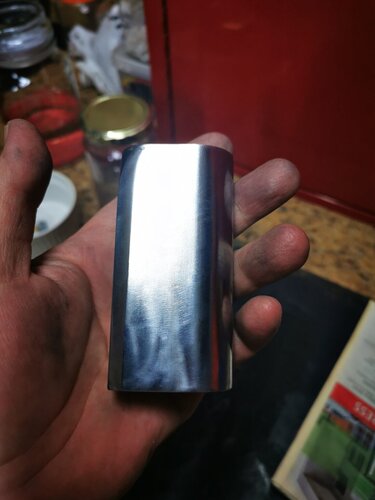
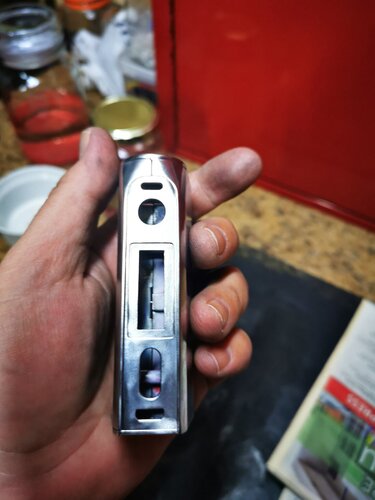
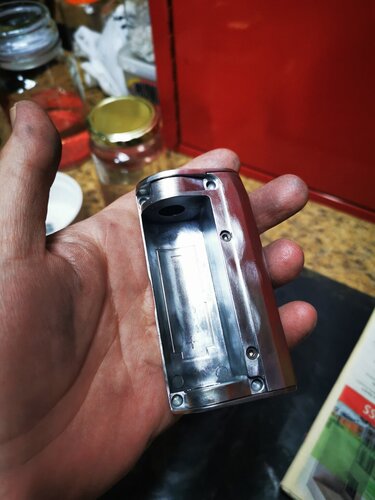
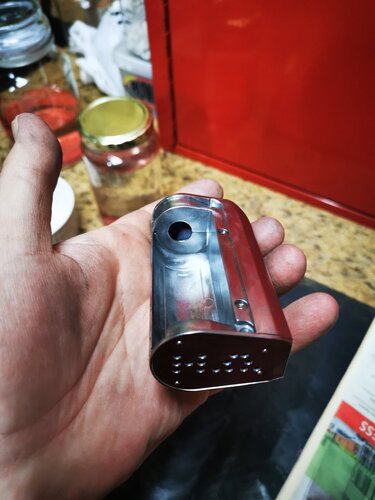
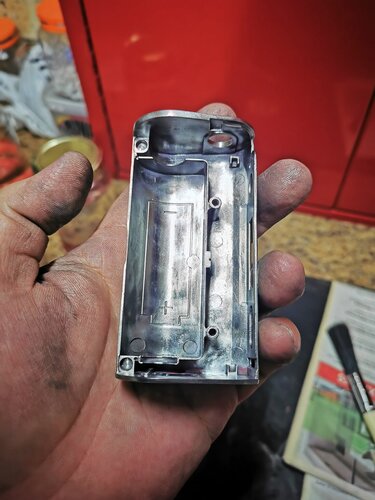
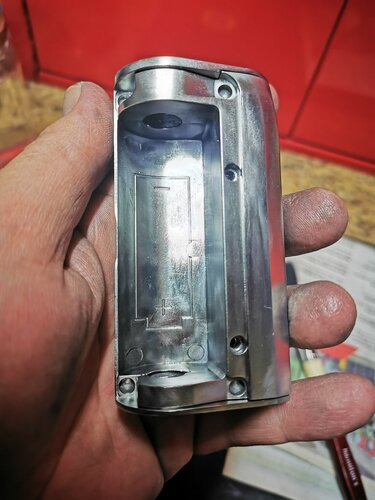
Okay, so my impatience got the better of me. Soaked it in Duram again, but the almost white undercoat laughed at it. So I grabbed my Tork Craft "Dremel" and set to work. Used up a few brushes (luckily they only range from like R10 to R15 a piece). Now I only have one or two small spots in obscure places where it will only bother me, lol, that will be soaked in Duram overnight. The damn buttons was the hardest to do and a have a few sore fingers for my troubles. Anyway, this is the state she is in now. Now I just need to find that elusive 510. The one I got in a pif is too big and the other's spring gave out, so it's stuck in the bottom position. Got the whole Hohm Slice mod with it though, also with paint chipped and sanded etc. Needs a little more TLC than mine, but if I can find two 510's I'd then have 3 Hohm Slice mods instead of only two. But I digress, here is my handy work for tonight.....

IMG_20211003_191545.jpg IMG_20211003_191550.jpg IMG_20211003_191557.jpg IMG_20211003_191600.jpg IMG_20211003_191603.jpg IMG_20211003_191605.jpg IMG_20211003_192724.jpg IMG_20211003_192757.jpg IMG_20211003_192814.jpg
 
Now ya smokin' ... That's already looking blimming sexy ... Well done man!

I must say that if that was my mod ... it'd be buffed up and stay as raw metal :inlove:
 
Now ya smokin' ... That's already looking blimming sexy ... Well done man!

I must say that if that was my mod ... it'd be buffed up and stay as raw metal :inlove:

I have considered buffing it, but then it's a fingerprint magnet and its a bit hard to get an even shine throughout, and my OCD would want the insides to be just as buffed as outside... I do have a 3rd Hohm Slibe to play with now however, so who knows what I'll do with that one. Maybe paint the insides a d buff up the outside. Thanks for the compliment by the way... Appreciate it
 
Wow wow wow. That looks amazing. I love it. I can't wait to see the final finish. Well done....

Sent from my vivo 2006 using Tapatalk
 
Just washed off the Duram it sat with since last night with some dishwashing liquid and gave it a good brush again. Still one litte space i can't get into to remove a very very small speck of red. Barely visible though. I have a brush for the pencil grinder that fits perfectly, but can't get the angle right, so it will have to stay I guess. Will take a pic at a later stage just before I give it it's new paint job. I did give some thought to keeping it bare metal and just buffing it up but decided to go ahead with painting it. Just need to wait until I find a 510 that works, in case I need to drill the opening a tad bigger. Currently submerged in acetone again, mostly to make sure all the Duram and dishwashing liquid is off.

My biggest challenge is going to be to get the surface ready and uniform for the primer. The outsides are easy to do with the Scotchbrite pads, but the inside area will be very difficult to reach and won't be able to use the pencil grinder again. A tad bit worried that the brushes has made the surface too smooth, so it will require some more thought. Maybe someone following here can give some advice.
I do think I will make at least one of the three a bare metal polished finish. If only I could find the right 510 connections. Already worried about getting out the black one's without incident.
 
I'm beginning to see why @Resistance calls for pics all the time ... it has nothing to do with proof of work done ... and I blame you here :--P ... you've gotten me sitting on the edge of my chair waiting for the next installment ... so post updated pics dammit :giggle:
 
Back
Top