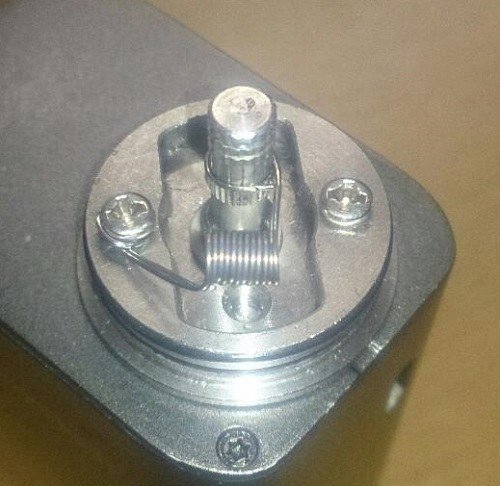
I loved the small Nipple RDA so much I wanted to bottom feed it after hearing from @Papa_Lazarou that this is indeed possible. The design lends itself to this task perfectly and made it very easy to do.
Here are the steps I took:

Fig.1 shows base, positive pin, o ring, insulator, center post and top screw cap, in the order of assembly.
First make sure the brass positive pin is tight while the two slots at the bottom of the center post face towards the juice wells. The center post is the second item from the right and already has a juice channel around the bottom with two slots cut in. If those slots do not point toward the juice wells, loosen the positive pin slightly, adjust the center post and tighten it up again.
Remove the top screw cap (far right) that is meant to hold the positive coil lead and check the orientation of the hole in the positive pin. (The center post insulator varies in thickness on all three my Nipples and that causes the top hole in the positive pin to point in different directions and also are covered by the center post in various amounts.) If the insulator (third item from right) is too thick the hole in the positive pin will only show about halfway, but that can also be fixed.
Mark the position of the slots in the center post on the positive pin with a black marker, because that is the direction to be drilled.
Remove the center post by unscrewing it from the positive pin. The positive pin and insulator will be loose now, so just press them tight together and mark the positive pin with a black marker just above the insulator. This is the height of the hole you want to drill. When assembled the hole should sit just on top of the insulator. The center post is very forgiving in that it has a juice channel right around the inside so the position of the hole you drill does not have to be perfect, but we want to get it as close to perfect as possible.
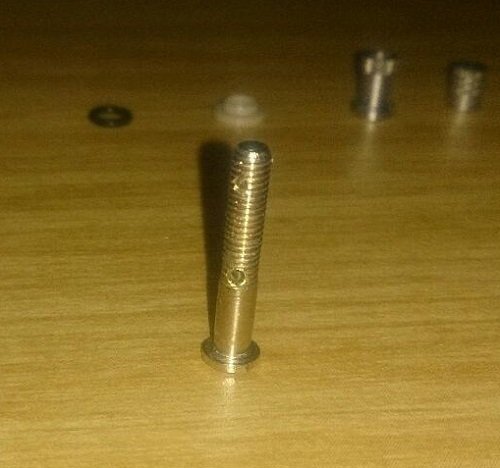
Fig. 2 shows the positive pin with 1.2mm hole drilled through.
Notice the top coiling hole and my squonking hole does not line up. The insulators are not the same thickness and will determine where your hole should be.
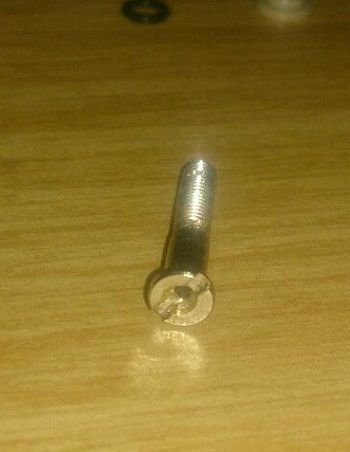
Fig.3 shows the bottom of the positive pin.
Before drilling my holes I used a sharp diamond dremel to mark the starting position for the drill, and on the screwdriver slot at the bottom I used a small round diamond dremel to make room for the 1.2mm drill bit.
Drill the hole through the center of the pin until it is through the hole across the pin. The brass is not very hard and I drilled freehand, but it gets very hot quickly so keep it cool by just dripping water on it every couple of seconds.
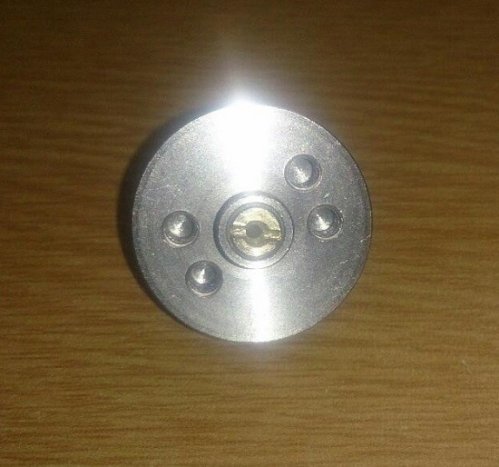
Fig.4 shows assembled bottom of Nipple with the nozzle storage holes.
Assemble the atty again taking care of the order of the parts shown in Fig.1 and make sure the slots in the center post face the juice wells. Tighten the positive pin and see how she squonks.
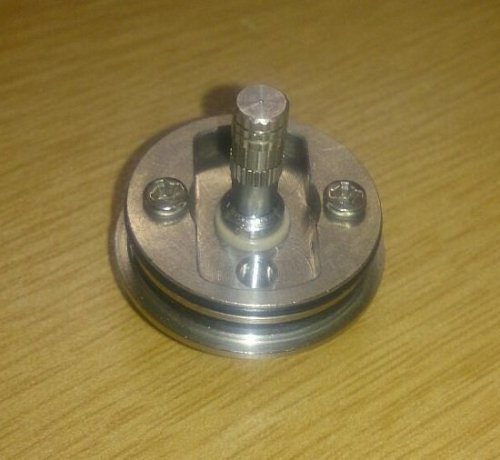
Fig.5 shows first test squonk.
The juice is clear so does not show nicely on the photo, but she squonks well.
The insulator on this Nipple was very thick and hid a large part of the coiling hole at the top of the positive pin, so I stripped it again and sanded the top of the insulator with very fine sandpaper. I normally just wrap the coil leg around the positive pin, but the hole makes it a bit easier for single coils and the thinner insulator helps with draining.
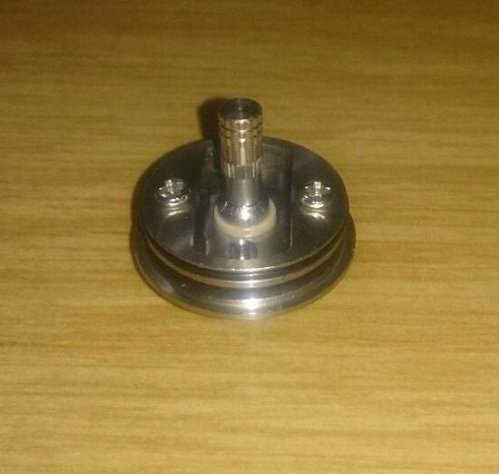
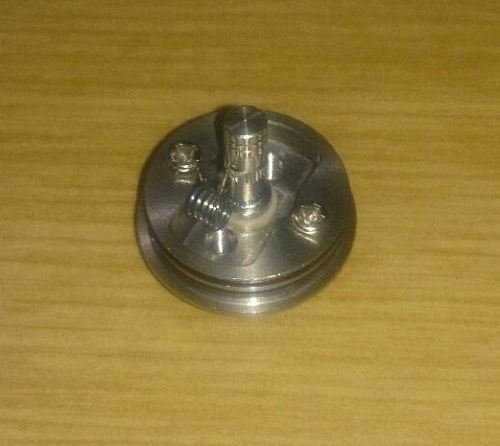
Single coil built above juice well. I also build a single coil above the negative screw with two long wick legs, one in each juice well. There are many coiling options, the two holes in the bottom of the juice well is for pins to help alignment of vertical coils. Pins are supplied in the spares.
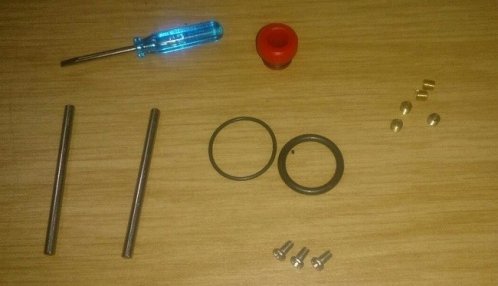
Fig.8 shows spares with airflow control inserts and two pins for aligning vertical coils.
Airflow control has a blank for single coil mode, two 1mm and two 1.5mm inserts.
I did a test on the Reo (the only one that was empty, because I had to fill with 3mg juice for this atty and all my Reo's run on 9mg)
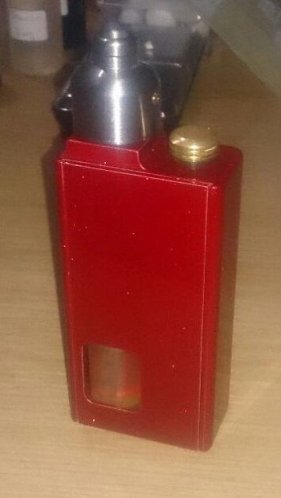
and she blows clouds.
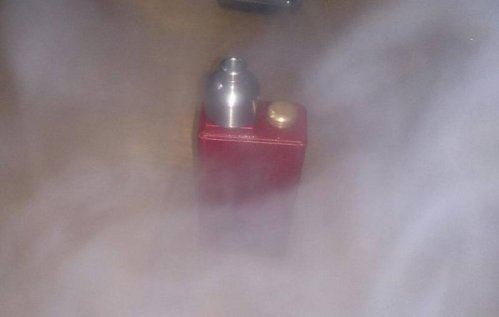
The single coil with one air hole gives a restricted lung hit with loads of flavor and clouds.
Dual coils with air flow wide open still give loads of flavor and clouds, is less restricted without being airy. Any one of the 1mm or 1.5mm nozzles in single or dual mode gives a nice MTL vape in varying degrees of "tightness".
Will be posting more coil builds here from time to time, but hope someone can find this useful when discovering this gem of an atty.
Tagging @vaporize.co.za who brought us this amazing atty and because I know he likes to suck on Nipples too.
Here are the steps I took:

Fig.1 shows base, positive pin, o ring, insulator, center post and top screw cap, in the order of assembly.
First make sure the brass positive pin is tight while the two slots at the bottom of the center post face towards the juice wells. The center post is the second item from the right and already has a juice channel around the bottom with two slots cut in. If those slots do not point toward the juice wells, loosen the positive pin slightly, adjust the center post and tighten it up again.
Remove the top screw cap (far right) that is meant to hold the positive coil lead and check the orientation of the hole in the positive pin. (The center post insulator varies in thickness on all three my Nipples and that causes the top hole in the positive pin to point in different directions and also are covered by the center post in various amounts.) If the insulator (third item from right) is too thick the hole in the positive pin will only show about halfway, but that can also be fixed.
Mark the position of the slots in the center post on the positive pin with a black marker, because that is the direction to be drilled.
Remove the center post by unscrewing it from the positive pin. The positive pin and insulator will be loose now, so just press them tight together and mark the positive pin with a black marker just above the insulator. This is the height of the hole you want to drill. When assembled the hole should sit just on top of the insulator. The center post is very forgiving in that it has a juice channel right around the inside so the position of the hole you drill does not have to be perfect, but we want to get it as close to perfect as possible.

Fig. 2 shows the positive pin with 1.2mm hole drilled through.
Notice the top coiling hole and my squonking hole does not line up. The insulators are not the same thickness and will determine where your hole should be.

Fig.3 shows the bottom of the positive pin.
Before drilling my holes I used a sharp diamond dremel to mark the starting position for the drill, and on the screwdriver slot at the bottom I used a small round diamond dremel to make room for the 1.2mm drill bit.
Drill the hole through the center of the pin until it is through the hole across the pin. The brass is not very hard and I drilled freehand, but it gets very hot quickly so keep it cool by just dripping water on it every couple of seconds.

Fig.4 shows assembled bottom of Nipple with the nozzle storage holes.
Assemble the atty again taking care of the order of the parts shown in Fig.1 and make sure the slots in the center post face the juice wells. Tighten the positive pin and see how she squonks.

Fig.5 shows first test squonk.
The juice is clear so does not show nicely on the photo, but she squonks well.
The insulator on this Nipple was very thick and hid a large part of the coiling hole at the top of the positive pin, so I stripped it again and sanded the top of the insulator with very fine sandpaper. I normally just wrap the coil leg around the positive pin, but the hole makes it a bit easier for single coils and the thinner insulator helps with draining.


Single coil built above juice well. I also build a single coil above the negative screw with two long wick legs, one in each juice well. There are many coiling options, the two holes in the bottom of the juice well is for pins to help alignment of vertical coils. Pins are supplied in the spares.

Fig.8 shows spares with airflow control inserts and two pins for aligning vertical coils.
Airflow control has a blank for single coil mode, two 1mm and two 1.5mm inserts.
I did a test on the Reo (the only one that was empty, because I had to fill with 3mg juice for this atty and all my Reo's run on 9mg)

and she blows clouds.

The single coil with one air hole gives a restricted lung hit with loads of flavor and clouds.
Dual coils with air flow wide open still give loads of flavor and clouds, is less restricted without being airy. Any one of the 1mm or 1.5mm nozzles in single or dual mode gives a nice MTL vape in varying degrees of "tightness".
Will be posting more coil builds here from time to time, but hope someone can find this useful when discovering this gem of an atty.
Tagging @vaporize.co.za who brought us this amazing atty and because I know he likes to suck on Nipples too.


