My Indulgence Mutation MT-RTA Review

Clouder

Dedicated Vaper
LV
14
 
Joined
26/10/15
Posts
701
Awards
17
Location
Recalculating....
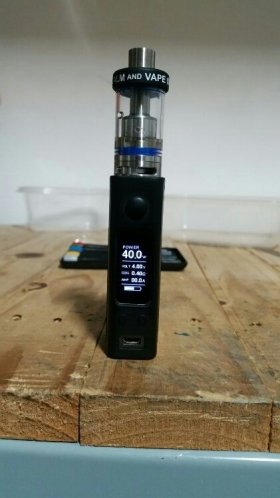
Hi guys, I got myself a Mutation MT-RTA at the JHB Vape meet and here's my own review:

Packaging
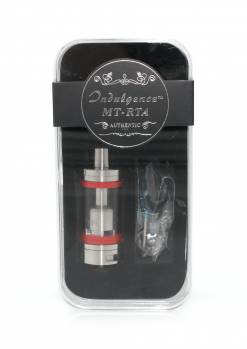
ehhh... Packinging is not bad, nothing like Kangertech though!

The casing is a see-through plastic casing, housing the authenticity card, the tank and accessories.
IMG_4247__02348_1447390110_1280_1280.png
Accessories
Accessories added are really nice, you get an extra tank glass, extra (blue) colour rings, a Passage blocker for single coil builds, old trusty blue screwdriver and some spare O-rings.

Rebuildable Deck
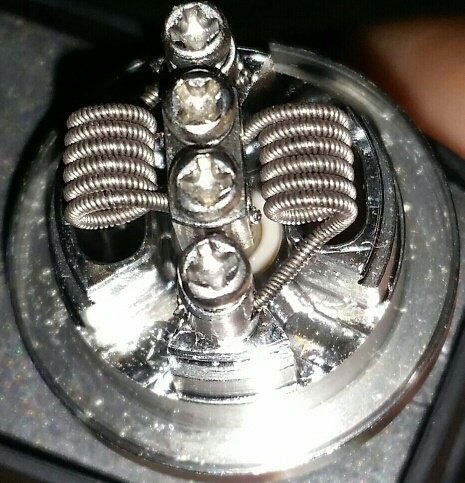
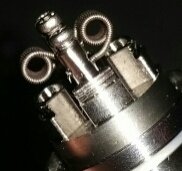
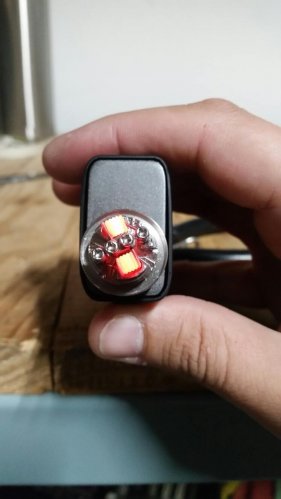
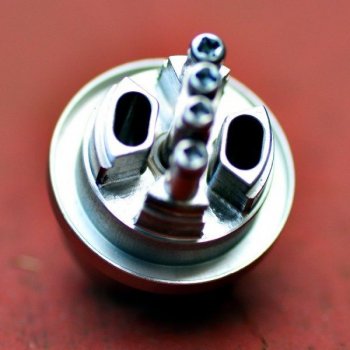
The rebuildable deck is really nice. it has MASSIVE juice wells, and MASSIVE air passages, which results in AAAIIIIIIRFLOW! The airflow this tank offers is immense! It is definitely meant for lung hits!

One thing I noticed is that the screws holding you coils in place WILL cut the coil when it is slightly over tightened! Care must be taken not to over tighten the coils.
Mutation-X-MT-RTA-7-600x600.jpg

Wicking
Wicking initially was a REAL headache at first. I could not get the thing to stop leaking! Eventually though I managed to get it right and I haven't had an issue with it ever since.

Quality
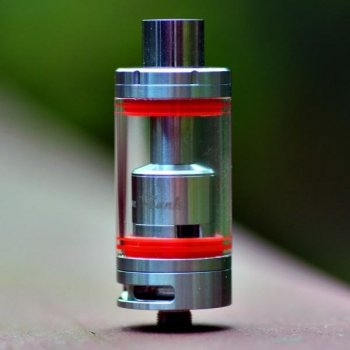
The quality of the machining is really good. Honestly, I cannot fault it. It is nice, smooth and well made. The only drawback (and its a biggy) is the Threads. All of the threads on this tank is... well I can't say its BAD, but there's MUCH MUUUUUCH room for improvement! It would also be nice if they put grooves on the metal parts in order to grip it when dismantling. Sometimes I sukkel to get it open because I can't grip it properly.
Mutation-X-MT-RTA-3-600x600.jpg

Filling with e-juice
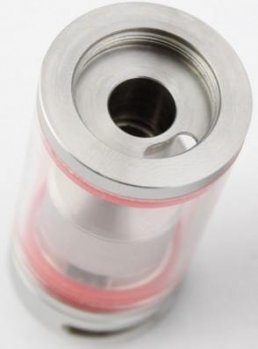
Filling with joooose can be a real pain with the Mutation MT-RTA. The Opening for the juice is extremely small and you will struggle to get in there with any bottle thicker than a thick needle. Also, there is only 1 juice hole. Juice has to go in while air escapes out at the same hole, and if done incorrectly, it will result in the tank to leak. Close the bottom air holes before filling up. Once filled up, while screwing in the top cap turn the tank upside down in screw the top cap in. Open the bottom air holes and tilt the tank back rightside up.
top.jpg

Conclusion
After I tried my first wicking and the tank leaked ALL my e-Juice out, I thought, Oh Hell, I bought a P.O.S!!! There's many things that can be improved of the Indulgence Mutation MT-RTA.

However, after you got the wicking and the filling right and you start vaping on it, it rewards you with rich, rich flavour and heaps of clouds! I love my Mutation RTA, and would buy one again in a heart beat!

Before I got the MT-RTA, I use to do ONLY Mouth to Lung. After I started vaping on this tank, I find myself only doing lungs hits - due to the airflow.

EDIT: NOTE: I've seen in other reviews, people complain about the short "stubby" driptip. They say that their lips hit the top part of the tank when vaping. I don't find it to be a problem, whatsoever...
 
Last edited:
One thing I noticed is that the screws holding you coils in place WILL cut the coil when it is slightly over tightened! Care must be taken not to over tighten the coils.

Now that was an awesome unbiased review! Thanks for that! And as for the screws... that is enough to send me over the edge of insanity! :-@
 
Hey @Clouder . Got this tank 2 days ago & sadly my experience has been nerve-racking. Wondering if you guys have had the same experience as me or at least point out what I'm doing wrong.

1) I swear I'm eventually going to break the glass with the amount of force it requires to take this tank apart. I've twisted , pulled , bitten at both the top & bottom & still couldn't get it to budge. Managed to open it up twice already & both times were a PITA .

2) Post screws can never be tightened enough. Even after being fully screwed down , the slightest nudge or movement of the coil pops it up a few threads out of place & then it has to be tightened down again. I've read on a few intl forums that grub screws can sort this issue out but does anyone know where in Durban I can get these? Are they still called grub screws in SA:confused:?

3) Coiling - What ID are you guys building at? I'm stuck using dual 26 gauge 6 wrap with a 2mmID as anything with a bigger diameter causes a short as the deck cap touches the ends of the coil(even when coils are perfectly centred & close to the centre post)
This , coupled with the forever loosening post screws make me dread doing a rebuild

4) Leaking - Thankfully there seems to be a lot of fixes for this that involve changing wicking & filling techniques which I will be trying out once I muster up enough courage to take apart the tank again.

Sorry for the long rant . I'm really trying to love this tank but the both time I worked on it I wanted to smash it against a brick wall.

Awesome airflow though:)
 
@Khan83 Don't give up yet! I promise you once get it sorted, you'll love it!

First up, I gooi 26ga 3mm ID and I don't get shorts. Maks sure you install your coils in a tight fit - close to the posts and low, almost touching the air chimney under the coil.

Yes, I agree with the grip issue. There's not enough slots or grooves on the outside that creates a grippy surface! Sometimes you really SUKKEL to get it open! - one tip, don't over tighten it when you assemble it!

Then with regard to the "grub screws" don't fiddle too much with it! What I do, is I install the coil, tighten slightly, adjust and move the coil to where I want it, tighten I little bit more, cut off excess coil legs, then adjust more if needed, and then tighten down. you shouldn't have an issue if you do it this way.

If you are using Kanthal, make sure to tighten the screws directly after you've done a dry burn as the dry burn will loosen the coil as the legs settle inside the posts during the dry burn.

As I've indicated, I'm not having any leaking issues with mine, except if the wicks are really old - and that's due to my own laziness...
 
so im sitting here reading through all of this and thinking "but i love this tank" lol

im regards to the wicking i found this to be the easiest to wick and didnt have any leaking issues at all.

il do a build on the tank in a few min once its empty
 
@shaunnadan same here! It's a b!tch to get to know, but once you get it, it really simple! In fact, I prefer wicking this tank over my subtank! To be quite honest, I prefer vaping on it too, over the subtank. Once you're used to that airflow...
 
@shaunnadan & @Clouder - Thanks a bunch guys. Good to know that with a bit of tinkering it will work out.

Regarding the wicking , I'm close to sorted now but not where I'd like it to be. Just don't like the fact that there is not much room for error , you either get it right or not.

My first couple wicking attempts were terrible , twice I got leaks , third time I tried the Scottish roll & really packed in the cotton & on my first drag got one mother of a dry hit......an amusing analogy I came across once - "tasted like Satan's ass" :D
 
@shaunnadan same here! It's a b!tch to get to know, but once you get it, it really simple! In fact, I prefer wicking this tank over my subtank! To be quite honest, I prefer vaping on it too, over the subtank. Once you're used to that airflow...
Did a dual coil build on the subtank & even with my sausage fingers felt it was a walk in the park compared to the Mutation tank lol
 
Shaun's mutation x build

Start off with a perfectly centered build.

My build for the day is a dual nichrome80 24g 7 wraps with 3mm id >>> 0.22ohms
b4f80dc0132ee273132659f74a862ed2.jpg


The get your wick, I'm using cotton bacon v2

Cut a piece the length of your thumb (if you have big fingers it will still work fine )

d6c9ec17df711dd5b911f6060cf0dcc7.jpg


Then half that amount and pack it away for the next time you rewick this tank.

Take the remaining half and half that , those new halves (quarter pieces... Eights from the beginning) is what you need for each coil

888adacfbe878ca394cf90741fc11602.jpg


Roll it like play dough into a snake

0a0ef0d1101a839c69cccb49b554548f.jpg


Then twist one end tightly , this twisted part must be longer than your coil to thread through easily

d7e923dbc8ba819cf76274f32e5972ca.jpg


Pull your cotton through and Centre it

5a39759d5ccae45aa1cbdbdb6a4ead13.jpg


Juice up the coil and the wick around the coil to make it easier to work with .

Now trim the wicks in line with the base of the atty .

37f4d05eec529cf6e98afd504dcd351c.jpg


Starting from the bottom of the wick , push that into the gap on the deck until you have the entire wick inside. Comb the front a bit with your screwdriver or tweezers to make it flat and that should be at the edge of the deck

7878456c44983955083b19a056e8763c.jpg


9c0683e73ccbbfeb1bd532c3783f4e62.jpg


Then screw on the top piece and your done !

29e26c1763ee678c8bd49250e79fd7a5.jpg


When filling I prefer to use the Luke skywalker "looking down the barrel" approach

d8db9f33edb726db91e335552cb7afd5.jpg


45 degrees towards you with the airline ontop . Place your dripper on either side of the air hole allowing space for air inside the tank to pass by.

089a01535084d278b237bee0c3f0a0f7.jpg


Sent from my iPhone using Tapatalk
 
Hey @Clouder .

2) Post screws can never be tightened enough. Even after being fully screwed down , the slightest nudge or movement of the coil pops it up a few threads out of place & then it has to be tightened down again. I've read on a few intl forums that grub screws can sort this issue out but does anyone know where in Durban I can get these? Are they still called grub screws in SA:confused:?

i have changed mine to grub screws. the change is epic and you have no problems at all. once you tighten a coil it stays there.

the screws i used was from an old tank. i usually keep all the little things in my toolbox for just incase.
 
Shaun's mutation x build

Start off with a perfectly centered build.

My build for the day is a dual nichrome80 24g 7 wraps with 3mm id >>> 0.22ohms
b4f80dc0132ee273132659f74a862ed2.jpg


The get your wick, I'm using cotton bacon v2

Cut a piece the length of your thumb (if you have big fingers it will still work fine )

d6c9ec17df711dd5b911f6060cf0dcc7.jpg


Then half that amount and pack it away for the next time you rewick this tank.

Take the remaining half and half that , those new halves (quarter pieces... Eights from the beginning) is what you need for each coil

888adacfbe878ca394cf90741fc11602.jpg


Roll it like play dough into a snake

0a0ef0d1101a839c69cccb49b554548f.jpg


Then twist one end tightly , this twisted part must be longer than your coil to thread through easily

d7e923dbc8ba819cf76274f32e5972ca.jpg


Pull your cotton through and Centre it

5a39759d5ccae45aa1cbdbdb6a4ead13.jpg


Juice up the coil and the wick around the coil to make it easier to work with .

Now trim the wicks in line with the base of the atty .

37f4d05eec529cf6e98afd504dcd351c.jpg


Starting from the bottom of the wick , push that into the gap on the deck until you have the entire wick inside. Comb the front a bit with your screwdriver or tweezers to make it flat and that should be at the edge of the deck

7878456c44983955083b19a056e8763c.jpg


9c0683e73ccbbfeb1bd532c3783f4e62.jpg


Then screw on the top piece and your done !

29e26c1763ee678c8bd49250e79fd7a5.jpg


When filling I prefer to use the Luke skywalker "looking down the barrel" approach

d8db9f33edb726db91e335552cb7afd5.jpg


45 degrees towards you with the airline ontop . Place your dripper on either side of the air hole allowing space for air inside the tank to pass by.

089a01535084d278b237bee0c3f0a0f7.jpg


Sent from my iPhone using Tapatalk
& where's the "money shot" @shaunnadan , wana see the clouds :D . Just kidding bud , thank you for the detailed step by step walk through.

Will definitely try this method.

Both you & @Clouder have been extremely helpful. Thanks again guys:rock:
 
Got this tank about 3 weeks ago, so much love for this thing. No leaking or dry hits so far. Here are my builds so far

20160331_111404-1-1_fact_1.jpg 20160331_111312-1-1_fact_2.jpg 20160331_111700_fact_1.jpg
2016-04-11 12.58.29.jpg
 
Back
Top