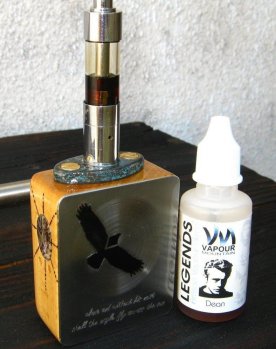
Drawing inspiration from all the DIY'ers here led to this hybrid boxfet, hybrid in that Im using a mechanical button made from a mother of pearl bead, which is glued onto an aluminium rivet. This presses a lever style micro switch on the gate of a IRLB3034 mosfet.
I used an on/off switch to supply power to the fire button as well as monitor batt voltage, this can be seen in this thread http://www.ecigssa.co.za/a-simple-2-led-battery-voltage-monitor.t16516/
I routered out Pau-Marfim for the wood body and used magnets glued to a stainless steel plate for the door.
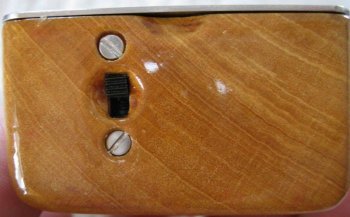
The bottom with on/off switch
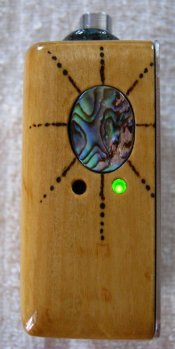
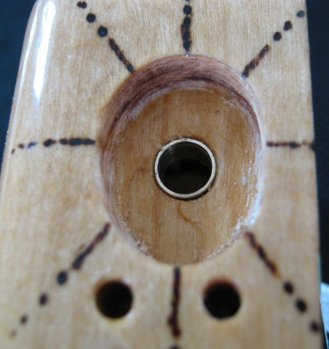
The firing button and green on led, red on the left for low voltage. The hippy design around the button was burned with a soldering iron.
Some imagination should reveal "jumping for joy".
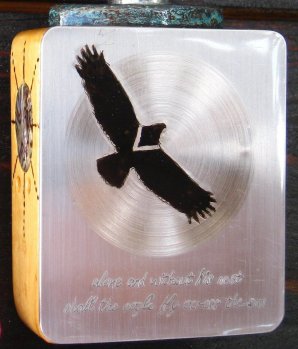
My freehand engraving on SS plate, hammerite black for the eagle and coated in Liquid Glass. The LG gives a nice depth with semi rounded edges.
I first brushed the plate down with a pot scourer, then chucked a disc of scouring pad into the drill press to create the sun and then engraved the eagle last.
The white V on the back is to represent the Black eagles on Table Mountain, where I saw them although they are found elsewhere.
Needless to say I have new found respect for tattoo artists.
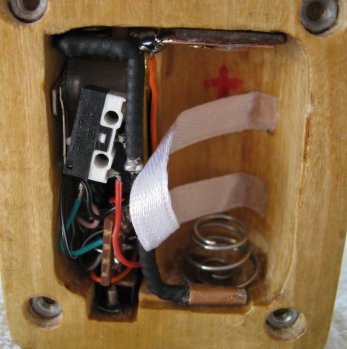
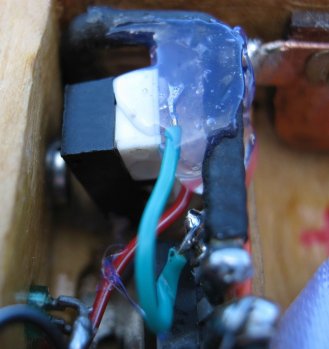
The insides, silicon tube for button return spring, a bit stiff but works for the meantime, 10A auto reset on the pos batt and coil. Battery contacts cut out of copper plate with 2 x 1mm dia solid bare copper wires twisted together and shrink wrapped for the power wiring.
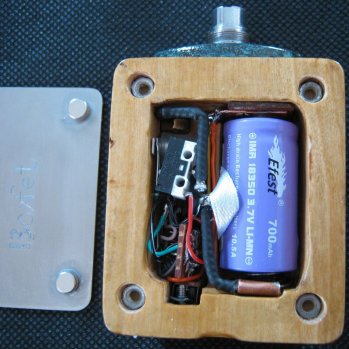
Another inside view with 18350 battery installed.
Alas the fire button had too much overhang and was binding, here I tried a very nice spring which I wound from SS fishing wire.
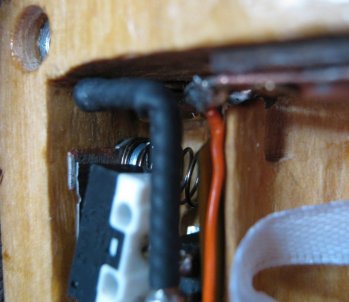
Eventually I sleeved the wood with brass, desoldered the micro switch off the mosfet and hot melt glued it into direct contact with the fire button, probably how I should have designed it in the beginning.
Here's how it started, the block was halved once all the drill press clamping was finished.
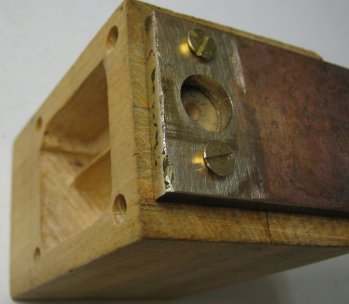
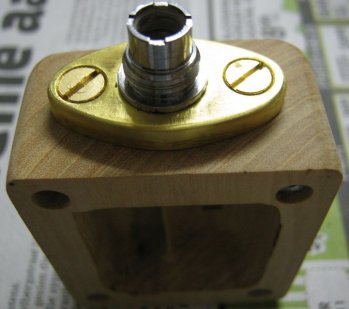
510 connector soldered onto the solid brass base, a brass countersink machine screw will be the neg path to the mosfet.
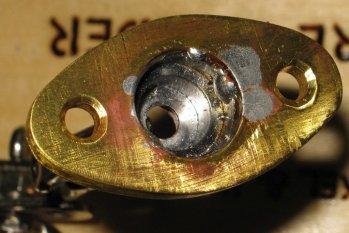
A quick dry fit.
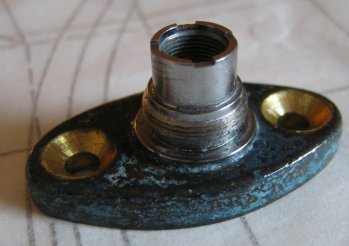
Patina'd 510 base plate coated with clear finger nail base coat, came out a lot darker than I wanted.
Finally, my mixing bowl vacuum chamber with a 15mm thick perspex lid. The pump is a rotary piston Matsushita from an aircon, found at the scrapyard. I used Woodoc 20 thinned with turps 50/50, many vac cycles over a 4hr period and then dried overnite.
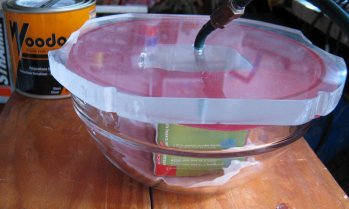
Another view from the top, ss nuts to keep the wood submerged.
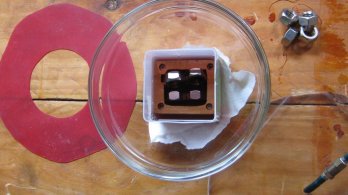
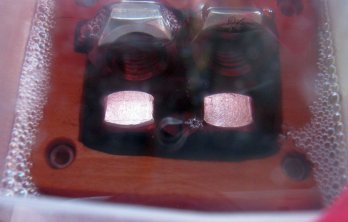
After about 2.5 hrs the foam had settled and now just a few small air bubble streams were left.
Hows it vape you ask? The best Ive had since yesterday.
Actually Ive designed it for 3A continous use with a 1.4 ohm atty, so Ive got lots of safety margin with the 10.5A battery.
I've used a full battery charge with a 0.9 ohm coil in my mini PT3 to check and nothing got hotter than 35 degrees C, so Im happy with the end product.
I used an on/off switch to supply power to the fire button as well as monitor batt voltage, this can be seen in this thread http://www.ecigssa.co.za/a-simple-2-led-battery-voltage-monitor.t16516/
I routered out Pau-Marfim for the wood body and used magnets glued to a stainless steel plate for the door.

The bottom with on/off switch

The firing button and green on led, red on the left for low voltage. The hippy design around the button was burned with a soldering iron.
Some imagination should reveal "jumping for joy".

My freehand engraving on SS plate, hammerite black for the eagle and coated in Liquid Glass. The LG gives a nice depth with semi rounded edges.
I first brushed the plate down with a pot scourer, then chucked a disc of scouring pad into the drill press to create the sun and then engraved the eagle last.
The white V on the back is to represent the Black eagles on Table Mountain, where I saw them although they are found elsewhere.
Needless to say I have new found respect for tattoo artists.

The insides, silicon tube for button return spring, a bit stiff but works for the meantime, 10A auto reset on the pos batt and coil. Battery contacts cut out of copper plate with 2 x 1mm dia solid bare copper wires twisted together and shrink wrapped for the power wiring.

Another inside view with 18350 battery installed.

Alas the fire button had too much overhang and was binding, here I tried a very nice spring which I wound from SS fishing wire.

Eventually I sleeved the wood with brass, desoldered the micro switch off the mosfet and hot melt glued it into direct contact with the fire button, probably how I should have designed it in the beginning.


Here's how it started, the block was halved once all the drill press clamping was finished.

510 connector soldered onto the solid brass base, a brass countersink machine screw will be the neg path to the mosfet.

A quick dry fit.

Patina'd 510 base plate coated with clear finger nail base coat, came out a lot darker than I wanted.

Finally, my mixing bowl vacuum chamber with a 15mm thick perspex lid. The pump is a rotary piston Matsushita from an aircon, found at the scrapyard. I used Woodoc 20 thinned with turps 50/50, many vac cycles over a 4hr period and then dried overnite.

Another view from the top, ss nuts to keep the wood submerged.

After about 2.5 hrs the foam had settled and now just a few small air bubble streams were left.

Hows it vape you ask? The best Ive had since yesterday.
Actually Ive designed it for 3A continous use with a 1.4 ohm atty, so Ive got lots of safety margin with the 10.5A battery.
I've used a full battery charge with a 0.9 ohm coil in my mini PT3 to check and nothing got hotter than 35 degrees C, so Im happy with the end product.
was taken from The Prophet by Kahlil GibranAlone and without his nest shall the eagle fly across the sun
Last edited:


