Hey guys,
I wanna share this quick little fix that will drastically improve the performance of the inexpensive Boxer BF mech (clone). So I've had this little mod for a week now, having managed to be one of the lucky few that managed to score one at Vapecon last weekend. I must say, for what it is, its a fantastic little squonker and the build quality is fairly decent overall.
My fellow mech-heads will know that one one of the biggest issues with mechanical mods is arcing - its essentially a poor switch connection that causes the electrical spark to have to travel through air, oxidizing the metal contact and massively increasing resistance and voltage drop.
[DISCLAIMER: Mechanical mods must be treated with a healthy respect - if you perform this modification, you do so at your own risk and accept all the associated dangers. Do not attempt this modification if you are not 100% confident in your ability. this is only a guide - you can use whatever means or tooling you have at your disposal]
The main issue with the Boxer squonker is the BF pin and switch assembly - being a clone, one would expect some level of dubious manufacturing or the other - in this case its thankfully a relatively easy fix. Basically - the surface area of the contact point is too small, pumping 20A through a spot the size of a pinhead is guaranteed to cause problems so we're gonna increase the contact surface by grinding and polishing the switch and BF pin.
Here is a rough illustration of the modification:

Tools required:
Table Vice
Metal file
600, 1000, 1500 waterpaper
Dremel or similar rotary tool
Screwdrivers for disassembly
Metal polish or Rouge
Dielectric Grease
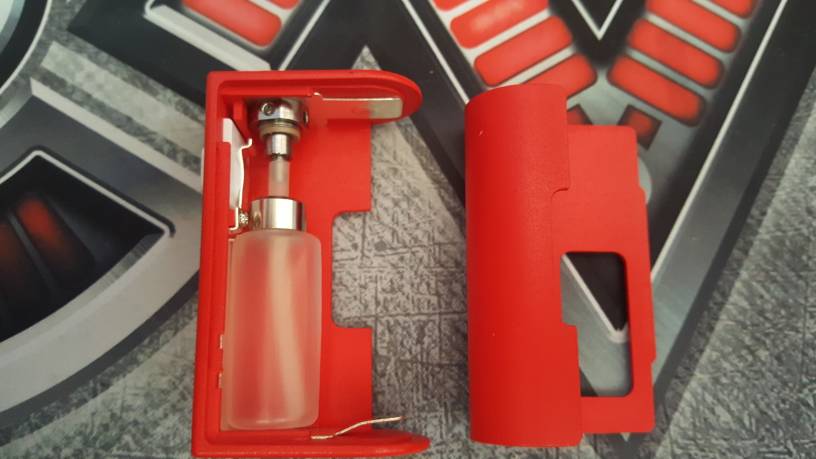
Step 1: Disassembly
Disassemble the BF pin by holding the bottom and gently unscrewing the pin in the 510 connector. a few turns will undo the entire bf bin - be sure to note the placement of rubbers and seals and keep all screws and parts in a little container for later retrieval.
Step 2: grinding down the BF pin
Clamp the round threaded bottom of the BF pin in a vice and gently file down one side by about 1.5mm. Be careful not to go too deep, inspecting after every few filings to prevent filing into the threads like I did. not a train smash if you do though - it will still work perfectly. The piece is made from brass with a nickel plating so the finished surface will be brass-on-brass.

Step 3: Finish the surface
Flatten the surface off by sanding it down, starting with the 600 and making your way up to the 1500 paper. Finish off the surface with some metal polish or rouge to end in a mirror shine.
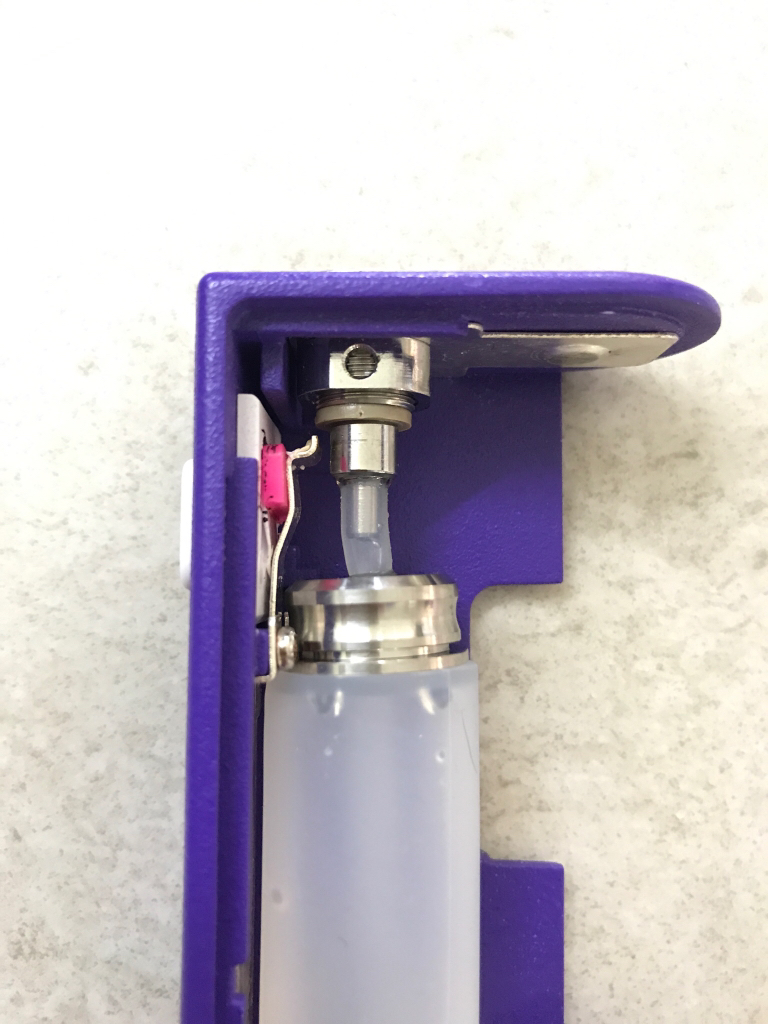
Looking at the image below, we can clearly see the arc point - the burrs and casting marks on the switch assembly are really bad - we're gonna have to attend to that too. Start by removing the two screws pictured - the entire piece slides outwards (beware the clips at the bottom)

Step 4: smoothing the switch contact
Using the same method outlined in steps 2 and 3 to reveal a flat, mirror finish on the switch contact.

This is what the modified bottom section profile should look like afterwards

A quick soak in some soapy water and a thorough rinsing (you can pop the parts in an ultrasonic cleaner if you have one) before re-assembly to get off the workshop cooties off the parts

Step 5
Reassemble the switch and BF pin assembles, making sure to align the ground-down side of the pin with the switch contact. If you have some DE grease, now is the time to apply a light coating to both faces with a cotton bud. Replace all screws and make certain all the seals and grommets are in the right places before putting a battery in. Insert the battery with caution and inspect the device thoroughly. The new surface faces should mate perfectly now.


There you have it folks, no more arcing. This little mod hits like a damn steam train! Thanks for reading, Please let me know if you attempted this and how it turned out.
I wanna share this quick little fix that will drastically improve the performance of the inexpensive Boxer BF mech (clone). So I've had this little mod for a week now, having managed to be one of the lucky few that managed to score one at Vapecon last weekend. I must say, for what it is, its a fantastic little squonker and the build quality is fairly decent overall.
My fellow mech-heads will know that one one of the biggest issues with mechanical mods is arcing - its essentially a poor switch connection that causes the electrical spark to have to travel through air, oxidizing the metal contact and massively increasing resistance and voltage drop.
[DISCLAIMER: Mechanical mods must be treated with a healthy respect - if you perform this modification, you do so at your own risk and accept all the associated dangers. Do not attempt this modification if you are not 100% confident in your ability. this is only a guide - you can use whatever means or tooling you have at your disposal]
The main issue with the Boxer squonker is the BF pin and switch assembly - being a clone, one would expect some level of dubious manufacturing or the other - in this case its thankfully a relatively easy fix. Basically - the surface area of the contact point is too small, pumping 20A through a spot the size of a pinhead is guaranteed to cause problems so we're gonna increase the contact surface by grinding and polishing the switch and BF pin.
Here is a rough illustration of the modification:
Tools required:
Table Vice
Metal file
600, 1000, 1500 waterpaper
Dremel or similar rotary tool
Screwdrivers for disassembly
Metal polish or Rouge
Dielectric Grease
Step 1: Disassembly
Disassemble the BF pin by holding the bottom and gently unscrewing the pin in the 510 connector. a few turns will undo the entire bf bin - be sure to note the placement of rubbers and seals and keep all screws and parts in a little container for later retrieval.
Step 2: grinding down the BF pin
Clamp the round threaded bottom of the BF pin in a vice and gently file down one side by about 1.5mm. Be careful not to go too deep, inspecting after every few filings to prevent filing into the threads like I did. not a train smash if you do though - it will still work perfectly. The piece is made from brass with a nickel plating so the finished surface will be brass-on-brass.
Step 3: Finish the surface
Flatten the surface off by sanding it down, starting with the 600 and making your way up to the 1500 paper. Finish off the surface with some metal polish or rouge to end in a mirror shine.
Looking at the image below, we can clearly see the arc point - the burrs and casting marks on the switch assembly are really bad - we're gonna have to attend to that too. Start by removing the two screws pictured - the entire piece slides outwards (beware the clips at the bottom)
Step 4: smoothing the switch contact
Using the same method outlined in steps 2 and 3 to reveal a flat, mirror finish on the switch contact.
This is what the modified bottom section profile should look like afterwards
A quick soak in some soapy water and a thorough rinsing (you can pop the parts in an ultrasonic cleaner if you have one) before re-assembly to get off the workshop cooties off the parts
Step 5
Reassemble the switch and BF pin assembles, making sure to align the ground-down side of the pin with the switch contact. If you have some DE grease, now is the time to apply a light coating to both faces with a cotton bud. Replace all screws and make certain all the seals and grommets are in the right places before putting a battery in. Insert the battery with caution and inspect the device thoroughly. The new surface faces should mate perfectly now.
There you have it folks, no more arcing. This little mod hits like a damn steam train! Thanks for reading, Please let me know if you attempted this and how it turned out.

")