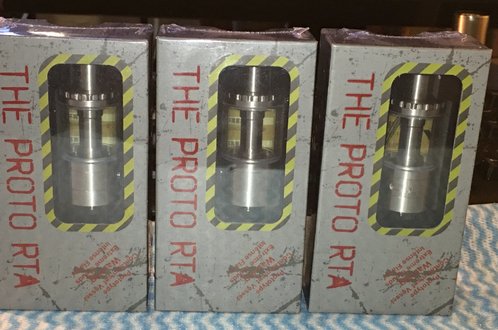
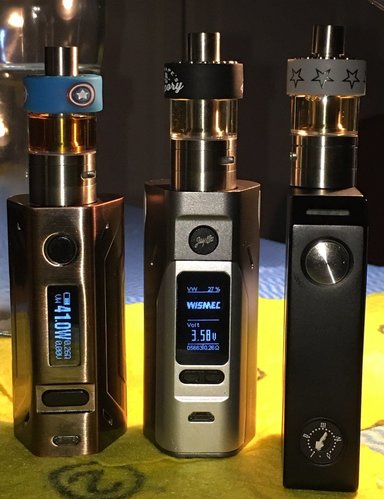
Last week I bought this on a whim as it was on a special my vendor. It was already cheap but marked down to half of its original price. I am guessing this tank was not popular due to its apparent weird, exclusive "plumbing" system, and very plain looks.
This 22mm tank is extremely simple in appearance but not in construction. It's post less and works on a unique "gravity" system. When you see it on a vendor website, it looks boring and totally unappealing. It just screams: "Leak!"
Upon its release a good few months ago, I watched You Tube clips, read Reddit and learned that without doubt, it will leak on you before you master the wicking technique. Some said a few other negative things about it e.g. it doesn't look fancy. However, some reviewers stated that if you wick it properly, it won't leak and that it is actually quite a good tank. (See the positive Mike Vapes review.)
Funny enough, I like tanks that are cheap, interesting and difficult to coil & wick. I enjoy buying a cheap tank and rising to the challenge of learning how to coil and wick to the point of maximum effectiveness. An example of my point is the first (cheap) IJoy Tornado which is challenging to wick, but when you crack it, it vapes like a dream.
The Proto RTA is my first post less tank. I had very little experience and expectations but looked forward to the challenge. It also comes with a decent instruction manual.
My first coils were 22 ID, 9 wraps giving me 0.30 Ohms. I wicked it carefully as seen on You Tube. I had no problem trimming the coil legs and placing the coils in line with the (only) 2 bottom airflow holes. While it didn't leak, it vaped exceptionally well, but the tank got way, way too hot. So I re built, with Kanthal, 24 GA, 8 wraps giving me 0.39 Ohms. Much better!
Here is the long and the short:
For a cheap 22mm RTA, the Proto performs exceptionally well. Due to the unique juice feed and airflow system, I am able to vape at higher wattages than usual: 45-55W is no problem, even 60 is OK. It must have something to do with the fact that the juice sits onto of the coils, as well as the whole unique design and construction. I am so stoked that I quickly learned how to coil and wick without any leaks. Overall, what an absolute pleasure to vape on this unsuspecting little tank. I like the 4.5ml juice capacity and the compactness of the whole package. The compactness delivers an excellent flavor.
The only con for me is that the drip tip is not standard. It is rather small, and when you take a hit, your lips touch the top of the tank. But I have got used to this now.
I am not saying buy this. I am saying that looks and price can be deceiving. I am suggesting that if you enjoy building and solving coil build challenges, then don't be afraid to try something different. You may be surprised and you may get many miles of pleasure. This is not a beginners tank, it is for those who want a really great tank on a shoe string budget, with the trade off of learning how to coil and wick it.
At months end, If there is still stock, I will be picking up my second Proto. This is how happy I am.
"Never judge a book by its cover."
Here is a step by step wicking guide for any Proto RTA owners who are struggling or for potential buyers:
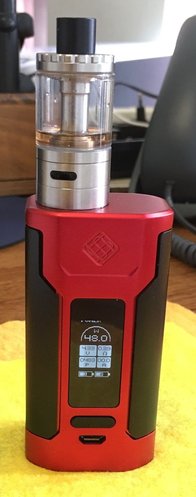
The set up.
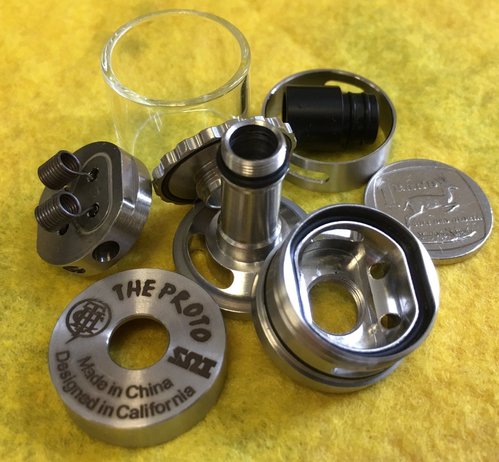
Washed, ready to coil and wick.
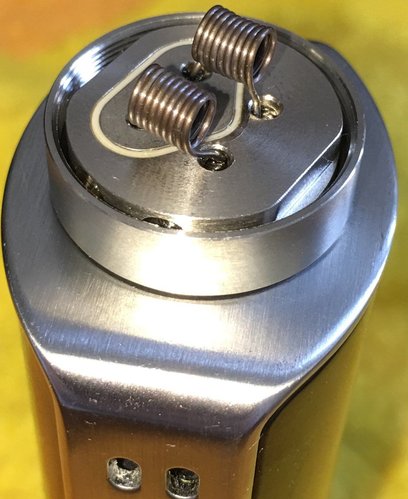
The deck. Coil legs must be 5mm long. Very easy to install and adjust the coils. Use 24 or 26 Ga. 22 Ga or lower will generate too much heat.
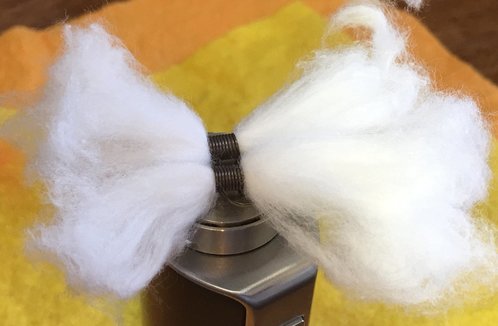
Insert cotton as usual and fluff. Not too wispy, you need a bit of density in the cotton.
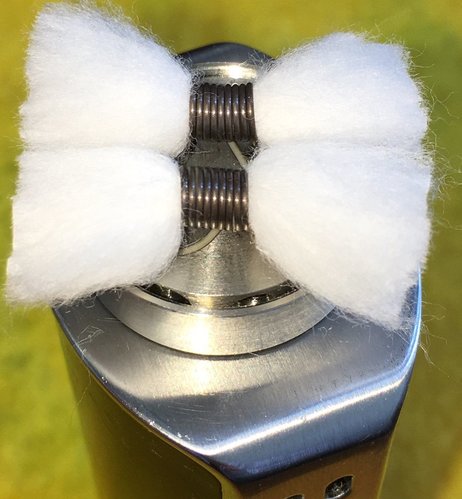
Wicks trimmed. Protruding slightly over the edge of the deck. Fluff and trim more off too thick.
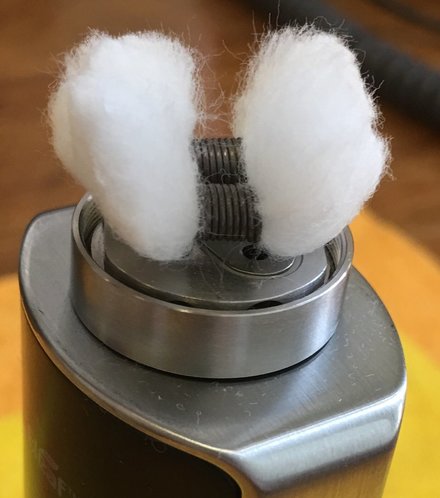
Curve the wicks upwards. Fluff and trim more if too dense.
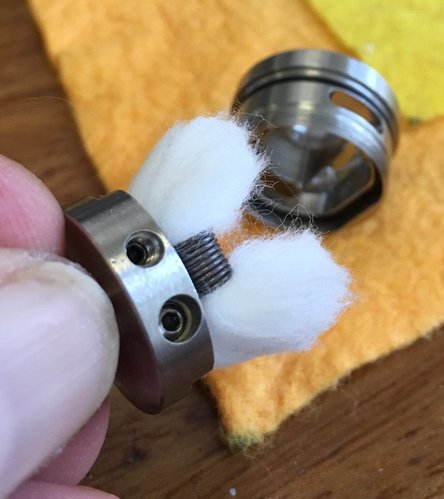
Insert the deck into the barrel, one side first making sure the cotton stays pointing upwards.
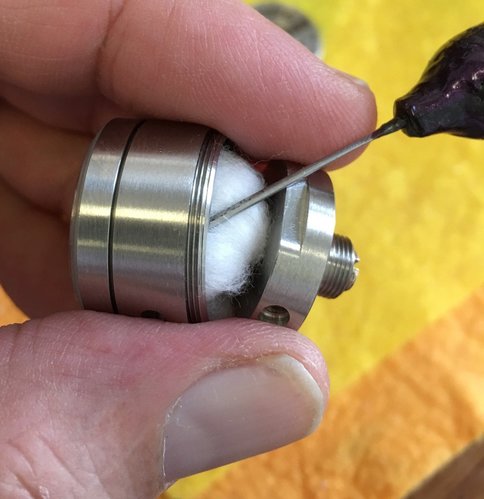
Tamp the other side of the cotton into the barrel with a sharp object.
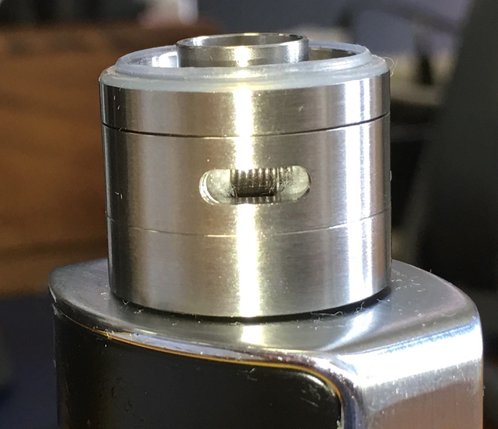
The coils must always be visible through the air vents. Move any excess cotton to the sides with a sharp object ensuring that the coils are visible.
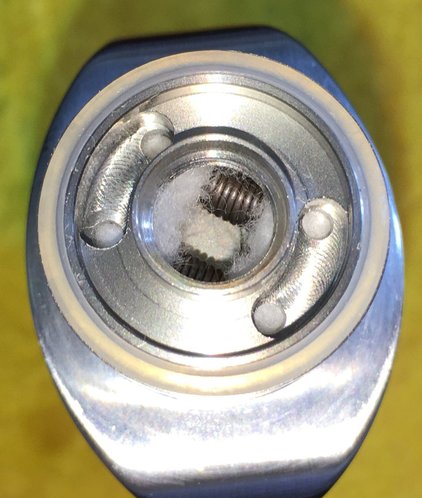
Move any excess cotton from the top of the barrel ensuring that the coils are exposed. There must be a gap in between the coils. It is important that the 4 holes you see are packed with cotton. If not, start again.
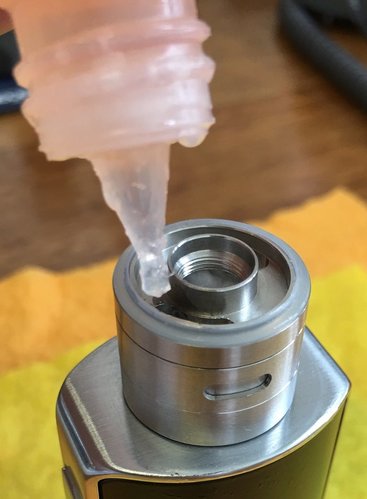
Important: Close the air vent ring. Juice up the cotton well before replacing the glass tube.
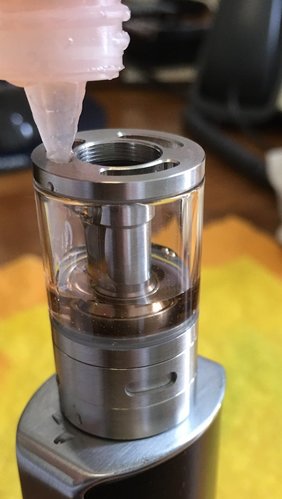
Fit the glass tube. Fill up the 4.5ml juice well. Attach top cap and (The very small) drip tip.
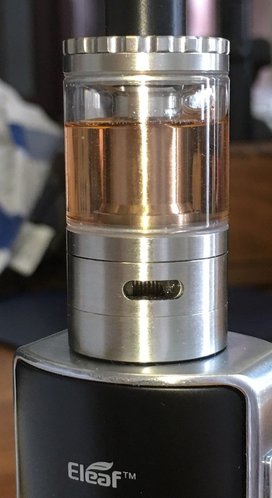
Keep a tissue ready. Open the air flow ring. You may get one or two drops of juice coming out. But take a quick puff on a low wattage, e.g. 30W and the juice in the air flow holes will disappear. You may have to roll up a piece of tissue paper into a thin sausage and stuff it down the shaft through the drip tip to soak up any excess juice.
Thereafter there is zero leaking if you wicked it properly.
After the cotton is "burned in" increase the wattage if you please.
If you succeeded at this mission, You will be very surprised at the excellent performance of this tank for a fraction of the price of any super modern 22mm tank.
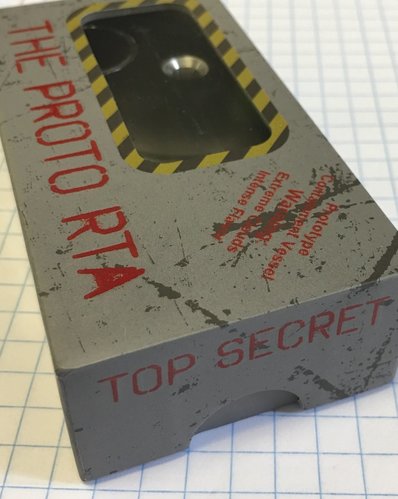
I guess this is the "Top secret".
Sent from my iPhone using Tapatalk
This 22mm tank is extremely simple in appearance but not in construction. It's post less and works on a unique "gravity" system. When you see it on a vendor website, it looks boring and totally unappealing. It just screams: "Leak!"
Upon its release a good few months ago, I watched You Tube clips, read Reddit and learned that without doubt, it will leak on you before you master the wicking technique. Some said a few other negative things about it e.g. it doesn't look fancy. However, some reviewers stated that if you wick it properly, it won't leak and that it is actually quite a good tank. (See the positive Mike Vapes review.)
Funny enough, I like tanks that are cheap, interesting and difficult to coil & wick. I enjoy buying a cheap tank and rising to the challenge of learning how to coil and wick to the point of maximum effectiveness. An example of my point is the first (cheap) IJoy Tornado which is challenging to wick, but when you crack it, it vapes like a dream.
The Proto RTA is my first post less tank. I had very little experience and expectations but looked forward to the challenge. It also comes with a decent instruction manual.
My first coils were 22 ID, 9 wraps giving me 0.30 Ohms. I wicked it carefully as seen on You Tube. I had no problem trimming the coil legs and placing the coils in line with the (only) 2 bottom airflow holes. While it didn't leak, it vaped exceptionally well, but the tank got way, way too hot. So I re built, with Kanthal, 24 GA, 8 wraps giving me 0.39 Ohms. Much better!
Here is the long and the short:
For a cheap 22mm RTA, the Proto performs exceptionally well. Due to the unique juice feed and airflow system, I am able to vape at higher wattages than usual: 45-55W is no problem, even 60 is OK. It must have something to do with the fact that the juice sits onto of the coils, as well as the whole unique design and construction. I am so stoked that I quickly learned how to coil and wick without any leaks. Overall, what an absolute pleasure to vape on this unsuspecting little tank. I like the 4.5ml juice capacity and the compactness of the whole package. The compactness delivers an excellent flavor.
The only con for me is that the drip tip is not standard. It is rather small, and when you take a hit, your lips touch the top of the tank. But I have got used to this now.
I am not saying buy this. I am saying that looks and price can be deceiving. I am suggesting that if you enjoy building and solving coil build challenges, then don't be afraid to try something different. You may be surprised and you may get many miles of pleasure. This is not a beginners tank, it is for those who want a really great tank on a shoe string budget, with the trade off of learning how to coil and wick it.
At months end, If there is still stock, I will be picking up my second Proto. This is how happy I am.
"Never judge a book by its cover."
Here is a step by step wicking guide for any Proto RTA owners who are struggling or for potential buyers:

The set up.

Washed, ready to coil and wick.

The deck. Coil legs must be 5mm long. Very easy to install and adjust the coils. Use 24 or 26 Ga. 22 Ga or lower will generate too much heat.

Insert cotton as usual and fluff. Not too wispy, you need a bit of density in the cotton.

Wicks trimmed. Protruding slightly over the edge of the deck. Fluff and trim more off too thick.

Curve the wicks upwards. Fluff and trim more if too dense.

Insert the deck into the barrel, one side first making sure the cotton stays pointing upwards.

Tamp the other side of the cotton into the barrel with a sharp object.

The coils must always be visible through the air vents. Move any excess cotton to the sides with a sharp object ensuring that the coils are visible.

Move any excess cotton from the top of the barrel ensuring that the coils are exposed. There must be a gap in between the coils. It is important that the 4 holes you see are packed with cotton. If not, start again.

Important: Close the air vent ring. Juice up the cotton well before replacing the glass tube.

Fit the glass tube. Fill up the 4.5ml juice well. Attach top cap and (The very small) drip tip.

Keep a tissue ready. Open the air flow ring. You may get one or two drops of juice coming out. But take a quick puff on a low wattage, e.g. 30W and the juice in the air flow holes will disappear. You may have to roll up a piece of tissue paper into a thin sausage and stuff it down the shaft through the drip tip to soak up any excess juice.
Thereafter there is zero leaking if you wicked it properly.
After the cotton is "burned in" increase the wattage if you please.
If you succeeded at this mission, You will be very surprised at the excellent performance of this tank for a fraction of the price of any super modern 22mm tank.

I guess this is the "Top secret".
Sent from my iPhone using Tapatalk


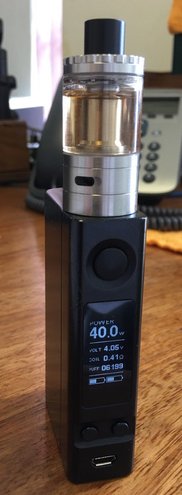
 ️To all the critics on You Tube, get it right and your are smiling...
 I will even buy their demo on Friday which was their 4th one left. Four is not enough, I need five.