Requiem RTA

Rob Fisher

ECIGSSA Admin
Staff member
Administrator
VIP
FINES MASTER
LV
64
 
Joined
3/2/14
Posts
39,359
Awards
51
Age
68
Location
Winston Park, Durbs
Vandy Vape has another winner with the Requiem RTA. It comes with three tanks and two top caps. Reasonably priced as well for what you get! Two different drip tips, but I do prefer my Robo Tip. The airflow ring and the three different chimneys make it handle a complete range from MTL to DL. The airflow is a bit noisy but smooth. The flavour is great and single coil RTA's are my game.

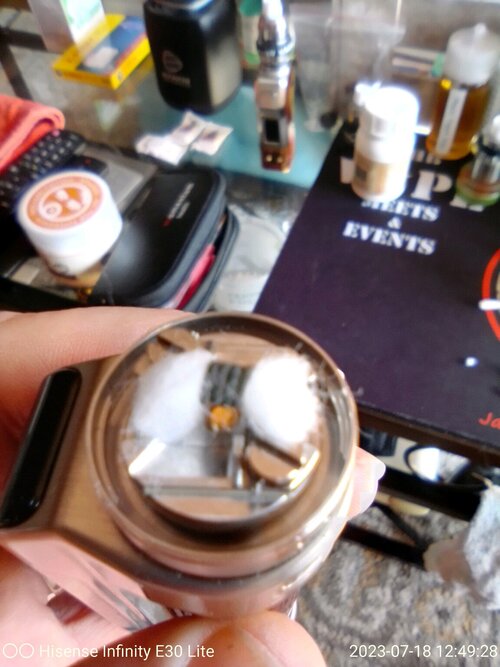
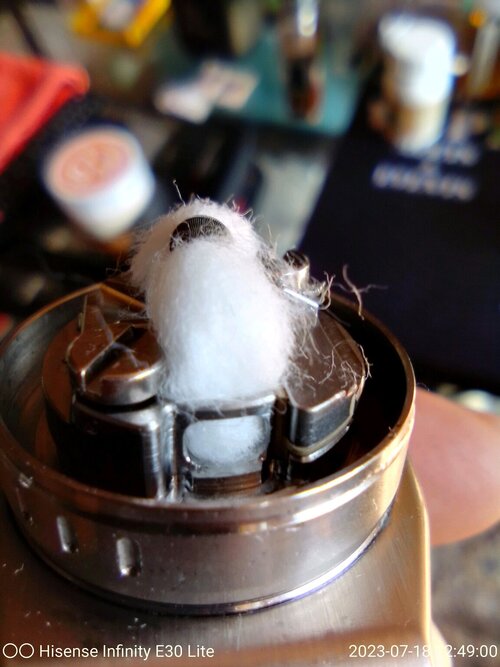
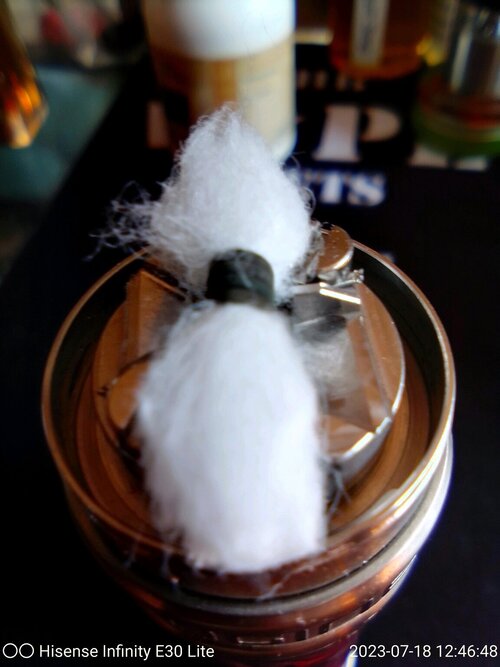
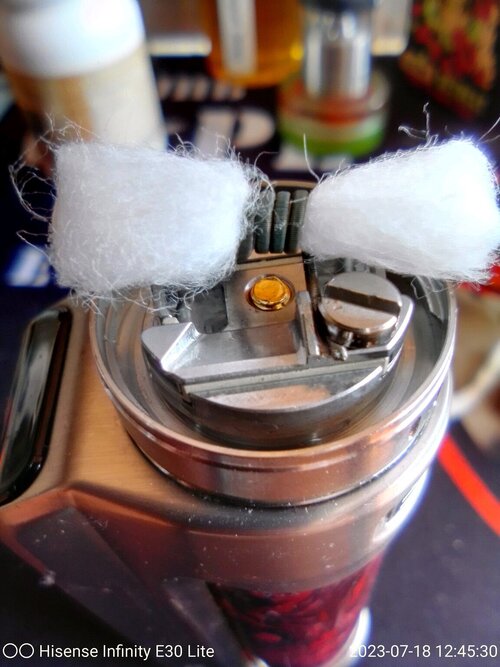
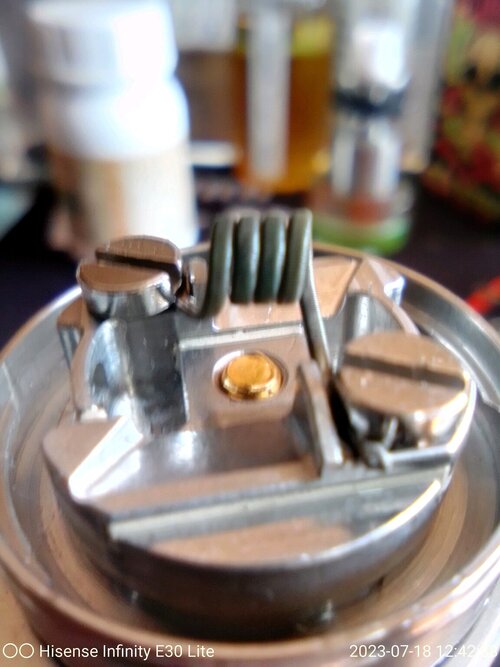
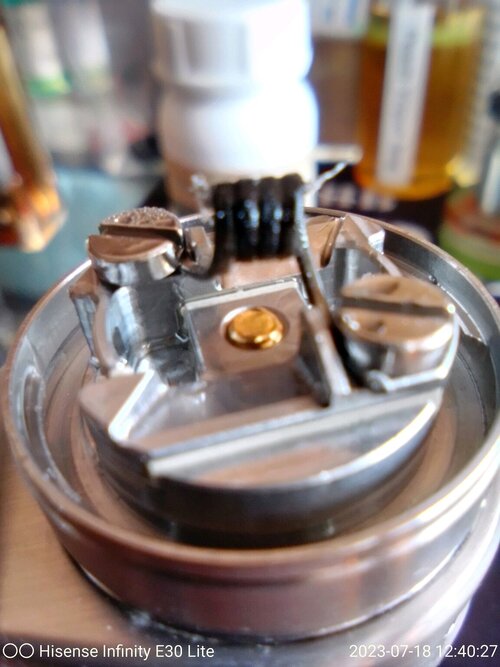
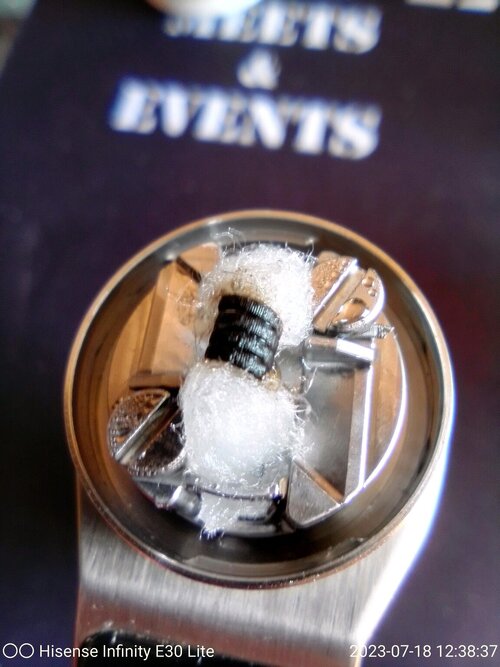
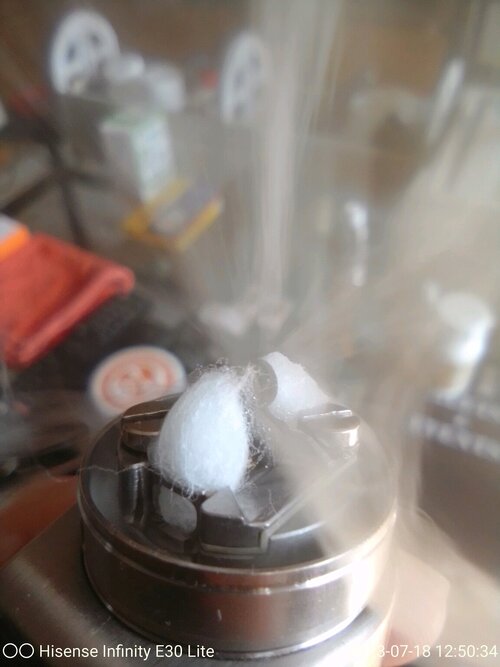
The tank is good looking, and building on it with its offset posts and large flat head screws make it a breeze. Wicking is simple as well. I cut the tails at 45 degrees and it's wicking well! It takes 4.5ml of juice, so not too small. 510 and 810 drip tip options. It comes with a baggie of o-rings etc as well as a little blue screwdriver and two fused claptons!

All in all a good deal and if you are a single coil RTA fan then this is one to add to the collection.

Requiem RTA 1.jpgRequiem RTA 2.jpgRequiem RTA 3.jpgRequiem RTA 4.jpgRequiem RTA 5.jpgRequiem RTA 6.jpg
 
The final test of the Requiem RTA was to leave it standing for two days and see if there was any leaking. Zero leaks! Bazinga!

Requim.JPG
 
i like the 510 and the 810 option top caps because i cannot stand 510 adapters!

this could be my next rta when my never say die druga eventually does die!
 
With Rob's permission, I will jump on this thread. After all he did give me the recommendation.

Supplied by All Day Vapes, who gave me the best deal, it arrived yesterday.

Packaging is pretty good and needs to be because when you get your set up as you like it, you need to keep the bits that you did not use

One deck. No man, this thing was no challenge. I think if this was the first deck you ever built on, you would have wondered what all the fuss was about. I used the .25 Clapton that they supplied and the handy positioning tool. There is enough room to slip in one leg and by raising one screw a little higher the other leg drops into a nice slot that has one raised edge so nothing pops out. Positioning is a pleasure and you get a nice little tool that allows you to place it, just so, the air flow from the tank lines up.

It does have a rotating deck but working on a mod or tab takes away that issue.

Three little piggies: I watched three reviews and all of them wicked this differently. One kept the tails long and just stuffed them in the hole, one went short, no thinning or fluffing and one went medium and thinned and fluffed. Hah, I DID IT MY WAY. Why not, I went medium and cut the tails at the 45 deg, fluffed a little and I got an instantly good result. Plenty bubbles and no dry hits.

Moving up we now have three tanks basically all the same design except that the chimneys are different as well as the air flow intakes that come in from the side to hit the coil. Now we know why there is a handy tool for coil positioning as this make certain you hit the right spot.

A DL tank. Easy to spot it has a single large intake hole. An RDL, two smaller intake holes and an MTL with one what I would call a tiny hole.

I knew from the get go which one I would be going for. The RDL for me.

Uncertain as to whether I would like the Ultem coloured PSU tank, it surprised me as being quite pleasing and looks really good on an amber Jelly box. After lubing the o rings and sliding on the airflow ring, the tank then takes a 1/4 turn to attach to the deck. That then leaves you with choices. There is a top cap onto which you can put an 810 wide bore drip tip or a top cap that has a 510 fitting and MTL style drip tip. The latter is the one I wanted to try and this set up will closely resemble the Intake solo's that are my daily's.

So RDL tank, MTL drip tip. If I had asked some one to make me a set up to my design, I could not have asked for more. Straight out of the box this is bloody fantastic. Bags of flavour and the air flow options from the ring are very precise. I was working the Intake and Requiem side by side and the Requiem got me where I wanted to be easily. Top fill, no mess, really enjoying this.

Thank you Rob Fisher, thank you All day vapes.

Two things I am taking note of. Unless there is a massive shake up in the disposable world, ala NZ, then tanks such as this will not be available going forward. Secondly at the price point this is value for money and knocks the socks of pods, especially if there are no rebuildable options for your pod.

So for me an all around winner with cons that quite frankly are not worth mentioning. The pro's far outweigh anything. Highly recommended.
Now THAT is the review I’ve been waiting for!

Now to convince my wife why I NEED one and off I shall go!
 
Monday update.

Sho, poor requiem. I hammered this thing over the weekend. Tank after tank and never picked up anything else. I would say around 4 tanks per day: 4x 4.5ml x 3 days = 54 mls +. This morning was re wick time. Getting access to the deck is so simple with the push / turn on the tank and the deck is right there. As is common for clapton coils it was a bit junked up. I noticed though, only on the top.
I had to cut the cotton on one end as it would not pull through and it was not so worked to separate in the middle. Getting it out showed a slight browning only, so the decision on the tight centre and fluffy tails was the right one. The fading flavour was down to the clapton gunking up.

I mean, the supplied coil is a tiny 4 wrap clapton, good quality for sure and very flavoursome. However it gunked up quickly and they don't clean as well as my comp wire coils. That will be the next step is to get my comp wire in there and see what result I get.

For now though, the other half of the 3mm shoe lace that I used has been put back in (seconds to do this, so easy) and off we go again. I am broke as usual but I am going to save for a second one.
 
Last edited:
So I stole this rta from @DarthBranMuffin yesterday and built and wicked and the ENTIRE tank dumped out.

Rewicked again and it leaked again.

SHOVED cotton in the wicking port and that seems to have worked.

Definitely not confident to wick and take this one to work just yet. Been a long time since I had a rta leak this on me like this. Definitely my fault though.

Wow did I feel like a right royal noob last night!

Free wicking lessons my place Saturday morning... old noob!
 
If you good people could show me some pics of your wicking technique i would appreciate it.

I've only been vaping for 10 years so wicking is new to me...
 
This is strange to me. I have rewicked mine now many times and never had a leaking issue. I need a rewick today, will take some pics.
 
This is strange to me. I have rewicked mine now many times and never had a leaking issue. I need a rewick today, will take some pics.
I must be broken because first tank literally dumped out, second tank leaked a little bit and third time was fine but I shoved cotton in there. The videos i have watched show them barely putting cotton in there and no issues so I am obviously the problem which my wife will vouch for.
 
The pics 1-2-3 show the gunked up coil, the removed cotton and as you can see almost no colour in the centre. Pic 4 shows cleaned up coil. I used the 3mm cotton although the coil is 2.5 mm.
I cut the corners off and then fluff a little bit and push down the hole. The idea is to get the centre down the hole and leave a shoulder where i cut the corners off.

I hate the new cotton taste so i always bed in the cotton until it is almost dry again before i put the tank back on. Also after a rewick i leave an air gap on the first refill to avoid any flooding.

Voila, done, fresh new wick, no leaking, wicking well. Yummy
 

Attachments

  • IMG_20230718_125026_HDR.jpg
    IMG_20230718_125026_HDR.jpg
    167.6 KB · Views: 20
  • IMG_20230718_124926_HDR.jpg
    IMG_20230718_124926_HDR.jpg
    232.8 KB · Views: 19
  • IMG_20230718_124917_HDR.jpg
    IMG_20230718_124917_HDR.jpg
    182.5 KB · Views: 19
  • IMG_20230718_124858_HDR.jpg
    IMG_20230718_124858_HDR.jpg
    211.2 KB · Views: 17
  • IMG_20230718_124647_HDR.jpg
    IMG_20230718_124647_HDR.jpg
    176.2 KB · Views: 18
  • IMG_20230718_124528_HDR.jpg
    IMG_20230718_124528_HDR.jpg
    247.5 KB · Views: 17
  • IMG_20230718_124519_HDR.jpg
    IMG_20230718_124519_HDR.jpg
    167.9 KB · Views: 18
  • IMG_20230718_124501_HDR.jpg
    IMG_20230718_124501_HDR.jpg
    256.4 KB · Views: 18
  • IMG_20230718_124236_HDR.jpg
    IMG_20230718_124236_HDR.jpg
    215 KB · Views: 19
  • IMG_20230718_124025_HDR.jpg
    IMG_20230718_124025_HDR.jpg
    224 KB · Views: 19
  • IMG_20230718_123948_HDR.jpg
    IMG_20230718_123948_HDR.jpg
    597.2 KB · Views: 17
  • IMG_20230718_123835_HDR.jpg
    IMG_20230718_123835_HDR.jpg
    243 KB · Views: 18
  • IMG_20230718_125033_HDR.jpg
    IMG_20230718_125033_HDR.jpg
    167.1 KB · Views: 17
Last edited:
Anyway, you are clearly stuffing it up and need to send it to me so you can put this whole horrible experience behind you.
 
The pics 1-2-3 show the gunked up coil, the removed cotton and as you can see almost no colour in the centre. Pic 4 shows cleaned up coil. I used the 3mm cotton although the coil is 2.5 mm.
I cut the corners off and then fluff a little bit and push down the hole. The idea is to get the centre down the hole and leave a shoulder where i cut the corners off.

I hate the new cotton taste so i always bed in the cotton until it is almost dry again before i put the tank back on. Also after a rewick i leave an air gap on the first refill to avoid any flooding.

Voila, done, fresh new wick, no leaking, wicking well. Yummy
I’ll try this when I get home a bit later thanks.
 
Back
Top