Show Us Your Reo Pics!!

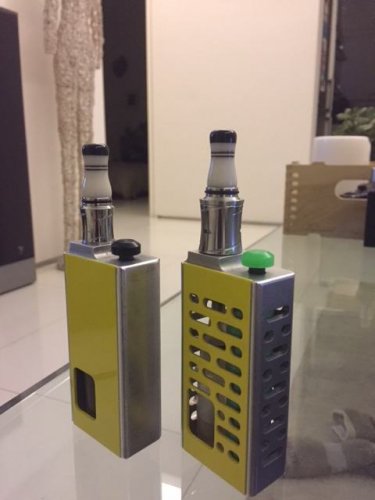
The spattered "Gruoch" (Lady MacBeth - you know, "out, out, damn spot") pictured with a selection of new atties...

gruochatties.jpg

Some deets on the atties...

atties.jpg

Nipple
* 3 post - 2x phillips screw in-body & knurled, raised center post
* 2x 3mm side air holes (they're binary - either open or closed)
* Air: MTL to restricted DL
* Flavour: excellent
* Single or dual coil

NaRDA
* 2 post - 2x phillips screw in-body
* 2x afc side air slots - both are in play always
* Air: MTL to restricted DL
* Flavour: excellent
* Single coil only

Maker
* 2 post - 1x gold plated, 1x ss, grub screws
* 2x afc top air slots - channeled down sides of cap, both are in play always
* Air: MTL to full DL
* Flavour: Good (gonna need some time to experiment)
* Single or dual coil

M-Atty
* 3 post - gold plated capture ledges & phillips screws
* 3x afc side air slots - single or dual afc
* Air: MTL to full DL
* Flavour: very good
* Single or dual coil

All but the NaRDA were modded by Catfish, NaRDA modded by Roscoe.

All are easy to build on - the Nipple is maybe a little challenging for dual coils (but not much).

Best flavour: prolly the NaRDA, Most leakproof: Maker, Best air control: M-Atty, Best value: Maker
 
2x 3mm side air holes (they're binary - either open or closed)

Why do you say the nipple has either open or closed 3mm holes? According to my info it has brass nozzles for air flow control (1mm, 1.5mm and blind for single coils) with storage space for the nozzles in the bottom of the deck.
 
LP/SL TRA with BF NoGain Mesh atty. The NoGain is a MTL atty that I drilled out for DLH's. Works pretty good, but needs another matching hole if I ever dig my drill press out because the inside chamber design doesn't allow as big of a hole as I want.

nogain.jpg
 
Bought some Hazeworks Scream today (Thanks for the link to the top local juices for the year @Andre). Tastes great in this old girl.
image.jpeg
 
Here is mine with her new door - the orange is darker than I expected and looks better than I imagined.

I have a problem though - the door sits a bit loosely and rattles which is very disappointing as I thought Reosmods are normally very precise in their construction. Is there a fix for this?

uploadfromtaptalk1462285104427.jpg
 
Here is mine with her new door - the orange is darker than I expected and looks better than I imagined.

I have a problem though - the door sits a bit loosely and rattles which is very disappointing as I thought Reosmods are normally very precise in their construction. Is there a fix for this?

View attachment 53135

Nice looking setup Wesley :borra2:

You can tighten the door up in a number of ways. The easiest is to put some tape on the inside bottom of the door - add as many layers as you need to get the fit you want. Another way recommended by the manufacturer is to bend the door ever so slightly. Simply lay the door on the edge of a table and push down on the overhanging edge. Go slowly and lightly until you get the hang of how bendable the aluminum is.

Ive done it using the second method,it works fine.
FWIW when placing the door onto a flat surface Ive done it with the outside face of the door on the bottom side,the slightly convex shape gets the outside edges of the door to push up into the groove when fitted back in the Reo.
 
Here is mine with her new door - the orange is darker than I expected and looks better than I imagined.

I have a problem though - the door sits a bit loosely and rattles which is very disappointing as I thought Reosmods are normally very precise in their construction. Is there a fix for this?

View attachment 53135

Also check if the magnets are attracted to one another. The only time I had a door problem was me being a dumbass when I glued one of the magnets the wrong way.
 
image.jpeg

Thi is my new P67 configured to match my little Fiat 500. Perfect match. I still intend to take more pics from outside the car, but this for now. These are two of my favorite things.
 
Here is mine with her new door - the orange is darker than I expected and looks better than I imagined.

I have a problem though - the door sits a bit loosely and rattles which is very disappointing as I thought Reosmods are normally very precise in their construction. Is there a fix for this?

View attachment 53135
Bending the door slightly works 100%.
I've done it with all my doors.
Just be gentle as it doesn't need force or the brute force approach.
 
Bending the door slightly works 100%.
I've done it with all my doors.
Just be gentle as it doesn't need force or the brute force approach.

I've tried bending and it's not working but I'm probably doing it wrong. Do you put it on the edge with the hole (bottle door) hanging over the edge?
 
Calling @KB_314, I'm really excited to see your yellow doors!
You beat me to it @Christos ! The Reomail arrived this morning but I only opened up after work this evening - all in good order and the doors are awesome - I'll post a couple of pics in a few minutes (tail-end of dinner and my better half giving me spine-chilling looks as I type this...:sweating:). The bottles will take some getting used to - I'm squonking way too hard.
Thank you for organising everything! (my parcel was addressed to @Rob Fisher so thanks Rob for helping with the buy, I'm guessing it's to do with a US address maybe?).
Amazing how a new door makes it feel like a different Reo!
 
I've tried bending and it's not working but I'm probably doing it wrong. Do you put it on the edge with the hole (bottle door) hanging over the edge?
I put thumbs in the centre on the inside of the door and index fingers on the outside of the door at the ends.
Try a few times. You don't want the door to bend too much.
 
I've tried bending and it's not working but I'm probably doing it wrong. Do you put it on the edge with the hole (bottle door) hanging over the edge?
Bend it along its length ie from top to bottom,not from side to side.
You have checked the magnets are orientated correctly as per @Alex post?
 
Not the best light for my phone camera, but yellow doors baby!
And some soft bottles and bright buttons
IMG_7186.JPG IMG_7189.JPG
They look much better in reality than in these pics, I'll post in ReoMail tomorrow
 

Attachments

  • IMG_7188.JPG
    IMG_7188.JPG
    27 KB · Views: 23
Not the best light for my phone camera, but yellow doors baby!
And some soft bottles and bright buttons
View attachment 53169 View attachment 53171
They look much better in reality than in these pics, I'll post in ReoMail tomorrow

Nice. And I absolutely LOVE the Italian bottles. I've changed over all my REOs that I use to those. They take a light touch.
 
Here is mine with her new door - the orange is darker than I expected and looks better than I imagined.

I have a problem though - the door sits a bit loosely and rattles which is very disappointing as I thought Reosmods are normally very precise in their construction. Is there a fix for this?

View attachment 53135

@Wesley, your Reo looks amazing!
Nice photo

Regarding the door, I too had a rattle on Reo Black. As the other guys suggested, I resolved it with a little bend. Go slowly. I did it without resting on a table, just as @Christos described. I did it about three times until it stopped rattling. Best not to overdo it though. Just enough till the rattle stops
 
View attachment 53146

Thi is my new P67 configured to match my little Fiat 500. Perfect match. I still intend to take more pics from outside the car, but this for now. These are two of my favorite things.

Love it @JC Okie
The car and the P67!
So cool that they are colour co-ordinated!!!
Thanks for sharing the pic
 
Running the p67's with small-mid chamber atty's right now...2013 Cyclones, an O-16, and a Nuppin' along with a Minikin VGOD/Avocado 24.

A quintet of the ultimate flavor machines.

wiyh25.jpg
 
My Little Reo project was a success (referring more to the size of the Reo than the project :) ) I took photos of the whole process, but the quality and lighting was so bad that I'm not going to post them. :(
Here is one of the finish Reo with it's mate ( my previous project) and then one of the entire Reo family as they stand now.

DSC_0827.JPG

DSC_0824.JPG

Sorry about the quality, but my cell takes really bad pictures in low light.
The new Reo mini was polished to a mirror finish and is running a single coil RM3 at 1.0 Ohm. With all the holes and the size she is light as a feather.
 
Back
Top