Smok TF RDTA - HELP NEEDED!!!

Lehan

Experienced Vaper
LV
8
 
Joined
19/11/15
Posts
161
Awards
9
Age
37
Location
Polokwane
Hi Guys,

I was wondering if someone might be able to help me with a Smok TF RDTA please.
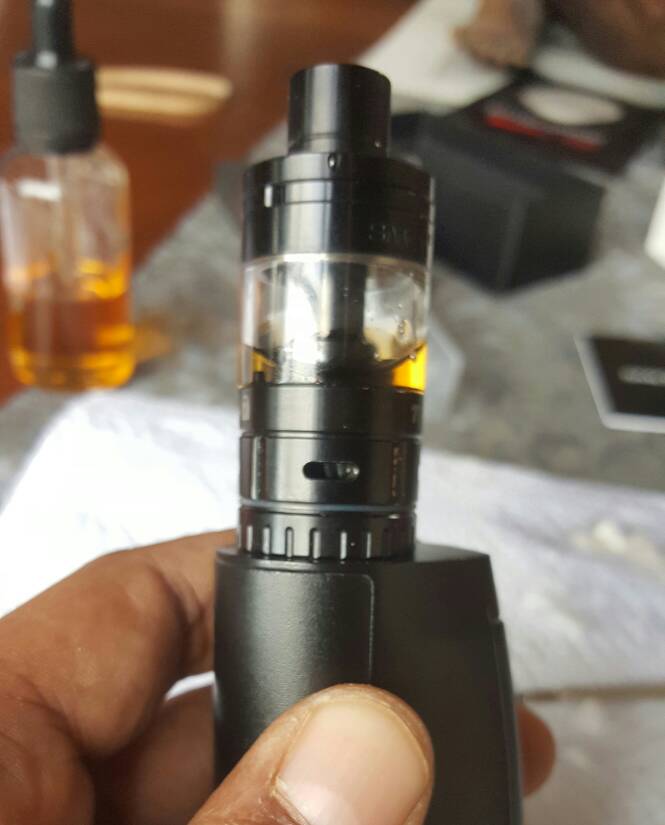
When filling the tank, it leaks from a slot above the air holes.

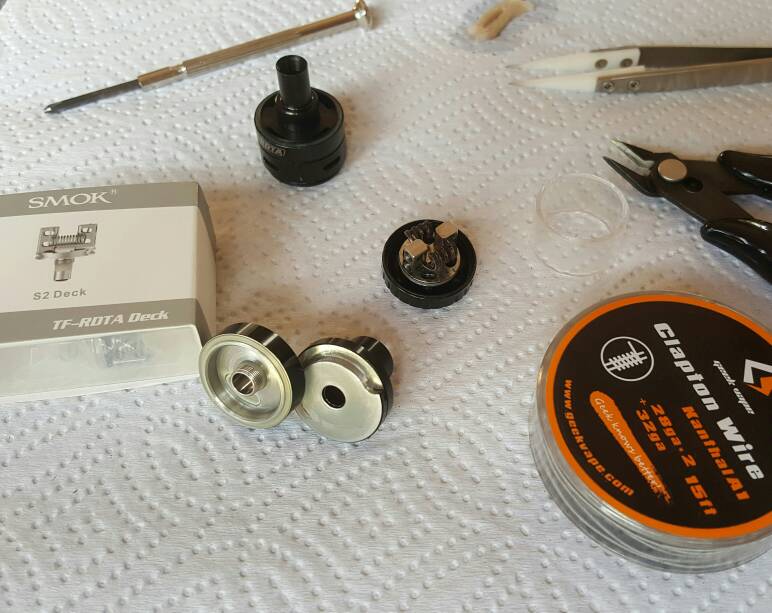
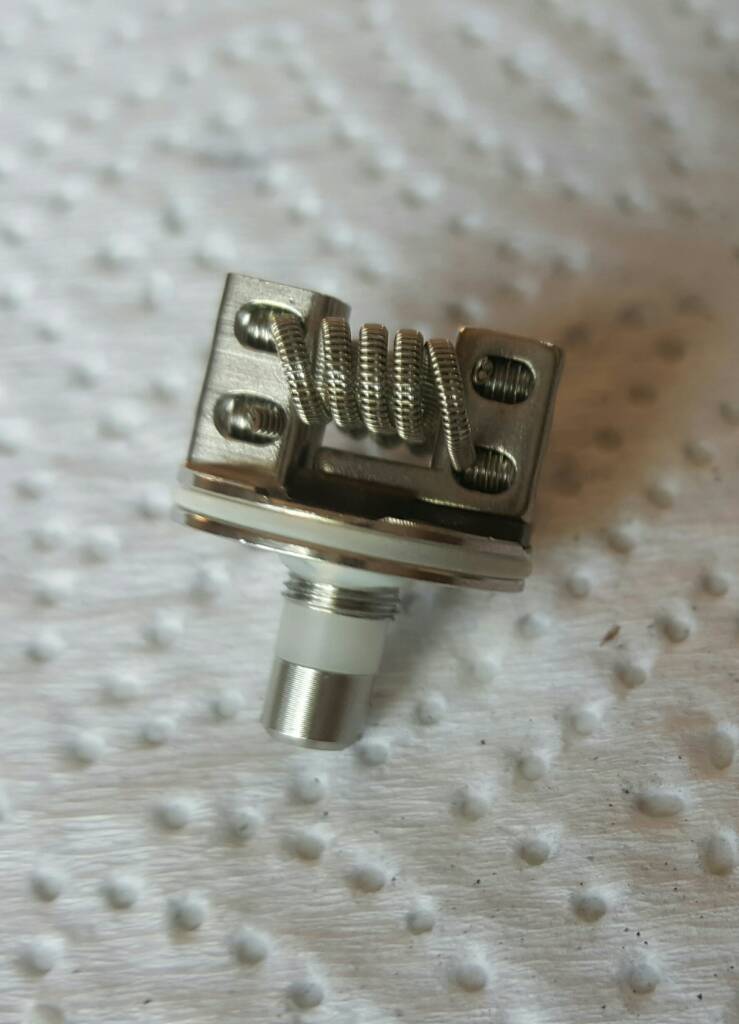
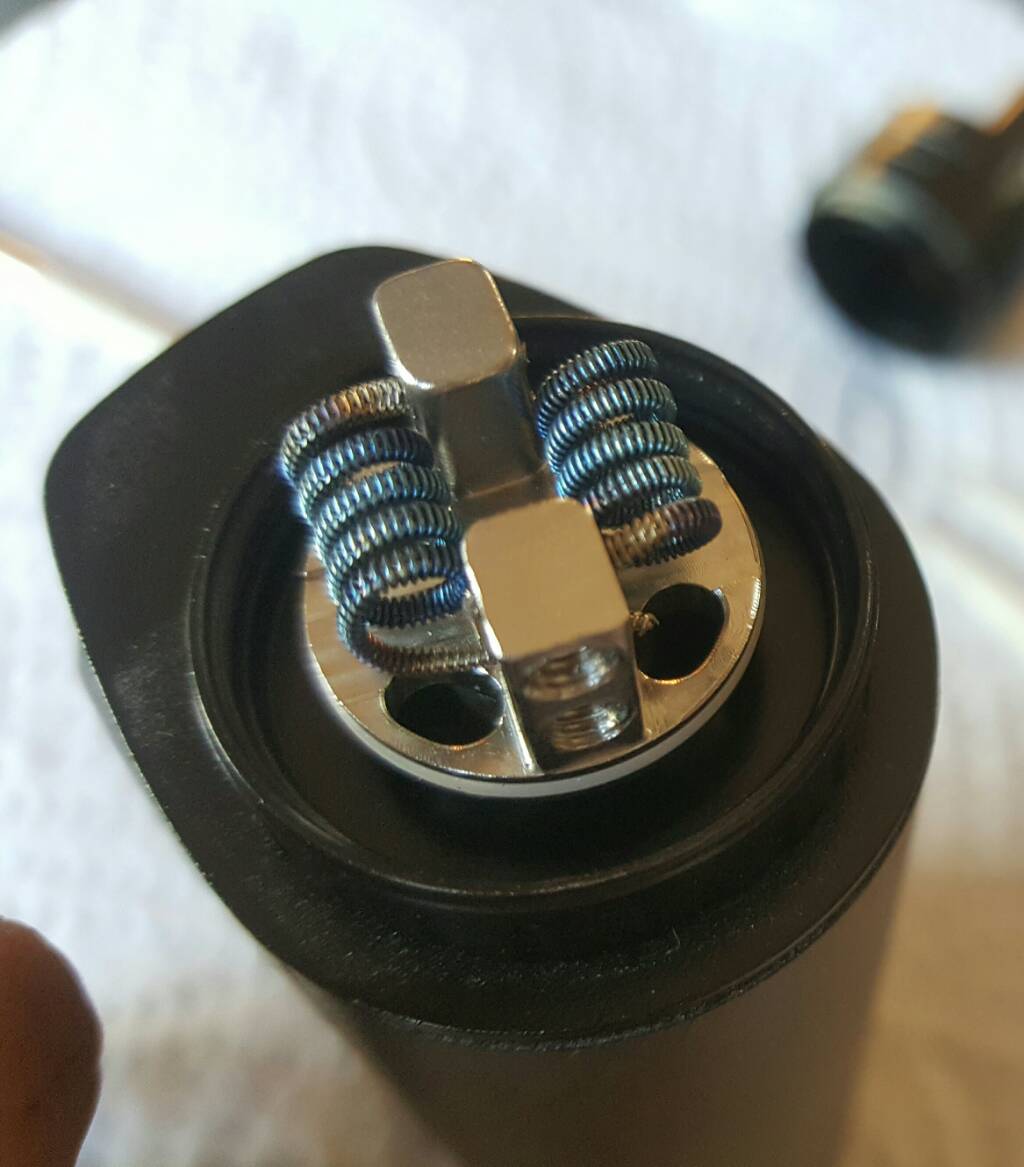
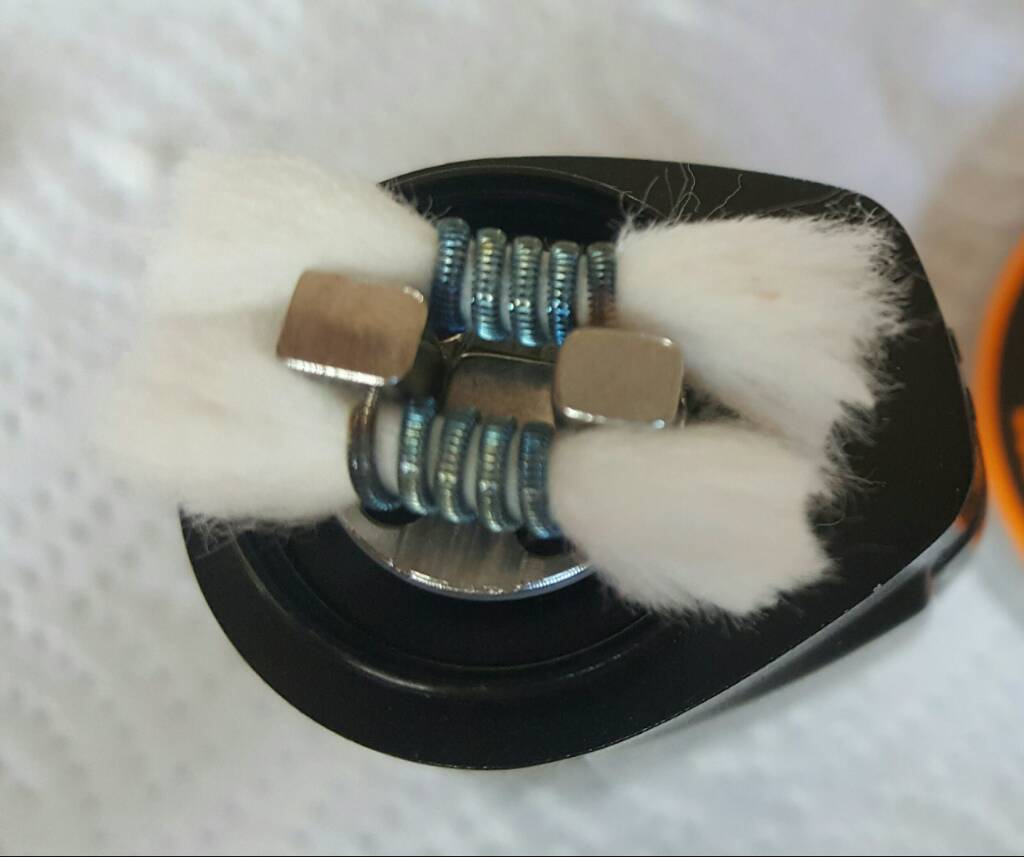
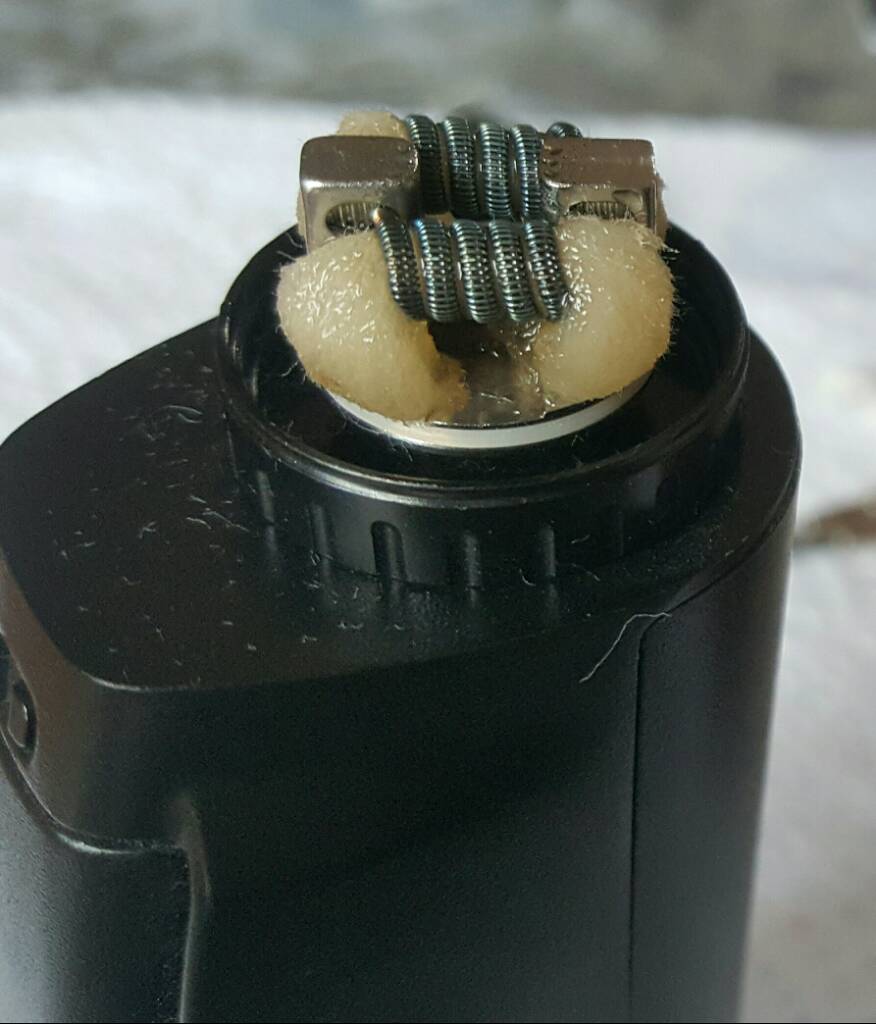
build - 2 x Ø3 x 8 wraps Kanthal A1 = 0.35 ohm.
mod - Cuboid 150w

I looked at numerous wicking methods, Currently i'm pushing the wick through the 4 holes in the base, (the wick goes through tightly). I'm really enjoying this tank but can't manage to fill it at all, once it has 2ml of juice in, it starts running out the bottom.

I have locked the juice control and the air holes, filled the tank, turned it around. while upside down, opened the juice flow. Nothing helps, it keeps leaking juice.

Thanks,
Lehan
 
I agree with @Chukin'Vape can you post some pics of the tank, I have a TF-RDTA too maybe I can help.
If you want, PM me and I'll give you my cell number and we can try fix this over whatsapp this evening.
 
Hi guys. The area it's leaking from does not seem to have an oring. I will post pics tonight. Greyz - I will pm you now thanks

Sent from my GT-I9190 using Tapatalk
 
I agree with @Chukin'Vape can you post some pics of the tank, I have a TF-RDTA too maybe I can help.
If you want, PM me and I'll give you my cell number and we can try fix this over whatsapp this evening.

It could be this o-ring that is causing all the havoc....
upload_2016-10-3_15-6-49.png

I cant see that @Lehan is not wicking correctly - It sounds like he has done some youtube'ing. But would need to see the build.

upload_2016-10-3_15-13-6.png
 
I had the same thought this morning about that o-ring. I was concerned about the wicking due to different information. Some say the wick must cover but the 4 holes in the base and not go through them, where as others say the wick must go through the base into the bottom chamber (this makes more sense to me).

I will post some pics tonight. Will be awesome to get it sorted as the leaking is a huge irritation currently. I doubt that the o-ring situated around the base (as shown in pictures above) seals firmly
For me, I found that just placing the wicks over the holes to more effective at wicking. Stuffing cotton into the holes prevents liquid flooding the chamber but chain vaping always lead to dry hits.

When I first got the tank I would have liquid always leaking through the air holes. I found the cause to be the cotton touching the chamber. Reduced my coils by one or two wraps and that fixed the leaking.

I will do a new build when I get home and I'll post some pics here to show how I wick etc.
I just bought a new S2 deck. This is a great excuse to bring it out to play.

Sent from my SM-G935F using Tapatalk
 

Thanks man - open her up take a picture with this angle. just want to make sure about that o-ring.... Also want to check the build and wicking for encase, but I dont think the problem is here. (dont remove the cotton - take the photo as is)
upload_2016-10-3_15-26-11.png

What is looking a bit odd for me is your centerpin: Just as a side note, make sure this is screwed in - it looks like a gap there

upload_2016-10-3_15-28-57.png
 
Thanks man - open her up take a picture with this angle. just want to make sure about that o-ring.... Also want to check the build and wicking for encase, but I dont think the problem is here. (dont remove the cotton - take the photo as is)
View attachment 70086

What is looking a bit odd for me is your centerpin: Just as a side note, make sure this is screwed in - it looks like a gap there

View attachment 70087

Google picture used :) not the actual tank
 
Google picture used :) not the actual tank
This is a good thing, that center-pin looks a bit odd. Oh I totally forgot - but also check the o-Ring here

upload_2016-10-3_15-36-47.png

If that O-ring is pinched, and you gooi the juice in - that thing will p!ss through the side! From a wicking perspective, scottish roll and make sure that the wick tails run though the juice holes - but aim for no more than 2mm protrusion. So eyeball it so that the tails just cover that juicy hole. :lipssealed:
 
Top and bottom o-rings on the glass looks fine, no pinching there and no leaks that can be seen
 
As promised a pictorial of the S2 wicking, done my way.
I don't have any leaks using this method.
I was going to coil and wick but the new S2 deck comes with a beautiful pair of Fused Clapton's preinstalled.

df5ea43d38d8fa91763c99bd308fdbaa.jpg

Ground work laid down

c4b45d6519ff7c55639b4c0c132d74f7.jpg

New S2 deck and it preinstalled Fused Clapton's

6238a4617ae0e98abb781ed078536265.jpg

Remove and check this oring, make sure it's not kinked or cut anywhere. Replace if necessary.

df017e72d05f9a11252d2a49ca59e172.jpg

Remove and check this oring too. Just my luck I managed to cut mine removing it so please be careful as there's NO spare one in the box. I used one of the bigger orings that's actually for the glass section, pic of that later.

892316553a6aa694019a771ba2ee4b42.jpg

All ready to be wicked.

303ada59456e7c2a1a429122bc5d982f.jpg

I actually trimmed these wicks down a bit, just forgot to take a pic.

14261e1bd57aac6dc38e1414953b0ec3.jpg

Here they are just tucked under the coils. Looks messed up now but just drop some juice on it and you can shape them nicely.

026119a412c7eba539d6b6a9ea173f01.jpg

Once wet the wicks can easily be shaped and manoeuvred so they clear under the coils (important for airflow and flavour). I then just stick a piece of Kanthal and press a hole into the juice well. This gets a little bit of the wick stuck inside but just enough to keep the wick in place when screwing things together but not so much that it chokes the wicks.

7e07bac9767811fa07d8b1a7c221d2c1.jpg

Here you can see the bigger oring in place. I had to screw it down till it was tight then back out a quarter turn to make sure the air intakes line up in line with the coils (remember that gap, here's why it's important)

All done and vaping like a champ!

I hope this helps @Lehan

Sent from my SM-G935F using Tapatalk
@Lehan if you follow this - you cant go wrong!
 
Just a big thanks to @Greyz for assisting me with this.

We have come to the conclusion that the tank is a dud. Seems to be a factory mistake when they pressed the bottom section together. This is bad coz i tried again to get some assistance from the vendor i bought the tank from, unfortunately the refuse and i'm stuck with the tank.

Thanks Guys!
It was my pleasure to help bud, I never expected a new tank to be broken. But that video you sent is proof the tank is broken.

Go ahead and post on their FB page, if they won't help you at least you can help warn others before they buy from the same shop.

Sent from my SM-G935F using Tapatalk
 
Hi Guys,

Just an update. The vendor decided to take the tank back and exchange it. Unfortunately they did not have another RDTA so i exchanged it for a Griffin 25 with top airflow.

Once again thanks for everyone's help with this.
 
So in the end this story had a happy ending. Glad your sorted @Lehan :D
 
Hi Guys,

Just an update. The vendor decided to take the tank back and exchange it. Unfortunately they did not have another RDTA so i exchanged it for a Griffin 25 with top airflow.

Once again thanks for everyone's help with this.
Sick atty bro - Griffin is way better lezbihonest!
 
Back
Top