First off, I'd like to thank @Timwis, and also out to the entire membership of ecigssa. Tim was kind enough to share this forum with me, and thus far, I am very impressed.
I hope this review isn't TOO big.

Thanks out to Joyi from @Sourcemore for sending out this kit for the purposes of this review. She did provide some coupon codes as well for you guys.
**Code: PAIOK**
 www.sourcemore.com
**Code: PULV**
www.sourcemore.com
Vandy Vape teamed up with [Tony B](https://www.youtube.com/user/VaporTrailChannel) again, for another product for the masses !!! I have nothing but respect for Tony, and what he has, and is doing for the community.
**Vandy Vape PULSE AIO 80W Kit Features *
*
* Dimensions - 97.5mm by 55.6mm by 28.2mm
* Single High-Amp 18650/20700/21700 Battery - Not Included
* Wattage, Voltage, Bypass, Temp Control (SS TC, TI, NI), and Smart Mode (when using VVC Coils).
* Wattage Output Range: 5-80W
* Voltage Output Range: 3.2-4.2V
* Resistance Range: 0.05~3.0ohm
* Zinc-Alloy Chassis Construction
* Intuitive Firing Button
* Two Adjustment Buttons
* OLED Display Screen
* 5.0mL Prebuilt Coil Pod Capacity
* 3.7mL RBA Pod Capacity
* Side Fill System - Silicone Stoppered
* Vandy Vape VVC Coil Series
* Press-Fit Coil Installation
* Open Circuit Protection
* Over-Current Protection
* 10S Cut-Off Protection
* Short-Circuit Protection
* Over-Temperature Protection
* Low Battery Protection
* Type-C USB Port
* Available in Frosted Black, Frosted Green, Frosted Blue, Frosted Grey, Frosted Red
**What's Included*
* 1 Pulse AIO Device
* 1 Pulse AIO DIY Pod
* 1 Pulse AIO Pod Cartridge
* 1 Wrench
* 2 VVC Coil
* 2 24ga Ni80 Wire
* 1 Accessories Bag
* 1 Coil Lead Guide
* 1 QC Type-C USB Cable
* 1 User Manual
* 1 18650 Adapter
There's a LOT to unpack here with this new kit, so let's get INTO it !!!!
Starting out with some of the Vandy Vape chipset features ...

You get TWO vessels (tanks), with one using Pre-built coils, and the other, Re-buildable coils ...

With lots of customizable options (we'll cover that more below), checking out the parts ...

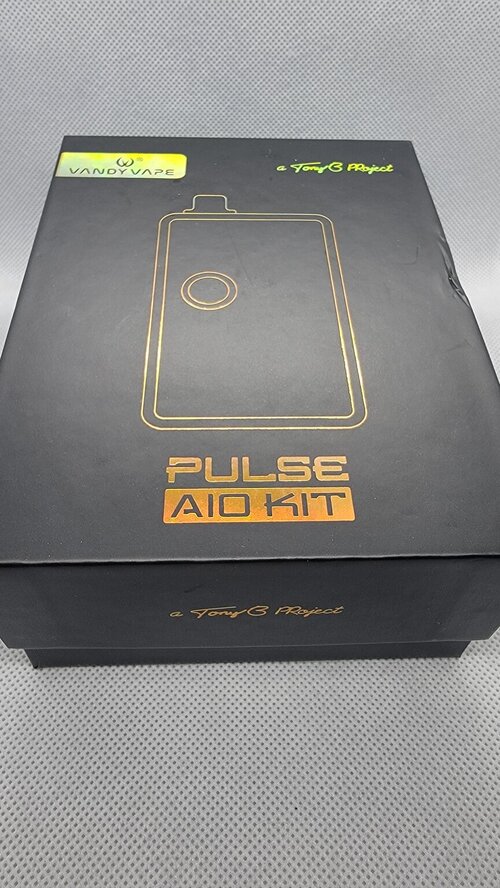
The box ...

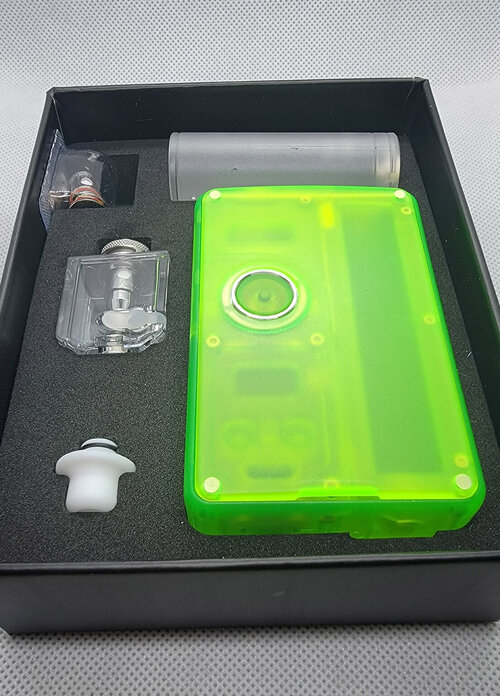
Nicely packaged ...

Lots of extras including both pre-built coils, and RBA deck coils, multi-tool, driver, o-rings, charger cable, driver, grub screws,coil cutting guide, user's manual (not pictured), AND a qualified certificate.

A close up of the bag contents ..

As mentioned, you get both the pre-built, and RBA vessels ...

Both with adjustable airflow rings on the bottom ...

Firing button, up/down adjustment buttons, 5mm X19mm OLED display, and USB-C charging port ...

Both the front and rear have removable panels with 4 magnets that hold them snugly in place ..

Removable top retaining screw, and chamber airflow venting ports ...

Visible internals, and snug lid magnet adhesion ...

Opaque, but still visible internals ...

Moving on to the top, and one of my cons, is the love/hate drip tip ..

Despite lubing it up, it rarely wanted to go fully flush ...

Clearly marked polarity, tight spring loaded battery posts, and an adapter if you want to go below a 21700, which is always my choice, on single batters ...

My 21700 was snug as a bug in a rug, no rattles ...

Now onto the first use for the Multi Tool, the ring and firing button ...

You can remove and replace the ring and firing button if you wish ...


Now onto the second use for the multi tool, getting your vessels in and out ...

The threading was smooth, and the screw was easily removable ...

Now that the retaining screw was out, time to move onto your vessels ....

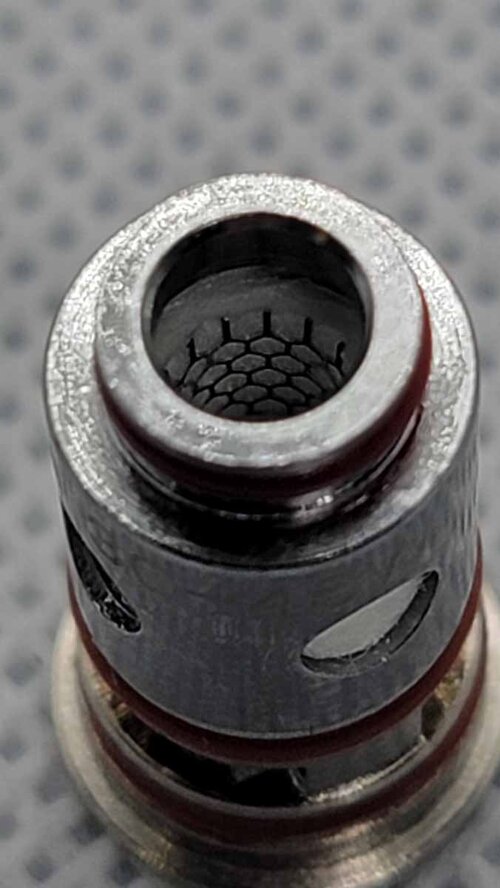
Starting out with the pre-built coil options ...

Easy Peasy with the Multi-Tool, just slide in, and pop out ...


I hope this review isn't TOO big.
Thanks out to Joyi from @Sourcemore for sending out this kit for the purposes of this review. She did provide some coupon codes as well for you guys.
**Code: PAIOK**
Vandy Vape Pulse AIO Kit 80W Vape Kit
Pulse AIO Kit supports 21700/20700/18650 cell, comes with DIY RBA tank, is compatible with VVC coils. It has 5ml capacity, features USB type-c charging, the tank can work in most boro style mods.
**Code: PULV**
Vandy Vape Pulse Vessel Kit RBA Tank with Pre-built Tank
Pulse Vessel Kit contains an RBA Tank with curved airflow and a Pre-built Tank that is compatible with VVC coils. It is easy to build and maintain, suitable for Vandy Vape Pulse AIO Kit. It has 3.7ml/5ml capacity.
Vandy Vape teamed up with [Tony B](https://www.youtube.com/user/VaporTrailChannel) again, for another product for the masses !!! I have nothing but respect for Tony, and what he has, and is doing for the community.
**Vandy Vape PULSE AIO 80W Kit Features
** Dimensions - 97.5mm by 55.6mm by 28.2mm
* Single High-Amp 18650/20700/21700 Battery - Not Included
* Wattage, Voltage, Bypass, Temp Control (SS TC, TI, NI), and Smart Mode (when using VVC Coils).
* Wattage Output Range: 5-80W
* Voltage Output Range: 3.2-4.2V
* Resistance Range: 0.05~3.0ohm
* Zinc-Alloy Chassis Construction
* Intuitive Firing Button
* Two Adjustment Buttons
* OLED Display Screen
* 5.0mL Prebuilt Coil Pod Capacity
* 3.7mL RBA Pod Capacity
* Side Fill System - Silicone Stoppered
* Vandy Vape VVC Coil Series
* Press-Fit Coil Installation
* Open Circuit Protection
* Over-Current Protection
* 10S Cut-Off Protection
* Short-Circuit Protection
* Over-Temperature Protection
* Low Battery Protection
* Type-C USB Port
* Available in Frosted Black, Frosted Green, Frosted Blue, Frosted Grey, Frosted Red
**What's Included
** 1 Pulse AIO Device
* 1 Pulse AIO DIY Pod
* 1 Pulse AIO Pod Cartridge
* 1 Wrench
* 2 VVC Coil
* 2 24ga Ni80 Wire
* 1 Accessories Bag
* 1 Coil Lead Guide
* 1 QC Type-C USB Cable
* 1 User Manual
* 1 18650 Adapter
There's a LOT to unpack here with this new kit, so let's get INTO it !!!!
Starting out with some of the Vandy Vape chipset features ...
You get TWO vessels (tanks), with one using Pre-built coils, and the other, Re-buildable coils ...
With lots of customizable options (we'll cover that more below), checking out the parts ...
The box ...
Nicely packaged ...
Lots of extras including both pre-built coils, and RBA deck coils, multi-tool, driver, o-rings, charger cable, driver, grub screws,coil cutting guide, user's manual (not pictured), AND a qualified certificate.
A close up of the bag contents ..
As mentioned, you get both the pre-built, and RBA vessels ...
Both with adjustable airflow rings on the bottom ...
Firing button, up/down adjustment buttons, 5mm X19mm OLED display, and USB-C charging port ...
Both the front and rear have removable panels with 4 magnets that hold them snugly in place ..
Removable top retaining screw, and chamber airflow venting ports ...
Visible internals, and snug lid magnet adhesion ...
Opaque, but still visible internals ...
Moving on to the top, and one of my cons, is the love/hate drip tip ..
Despite lubing it up, it rarely wanted to go fully flush ...
Clearly marked polarity, tight spring loaded battery posts, and an adapter if you want to go below a 21700, which is always my choice, on single batters ...
My 21700 was snug as a bug in a rug, no rattles ...
Now onto the first use for the Multi Tool, the ring and firing button ...
You can remove and replace the ring and firing button if you wish ...
Now onto the second use for the multi tool, getting your vessels in and out ...
The threading was smooth, and the screw was easily removable ...
Now that the retaining screw was out, time to move onto your vessels ....
Starting out with the pre-built coil options ...
Easy Peasy with the Multi-Tool, just slide in, and pop out ...