Rebuilding the iJust2 with a Notch Coil

BumbleBee

Vaping Master
VIP
LV
47
 
Joined
18/5/14
Posts
9,880
Awards
41
Age
48
Location
Robertson
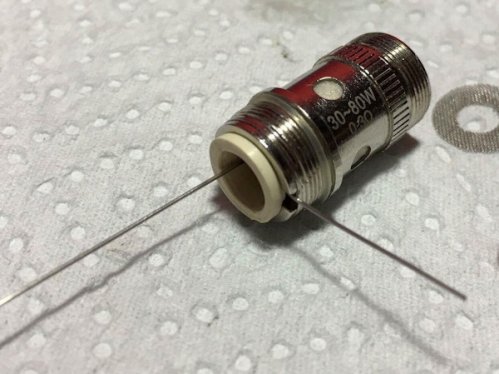
I started with an old iJust2 0.3 ohm coil. I got a pack of 10 Stainless Steel 316L Notch coils from Vape King for R100.
13242119_10209402015668863_1997295554_o.jpg

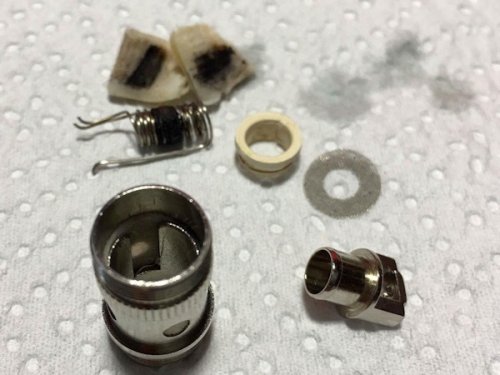
Start by disassembling your old coil and getting all the reusable bits nice and clean. I left the cotton strip in place inside the coil shell.
13199269_10209402015988871_2036315732_o.jpg

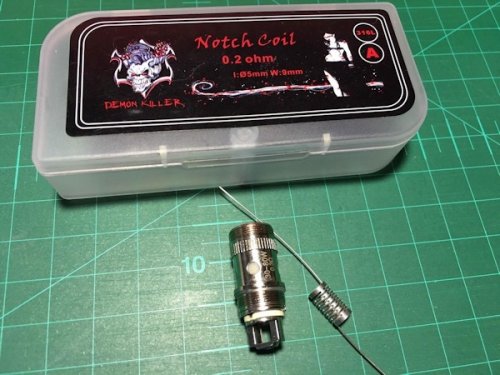
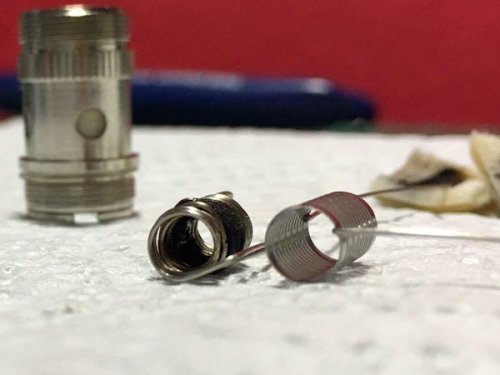
Here is the old coil next to the new Notch coil for size comparison, they are pretty much the same size.
13224259_10209402016628887_2011222734_o.jpg

Cut a strip of Koh Gen Doh the same width as the coil, I left the cotton strip in tact, don't remove the outer layers.
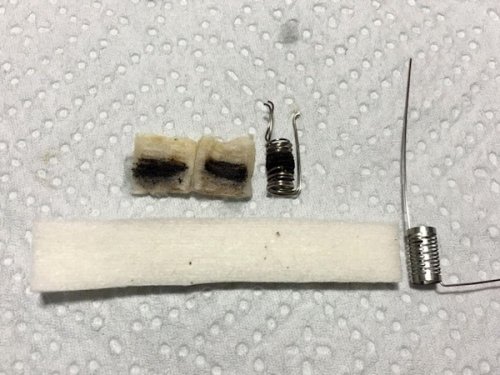
13187712_10209402016948895_1582341500_n.jpg

Wrap the Jap Cotton around the coil tightly once and bend the one coil leg over to hold the cotton down.
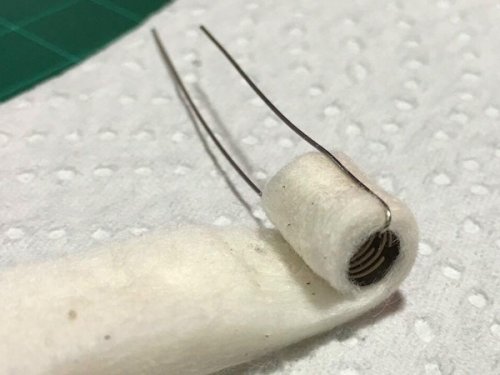
13234784_10209402017268903_684419043_o.jpg

Now one more tight wrap and cut off the excess cotton.
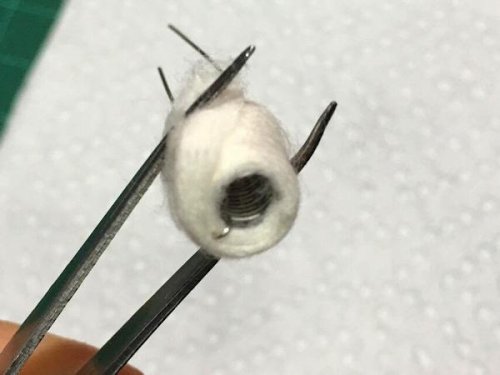
13230790_10209402017668913_1628458884_o.jpg

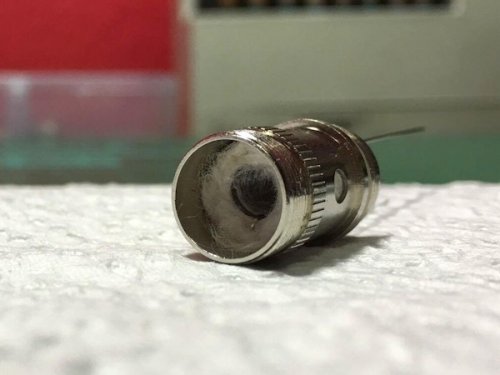
Gently push/shove/tuck the new core into the old shell from the top, legs first.
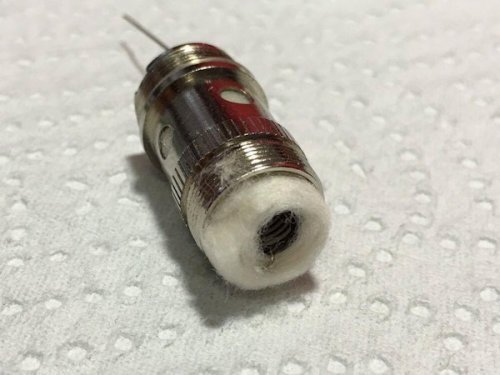
13214493_10209402017948920_1354186863_o.jpg

I used my tweezers to persuade it to go in without scrunching up the cotton against the tabs on the inside of the coil shell.
13211204_10209402018468933_1947300323_o.jpg
13214989_10209402018908944_1200679237_o.jpg

Pop the rubber grommet over the leg that is closest to the middle, the leg that runs close to the side goes on the outside of the grommet.
13214458_10209402020988996_2117758474_o.jpg
13214542_10209402020428982_1703872945_o.jpg

Pop the positive post back on and trim off all the excess wire.
13225125_10209402021229002_554553550_o.jpg

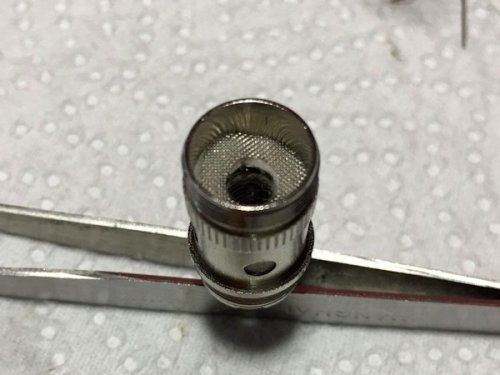
Zap the meshy bit back on nice and snug...
13230743_10209402021909019_1396501693_o.jpg

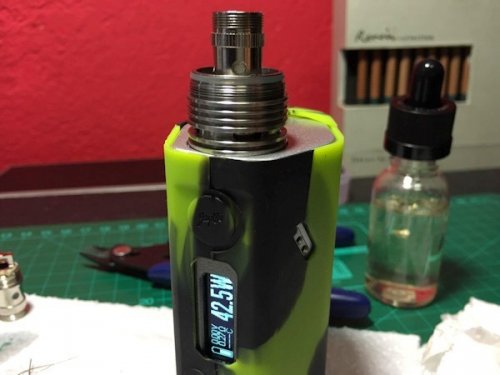
Now check your freshly built coil for errors...
13242193_10209402022309029_791145901_o.jpg

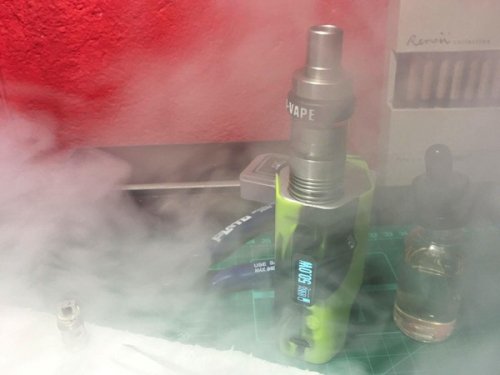
Juice that bad boy up, sit back and marvel at your sheer genius and enjoy your new iNotch2 Coil :D
13230914_10209402022509034_526216829_o.jpg
 
I need to learn how to do this last one I tried I cocked it up badly u make this process look easy. Where are u based?

Sent from my SM-G935F using Tapatalk
 
How many times did u wrap it in cotton?

Sent from my SM-G935F using Tapatalk
 
Are u using it in tc mode

Sent from my SM-G935F using Tapatalk
 
Great stuff. Should be even easier in the RBA unit.
This was much easier than the Triton RBA which I could not for the life of me get to work properly. I haven't tried the eLeaf RBA yet, don't really see the point now that these notch coils are available. So far this rebuild is working great, tons of air, no dry hits and no flooding.
 
Excellent tutorial @BumbleBee - great photos and instructions!!
Hows the vape compared to the normal iJust2 coils?
 
This was much easier than the Triton RBA which I could not for the life of me get to work properly. I haven't tried the eLeaf RBA yet, don't really see the point now that these notch coils are available. So far this rebuild is working great, tons of air, no dry hits and no flooding.
I have not tried the Triton RBA, but have read that it is difficult to get right. Recently got the Eleaf RBA and, being used to building the Ego RBA for HRH, it was really a breeze in comparison. And works perfectly (horizontal coil). The Cubis RBA, on the other hand, now lies in the gorge.
 
Epic tutorial, doesn't look difficult at all. Will get myself some of these, my wallet is going to love me again :)
 
That is so cool. Need to get my hands on some of those notch coils.

Sent from my Nexus 6P using Tapatalk
 
This thread kinda motivated me to rebuild an ec coil this afternoon, I am now running a parallel ni80 coil in my melo tank, sitting at 0.27ohm and it is chucking some decent flavour and cloud... its not as easy as these pics make it look though. My cotton was going everywhere except where it should be.
 
@BumbleBee Hi, I wonder if you could recommend a good cotton to use in this rebuild? I got some UD cotton and I must say it's absolute crap! I've rebuilt one coil now about 5x and it keeps on burning the cotton on the first vape. The cotton is totally saturated, so it's not a dry hit. I've tried it on TC mode and Wattage mode at around 45W/220C. The taste is so gross I nearly vomited. The cotton used in this tutorial looks totally different to the UD.
 
Same here @werner84 Although i didnt use the Notch coil, i twisted my own kanthal a1 and used decent cotton from demon killer but no matter what i try, the coil burned even fully saturated in juice and then i gave up.
 
The only thing I can think of is that the cotton is giving off a funky taste, cotton does this to varying degrees across most brands. I used some generic stuff I had in a box from somewhere. The cotton taste should go away after a few puffs, no idea why it's tasting burnt though.
 
Yeah I played around with it... removing the outer layers of the cotton etc. but no luck. Really disappointed at this stage. I got one pre-built notch coil when I bought the device, any idea where I can buy those same coils?
 
Well I think I've kind of figured it out. After lots of wasted cotton and a few new swear words that I've invented, I removed one of the outer layers of the cotton strip and put that side against the coil. So far it's better than before. Hopefully this works :whew:
 
Well I think I've kind of figured it out. After lots of wasted cotton and a few new swear words that I've invented, I removed one of the outer layers of the cotton strip and put that side against the coil. So far it's better than before. Hopefully this works :whew:
Inventing new swear words is all part of the fun :D

Let us know how it turns out (the wicking, not the new swear words) ;)
 
Hi @BumbleBee - i have an iJust2 tank that for some reason didnt get much airtime
I think it was okay when i vaped it out the box but I think i got distracted with other gear afterwards and it has just been sitting and I forgot about it.
Discovered it again

What can I do coil wise to bring it back to service? Whats the best commercial coil or easiest rebuildable option. Am thinking of putting it on an Evic VTC Mini ;-)
I like the iJust2 for its simplicity. For me the 0.3 ohm coils work great but ELeaf are bringing out a few new coils like the SS316 0.18 ohm that ships with the new iJustS kit, there is a 0.25 Notch Coil and a 0.75 MTL that should be available soon.

If you're a fan of those cCell coils then those will work too, personally I don't see why people are raving about them but hey, to each his own ;)

So far the easiest rebuild for me has been the notch coil rebuilding in the stock coil casing, still need to try the ECR head but I suspect it may not be for me because I like a lower ohm build with lots of air. The Triton RBA was a complete waste of time.
 
I started with an old iJust2 0.3 ohm coil. I got a pack of 10 Stainless Steel 316L Notch coils from Vape King for R100.
View attachment 54264

Start by disassembling your old coil and getting all the reusable bits nice and clean. I left the cotton strip in place inside the coil shell.
View attachment 54263

Here is the old coil next to the new Notch coil for size comparison, they are pretty much the same size.
View attachment 54262

Cut a strip of Koh Gen Doh the same width as the coil, I left the cotton strip in tact, don't remove the outer layers.
View attachment 54261

Wrap the Jap Cotton around the coil tightly once and bend the one coil leg over to hold the cotton down.
View attachment 54260

Now one more tight wrap and cut off the excess cotton.
View attachment 54259

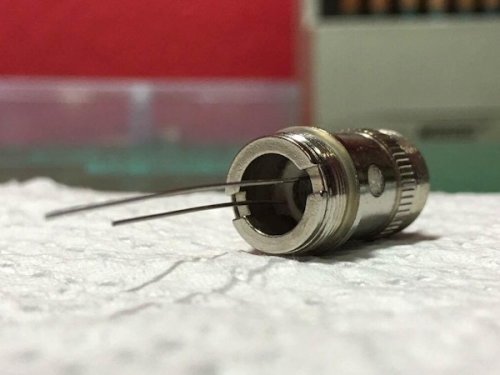
Gently push/shove/tuck the new core into the old shell from the top, legs first.
View attachment 54258

I used my tweezers to persuade it to go in without scrunching up the cotton against the tabs on the inside of the coil shell.
View attachment 54257
View attachment 54256

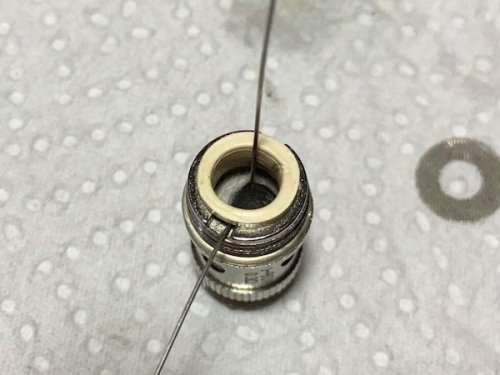
Pop the rubber grommet over the leg that is closest to the middle, the leg that runs close to the side goes on the outside of the grommet.
View attachment 54254
View attachment 54255

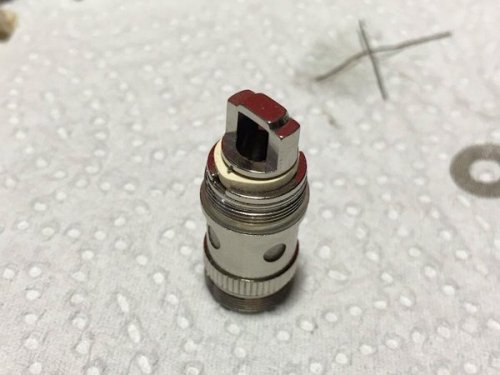
Pop the positive post back on and trim off all the excess wire.
View attachment 54253

Zap the meshy bit back on nice and snug...
View attachment 54252

Now check your freshly built coil for errors...
View attachment 54251

Juice that bad boy up, sit back and marvel at your sheer genius and enjoy your new iNotch2 Coil :D
View attachment 54250
I just got interested in these so I find this informative,nice idea using a coil head as the characteristics seem suited for this.
 
Back
Top