Weekend Projects

By my calculations, my distillation efforts will be much improved if I start off with a decent raw material. Tried it with my distilled apricot water and hell yeah! Damn this pure water is the bomb!

RegardsView attachment 240640 View attachment 240641

What is the final ppm or EC value of your reverse osmosis water?

I ran tests on my current water filtration and only noticeable difference was a PH reading of 0.5 less than tap water. I cannot comment on any pesticides or chemicals that are in the tap water. (I would recommend filtration irrespective of tap quality to remove bacteria and other impurities I don’t have the equipment to test for)

I was thinking of getting reverse osmosis but my water quality is quite good 50- 100 ppm. RO wouldn’t help me much. Only think I can think of is perhaps the RO changes the PH of the water making it slightly less alkaline towards PH neutral.
Most people agree that a slightly acidic PH in water tastes better than tap water.
To put things into perspective, tap water is around 8.5PH where spring or bottled water is around 5-6PH.
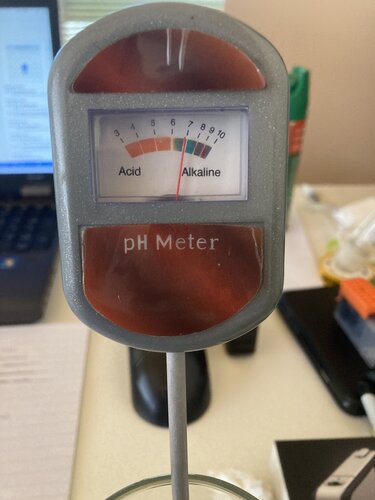
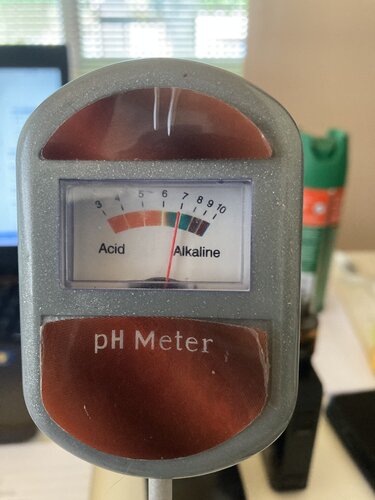
After very careful testing with the most state of the art equipment at my disposal the following results:
Plain tap water:
9FCC2C92-9657-401F-A654-121F1231B4C7.jpeg

Filtered tap water:
08DC0B8B-B6B1-4955-B2C3-38C76ADFE2D7.jpeg

No comment.

Regards
 
After very careful testing with the most state of the art equipment at my disposal the following results:
Plain tap water:
View attachment 241384

Filtered tap water:
View attachment 241385

No comment.

Regards
Interestingly, Please remember to top yourself up with calcium and magnesium as our tap water and your RO water should have very little in it!
 
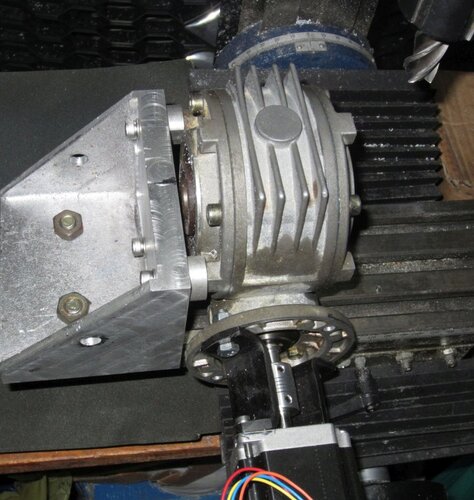
After 3 days of flops and tribulations, I finally have an angle plate, shown mounted on my mill table.
The next stage is searching for some 25mm dia steel bar to mount a 4 jaw chuck on the end and all will be complete.
mounted.jpg
 
After 3 days of flops and tribulations, I finally have an angle plate, shown mounted on my mill table.
The next stage is searching for some 25mm dia steel bar to mount a 4 jaw chuck on the end and all will be complete.
View attachment 241409

Well done! :clap: ... That 100:1 gearbox with a Arduino behind the stepper motor is going to make it indexable and possibly more accurate than the bearing backlash on that box :number_one:
 
Well done! :clap: ... That 100:1 gearbox with a Arduino behind the stepper motor is going to make it indexable and possibly more accurate than the bearing backlash on that box :number_one:

Thanks, that was my plan to make a dividing head/ rotary table.
There doesnt seem to be any backlash trying to wiggle it by hand, but we'll see once I have a keyed spindle in there.
 
After very careful testing with the most state of the art equipment at my disposal the following results:
Plain tap water:
View attachment 241384

Filtered tap water:
View attachment 241385

No comment.

Regards
Interestingly, I took a reading of a popular bottled water brand that I have as we did not have water yesterday.

Turns out the PH 7.8 - not far off from my taps 8.1 reading and the EC of the "Pure" water was 0.4 - roughly 200PPM compared to the 50PPM from my tap.

I was expecting the water to be less alkaline firstly. the EC reading would also be alarming but the EC reading can be justified possibly by being "spring water", having calcium, magnesium and other dissolvable solids found in spring water.

I am still impressed with the quality of water we have in JHB but as mentioned before, these are basic tests and I do not have the equipment to test for other chemicals or bacteria that could be present in the water.
 
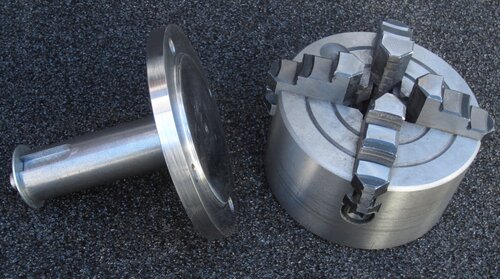
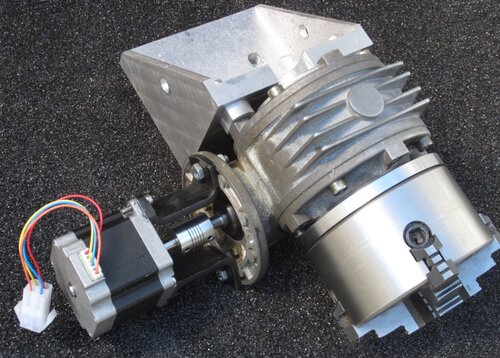
After much searching I was kindly given a piece of high carbon steel(25mm dia x 130mm long) by the gent at Zaya Metals in Montague gardens.

You could say this pic is sponsored by Zaya Metals. :)
shaft chuck1.JPG


The complete unit bolted together. Currently using 3 standoffs between the gearbox and angle plate, but I might leave them off and just cut a clearance hole for the worm's hub.
stepper worm chuck - Copy.JPG


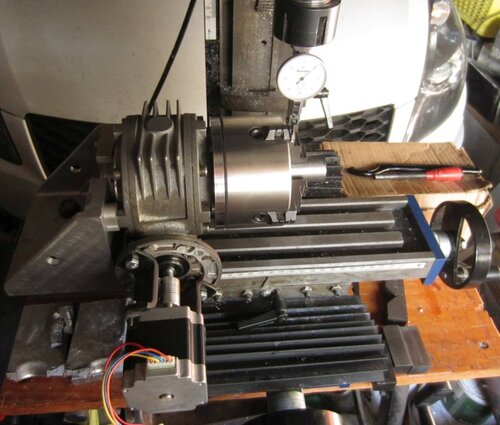
Mounted on the mini mill, checking backlash which was an expected 9/100mm call it 0.1mm.
Run out on the chuck face is a more worrying 0.15mm.
Still busy with the blue printing to see which bolt hole combo gives the least error.
checking backlash - Copy.JPG

EDIT: the next day.
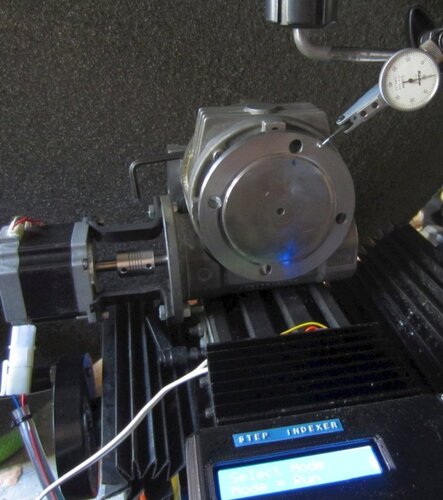
I decided to mill the worm hub mating face square in the fixture and then keyed the adapter flange and milled that square as well.
Now the face runout on the flange/chuck side is a respectable 0.01mm.
Black lash is down to 8/100 mm after dimpling the key with a center punch, not a huge concern as long as you rotate in the same direction and dont reverse at all.
milled face runout.JPG
 
Last edited:
After much searching I was kindly given a piece of high carbon steel(25mm dia x 130mm long) by the gent at Zaya Metals in Montague gardens.

You could say this pic is sponsored by Zaya Metals. :)
View attachment 241855


The complete unit bolted together. Currently using 3 standoffs between the gearbox and angle plate, but I might leave them off and just cut a clearance hole for the worm's hub.
View attachment 241856


Mounted on the mini mill, checking backlash which was an expected 9/100mm call it 0.1mm.
Run out on the chuck face is a more worrying 0.15mm.
Still busy with the blue printing to see which bolt hole combo gives the least error.
View attachment 241857
Sheer brilliance!
 
A bit of vibration causes my mill head to drop resulting in a cutter crash, gouges the work piece and knocks the column out of perpendicular.
So far I havent stripped the plastic gear on the motor shaft, but I figured it was time to do something.

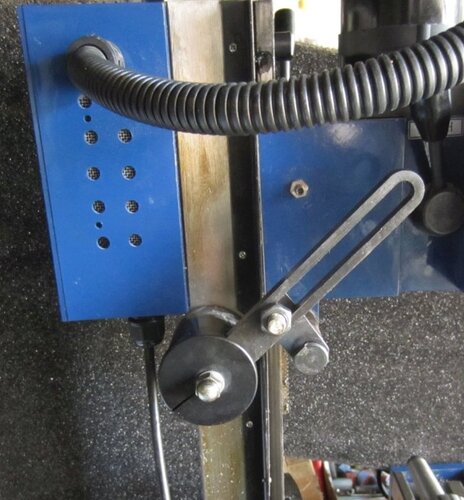
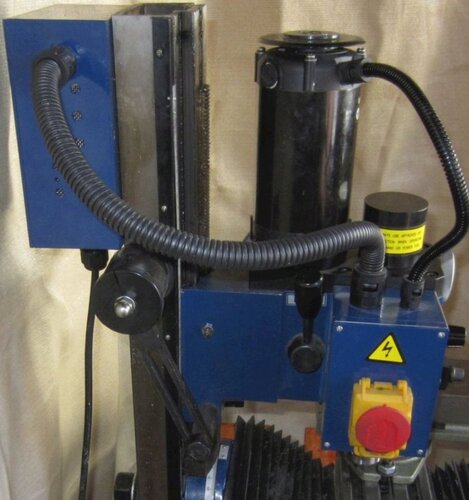
These mini mills use a torsion spring to counter the 17kgs of the head, a very poor design. I tried adding a 30mm bar link but it only made things worse at the top of travel and not much improvement at the bottom.
mill link before.JPG
I had an idea of using a counter weight hanging at the back, so I popped onto the interwebs looking for mods.
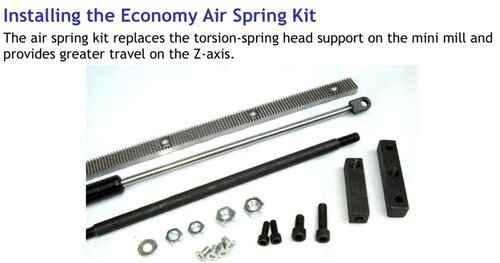
Qquite a few Americans using gas struts, with a company selling a kit.

airspring.jpg
I'm going for the sub- economy version because I cant find a module 1 rack in the right size in South Africa.
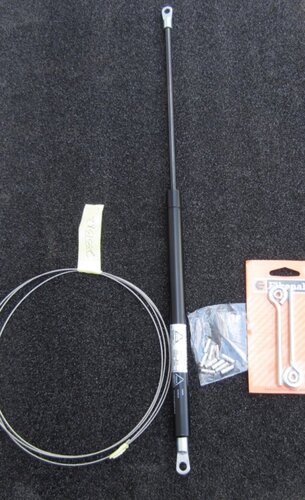
So basically just a gas strut, 2m of 1.5mm dia wire rope, 2 pulleys, some mounts and hardware.

Gas strut came from McNaughtans in Parow, its the K4046( too long, changed to a K4045) charged to 180 newtons. (R135)
The Youtube mods typically use 2 struts and one cable, I'm going with one strut and 2 cables to balance the load.
It probably should work okay. :)
gas strut.JPG
 
Last edited:
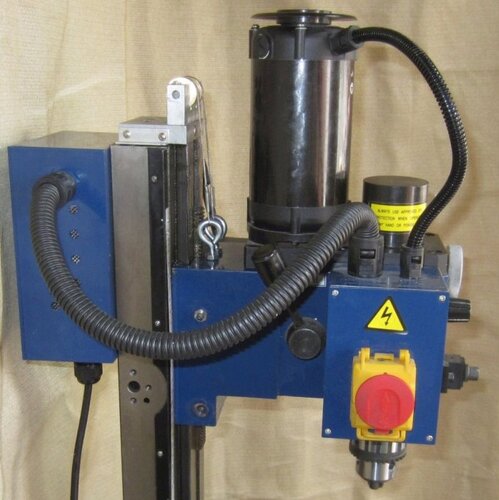
Finished my mill upgrade last nite. Works well, the wire cables dont slacken even if I wind up as fast as possible.

The complete assembly.
complete assy.jpg

A before shot with the torsion oem spring that had lost most of its torsion in the 5 years Ive had it.
before1 ecig.JPG


The after.

main2 ecig.JPG
 
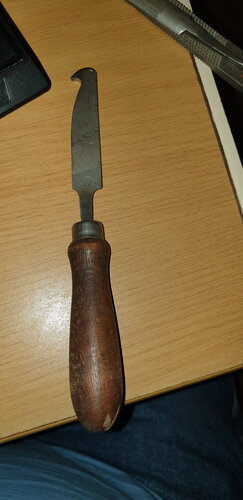
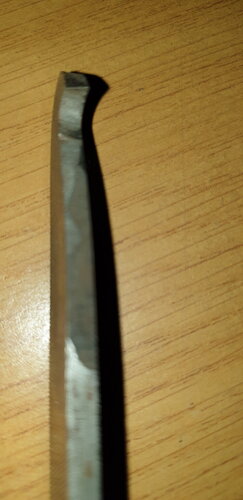
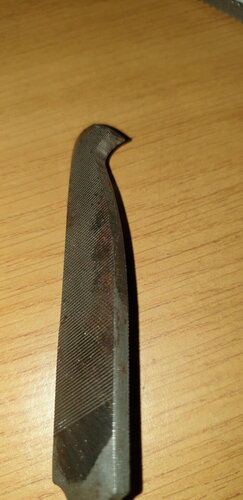
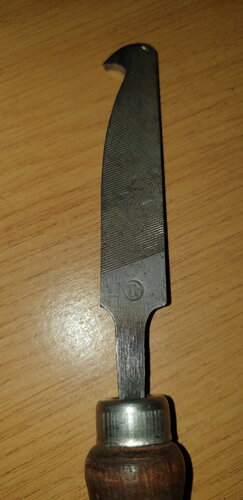
Thought I would share with you a Perspex cutting tool I made many years ago. It actually gouges out a strip of Perspex. There is an angle on the cutting or gouging edge and the perspex never splinters.

20211030_120632.jpg 20211030_120616.jpg 20211030_120551.jpg 20211030_120534.jpg
 
Last edited:
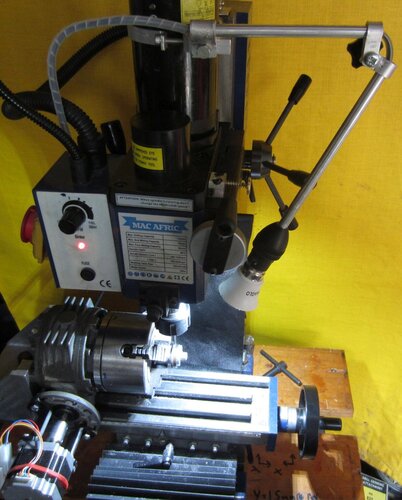
Sundays job was a gooseneck light for the mill, some ally strap and tube and uncle bob.

gooseneck light.JPG

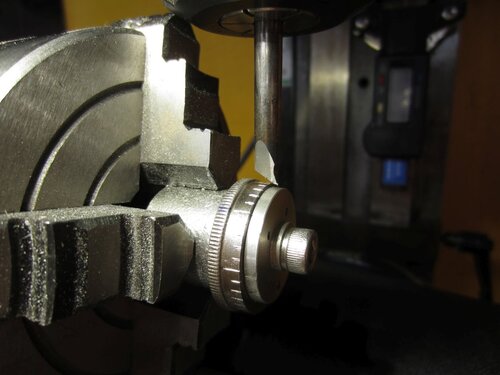
First real job with my new gadget, re doing the graduations on my lathe dial, it was worn off from bad pitting rust when I bought it and my cleaning with steel wool didnt make anything better.
Using an inlet valve stem that I shaped on the grinding wheel.
ecig dial scribe.JPG
 
Sundays job was a gooseneck light for the mill, some ally strap and tube and uncle bob.

View attachment 242855

First real job with my new gadget, re doing the graduations on my lathe dial, it was worn off from bad pitting rust when I bought it and my cleaning with steel wool didnt make anything better.
Using an inlet valve stem that I shaped on the grinding wheel.
View attachment 242856
I made toast today
 
New week , new project.
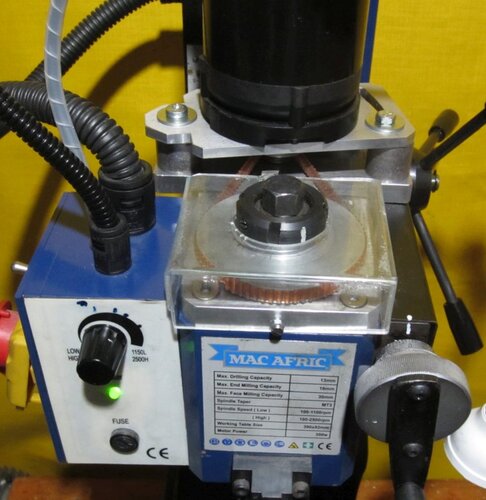
This time its a belt drive for the mini mill.
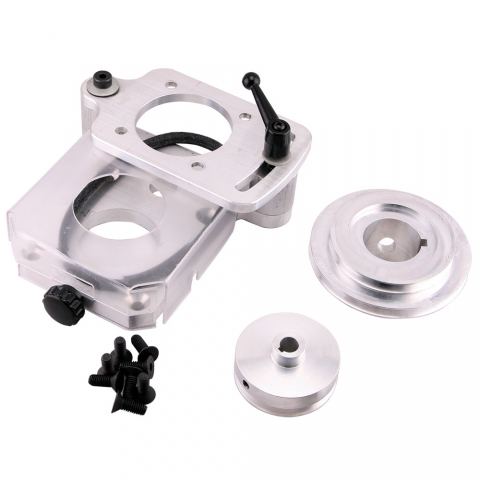
Only kit available is an import from Pasadena, California @ R3050 incl shipping, alas its large pulley is designed for the Sieg X2 mini mill with a 30mm dia spindle and my Mac Afric has a 28mm spindle.
Not that I was going to toss R3k at California anyway. :)
belt drive.jpg

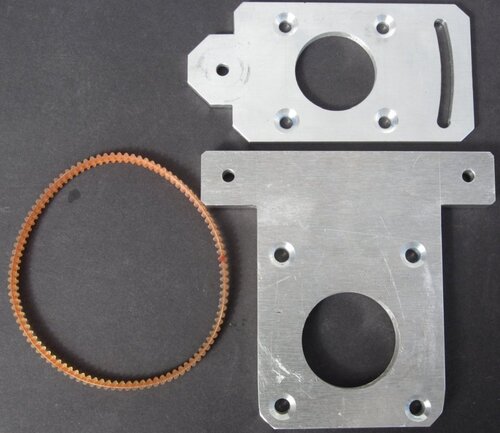
What I've made so far.
belt drive plates vbelt ecig.jpg

Belt took a few days to find, R17.50 from a sewing machine place and the aluminium was R86 from Non Ferrous Metals.
Just the pulleys to design and cast and some hardware to button it together... probably all in for less than R150.
I feel like a weenah.:D
 
...and done. Belt still a bit short for the smaller high speed because I was a chop chasing rpm's and made the pulley to small. :)
Low speed is still 1100, high would be 4600rpm compared to the original 2500.
I'll probably be looking for a smaller sewing machine belt come Monday.

complete with cover ecig.jpg

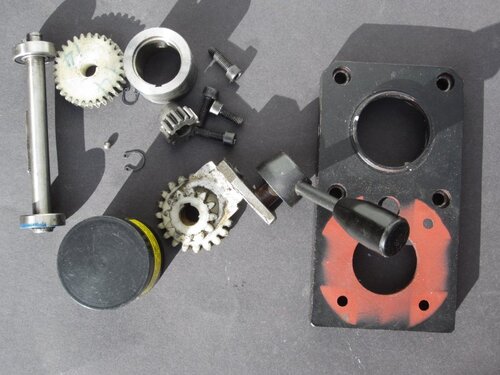
All the parts no longer needed, old cast iron top plate and intermediate shaft with nylon cogs from the gearbox.
deleted parts ecig.jpg
 
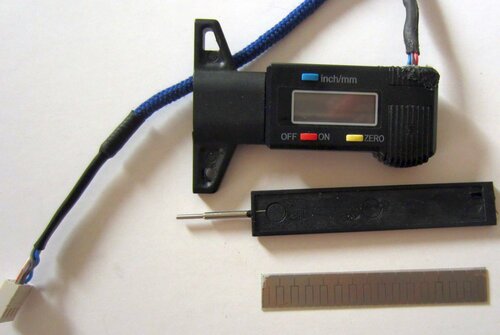
I'm wanting to have a custom pcb made for a tyre tread depth gauge so that I can hack it into a DRO for my mill.
Any board designer boffins that could tell me what software I should be using would be a great help.
I've tried many of the free ones like Fritzing , FreePcb and LibrePcb, but they start with the premise that you have a schematic and put components on a board that you connect with traces.
In my case I have no holes, traces or components and I've been stumped at the design stage. Most of the pcb manufacturers want a gerber file which is the output of the cad software.
IMG_1659.JPG

So far I've got a usable output from the read head and by cutting the plastic slider, I've got a range of 0mm to 65mm(originally 25mm), but to get to 250mm I'm going to need a new pcb.
 
I'm wanting to have a custom pcb made for a tyre tread depth gauge so that I can hack it into a DRO for my mill.
Any board designer boffins that could tell me what software I should be using would be a great help.
I've tried many of the free ones like Fritzing , FreePcb and LibrePcb, but they start with the premise that you have a schematic and put components on a board that you connect with traces.
In my case I have no holes, traces or components and I've been stumped at the design stage. Most of the pcb manufacturers want a gerber file which is the output of the cad software.
View attachment 245459

So far I've got a usable output from the read head and by cutting the plastic slider, I've got a range of 0mm to 65mm(originally 25mm), but to get to 250mm I'm going to need a new pcb.

I use a program called ZenitPCB, (which is freeware, and does read / produce Gerber files).
Most of the freeware should be able to do what you want tho' if you use one of their their edge connector templates, and then tweak the sizing ;)
 
Back
Top