Mod restoration

Please tell me more about this baking process, as I've never done that

I have a mate who has repurposed an old eye level oven in his garage for powder coating, not sure about baking "normal" enamel paints in it tho, save to say that I have warmed up small parts in the sun prior to using rattle can paint, and that seems to work well.
 
My biggest concern here is that the new 510 might be thicker that the old one and create a gap between the tank and mod. Let's hope someone has an old Hohm Slice lying around to strip for spares. In the meantime someone very kind has offered to send me one that also used to be red but is totally stripped of paint now. So I can play around with the finish on both casings and then just throw in the internals in the one that come out the best.
I think it's time to get that vernier out and measure up your mods "indentation", both depth and diameter, to resolve your concerns ;)
 
I think it's time to get that vernier out and measure up your mods "indentation", both depth and diameter, to resolve your concerns ;)

Yup, will head off to mica as soon as I can. Just supervising some building work at my mom's place for an extension on a step to fit her walker on. But from sight I can say it really isn't deep at all. Still holding thumbs that someone in the classifieds will come through. This morning I have a hundred ideas of how I could have gotten it out without breaking it, but too late now. At least I've learnt for when I do the black one.
 
Yup, will head off to mica as soon as I can. Just supervising some building work at my mom's place for an extension on a step to fit her walker on. But from sight I can say it really isn't deep at all. Still holding thumbs that someone in the classifieds will come through. This morning I have a hundred ideas of how I could have gotten it out without breaking it, but too late now. At least I've learnt for when I do the black one.

Personally ... I prefer a larger 510 adapter that stands some 0.1 to 0.25mm proud of the mod itself, to protect the paintwork of the mod, and I think that's what you'd have if you used a slightly larger 510 adapter ;) ... You could even use one of the 510 adapters with three countersunk 2mm screws, which I did on one of my Gen-S's to fix the infamous Gen/Gen-S floppy 510 adapter.
Let's hold thumbs on some kind forum member having two matchy matchys 510's hiding in their bottom drawer, and or someone who's prepared to take me up on my offer of replacing their tank stands 510 adapters :)
In the meantime, strip all that old paint off an' lets see what she looks like with no clothes on ;)
I would also prefer if the 510 protruded just a tad, but that would mean the tank's diameter would be greater than the diameter of the 510, which I'm not too crazy about. If the 510 plate was the same size as the tank, that would have been a winner. Pity Ecig-inn is out of stock. Not in the mood to buy from Bid or Buy.
 
I would also prefer if the 510 protruded just a tad, but that would mean the tank's diameter would be greater than the diameter of the 510, which I'm not too crazy about. If the 510 plate was the same size as the tank, that would have been a winner. Pity Ecig-inn is out of stock. Not in the mood to buy from Bid or Buy.

Have some faith ... I'm sure someone out there has a couple of 510's for you ;)

On the subject of "overhang" ... I'm assuming you're referring to tanks overhanging the 510 adapter? ... As 22mm is pretty much the standard for 510 sockets, (and that I doubt you have any tanks smaller than 22mm diameter?) ... I believe you'll be just fine, also ... your mods will in fact look even better with 510 sockets that fully occupy that indentation on the top of your mod(s) as apposed your current setup :)

Yup, still supervising the building process (very slow progress for one step) but I snuck out to Mica to get my supplies I think I will need. Including a battery for the vernier. So I can take some measurements when I eventually get home and the F1 qualifying is done with. @Angelskeeper did offer me two 510's, I'm just holding out to see if I can keep the two mods identical. I'm very pedantic that way
 
Once tanks are on, you won't see the 510 ;) #justsaying ... but hey ... they're your mods, and you need too be comfortable with them :)
I have a feeling that they'll become your favorite mods once you've invested all the time and effort in repairing / prettifying them :)
 
Not 100% sure... My caliper's battery is dead and the manual ones are in some obscure place in the garage. The Pico does look more like it forms part of the top plate? Or am I missing something in your question? I'll check tomorrow once I'm actually awake and can scrutinise and measure with my old-man Clicks reading glasses :rolleyes:

Okay, just measured it quickly. Diameter of recess is 17.6 mm and depth is 0.8 mm.
 
Okay, just measured it quickly. Diameter of recess is 17.6 mm and depth is 0.8 mm.

That's easy enough then, pop em' into a lathe, (or your drill), and take a file to them you're only taking of a little more than 2mm on radius, and they're probably one mm thick like mine, so they'll be raised by 0.2mm, (and I prefer slightly raised) :)
 
Sorry bout that, I used the app so thats prob why

Never used wish before. Actually don't know anything about it. Is that also like a Chinese thing? Think I might be a bit too impatient for that.... I'm already considering buying a cheap beat up mod from someone and just ripping into it for spares. Will see how it goes. Spares are submerged in acetone as we speak to remove that k@k original paint.
 
Please tell me more about this baking process, as I've never done that
After spray painting to properly cure the paint preheat your oven to 180⁰ for ten minutes. Insert the part on a heat safe surface and insert it in the oven. Baking tray) insert the part and set the oven on 50⁰ for half an hour. Switch of the oven and leave it in there overnight. It properly cures the paint to a heavy duty finish. Works well on enamel, duco and 2k and other two part paints.
You can also preheat heat the part in the oven while it gets to temperature and then spray it. When done just pop it back in and run the process. The heat helps with bonding as well.
Don't heat the part to 180⁰. That's just to get the oven warm and also don't bake it at 180⁰.
What I did in the past is heat the oven then switch it off completely then just leave it in there overnight.

Okay, let me see if I understand this. Does the part already need to be dry before you start this process? Then, switch on oven set to 180, but don't let it actually reach 180? Then pop in the part for 10 minutes and then drop the setpoint to 50 for half an hour?
 
Okay, let me see if I understand this. Does the part already need to be dry before you start this process? Then, switch on oven set to 180, but don't let it actually reach 180? Then pop in the part for 10 minutes and then drop the setpoint to 50 for half an hour?
Yes and no.
Spray the part and let it dry.

Preheat the oven to 180⁰

Lower the oven after ten minutes (the oven would be at temp by this time then pop in the part and just leave it there
or pop in the part and bake at 50⁰ for 30mins.
Switch off and leave till morning.

If done during the day wait untill the oven and part is totally cooled off and you can remove the part with your bare hands..

180⁰ is to get the oven heat completely bake at 50⁰
Or heat to 180⁰ switch off insert part and walk away till it's cold.
 
Or heat to 180⁰ switch off insert part and walk away till it's cold.

This sounds the least confusing to me :oops::rolleyes:
So I'll heat up the oven until it "switches" off the element as it is at 180 degrees. Then I pop in the parts, switch off the power to the oven and leave until cooled off? So the temperature curve would start dropping from 180 degrees the moment the part is introduced and then just gradually cool down?

Hope I got it right this time....
 
Just as an update, I completely submerged all the parts in acetone in a sealed glass bottle. I can already see paint starting to flake off. At least the scratched up outer paint. Seems like the inner paint is much tougher. I NEED to get all of the inner paint off as well, lol, because the mod is not going to be anywhere near red again. I just hope I chose the right two colors to contrast with each other. The Zeus on top is a dark blue, so I had the choice of doing a blue background with either white or black crackle to cover it. I went with black for the crackle. Originally before the paint got really bad I wanted to do a red, white and blue, but changed my mind today while looking at the colors.

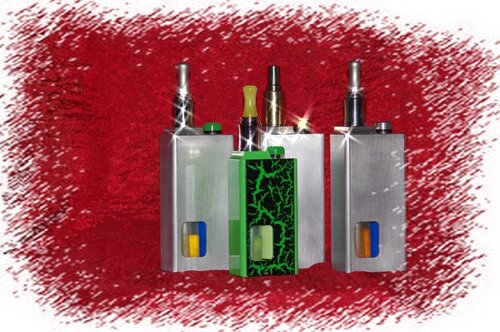
Adding a picture of my old Reo collection to demonstrate the crackle effect I'll be aiming for and I'll try and get a photo of the cans to represent the colors I am expecting. I went with a matt clear coat instead of gloss as the Zeus is a matt finish and not glossy at all. I do however have some gloss clear coat from a previous project and will test it on something else to see, but I have a feeling the matt will triumph.


IMGP2681.jpg

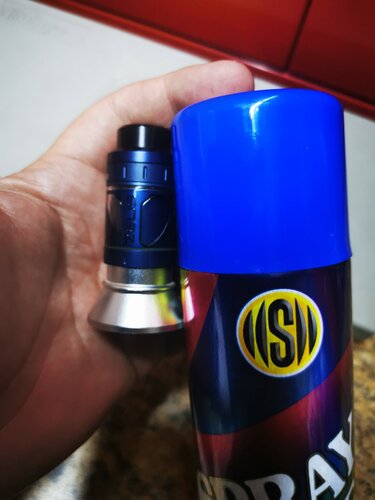
The Blue I chose is brighter than the blue on the Zeus, but it will be toned down quite a bit with the black crackle on top of it. I was afraid the white crackle would brighten up the mod too much and make the Zeus almost invisible. If that makes any sense.

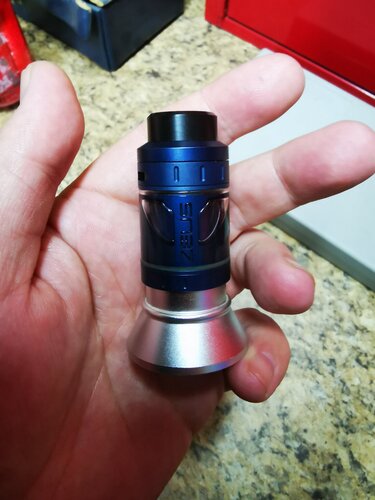
This is what the blue Zeus looks like next to the blue "undercoat" the mod will be

IMG_20210925_160547.jpg

IMG_20210925_160603.jpg

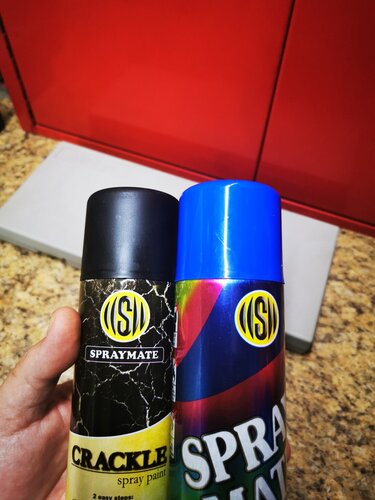
Then finally the black crackle that will be applied over the blue. The crackle in itself is more of a matt finish already, so that is why I'll experiment with both gloss and matt clear coats. Didn't get a white crackle to try out as these cans have gotten quite expensive since I last played around with paintwork. Don't want to get stuck with something I won't ever use again. Plus, the blue Zeus has a black drip tip, so I think it will balance out and look cool. The more, or thicker, the coat of crackle spray you apply, the bigger the cracks get. So it's a tough one to get just right.

This is what the contrast should look like

IMG_20210925_160309.jpg

The green Reo in the 1st pic I got right on the very 1st try. Did a second spare door with a thicker coat, but it opened up huge "ravines" in the green that just looked like the paint was flaking off. Only cool bit about that was that it looked like a cross was purposefully made on the door.

Really looking forward to getting stuck into this project. I have one more week of training to facilitate and next weekend is my standby weekend, so I'll have to force myself to be a bit patient. If I was patient last night my 510 might still be intact ;(

Curious to hear your thoughts on the color choices and ideas though
 
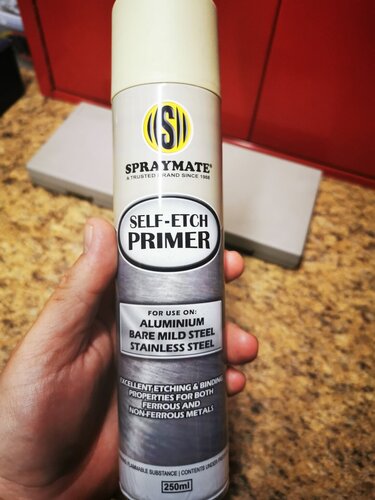
This was the primer I used on the aluminum Reo door, so I'm hoping for the same good results on this zinc alloy...

IMG_20210925_162011.jpg
 
Sorry bout that, I used the app so thats prob why

Keeps telling me it can't verify my details when I try to sign up. Hoping as a last resort Ecig-Inn gets stock again. Just can't remember who owns the place, so no idea who to tag here.
 
I've had plenty of success with that exact brand of spraypaint, and yes, that etch primer should be fine!
I've even resprayed the wheels on the missus's car after she scuffed them, using that exact etch primer and a gun metal grey, same brand spraypaint, and yes, I used spraycans, not 2k.

If you spray it properly and don't spray the coats to thick/heavy and your prep work is done properly, that paintjob will last for ages!

I'm sure about oven baking that spraypaint though, Ive never done that with spraycan paints.
Used the ovenbake for 2k paints, never spraycans though.
 
Last edited:
Keeps telling me it can't verify my details when I try to sign up. Hoping as a last resort Ecig-Inn gets stock again. Just can't remember who owns the place, so no idea who to tag here.

Will ask Brian if he is getting in again...
 
Keeps telling me it can't verify my details when I try to sign up. Hoping as a last resort Ecig-Inn gets stock again. Just can't remember who owns the place, so no idea who to tag here.
You just need the oven to be hot enough and loose heat gradually over time.

When you open the door you loose heat so basically the oven stays hot after insertion of said parts.
50⁰ is what you need and baking it at 180⁰ won't do any good.
Like I said you need the oven hot. Same as baking a cake. The oven needs to be hot before you place the cake batter inside otherwise the cake would flop.
Same with the parts your curing in the oven. Even heat distribution so you don't get hard and soft surface on the same part.
You also don't have to bake it. But then you'd have to give it enough coats to counter wear and tear.
 
Last edited:
Back
Top