Mod restoration

Viper_SA

https://www.tiktok.com/@tinus_viper?lang=en
LV
47
 
Joined
19/2/15
Posts
5,083
Awards
41
Age
46
Location
Sasolburg
So, this might not be 100% the right section of the forum to post in, since my mod isn't broken, but I do need some help and advice on how to proceed with a little project I want to do.

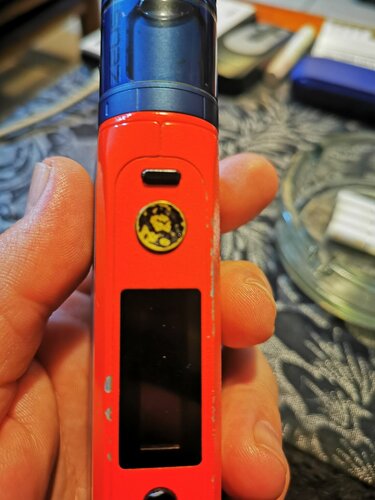
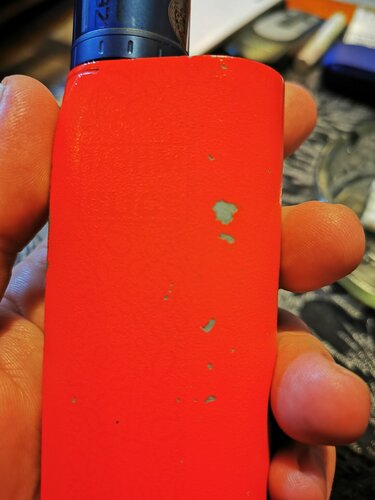
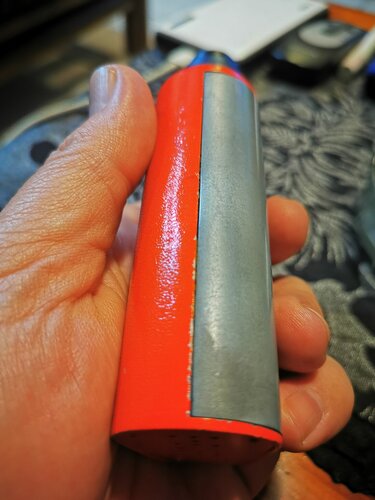
I have two Hohm Slice LE 26650 mods which paint jobs are really bad. They were notorious for these crappy paint jobs out of the factory. I have a red and a black one, but the red is by far the worst and I want to start there.

I have the spray job covered as I've sprayed lots of stuff over the years and know exactly which undercoats and finishes etc I want to use (although some inputs would also be welcome). My main need for advice is the actual disassembly and paint removal. I don't want to end up breaking off wires while taking it apart, so I was wondering if anyone has taken this specific mod apart?

In the past I have soaked stuff in acetone to remove paint with great success, and I know this will undoubtedly also make the glue on the magnets come loose, but I'm sure some superglue will fix that as I have done so with my old Reos.

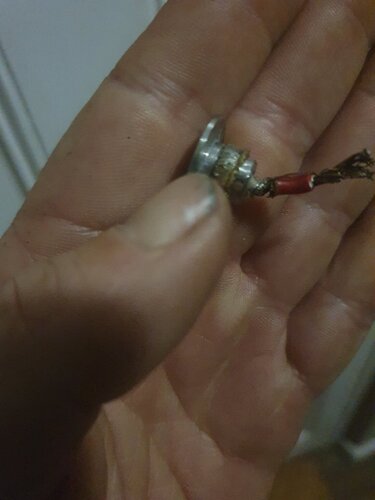
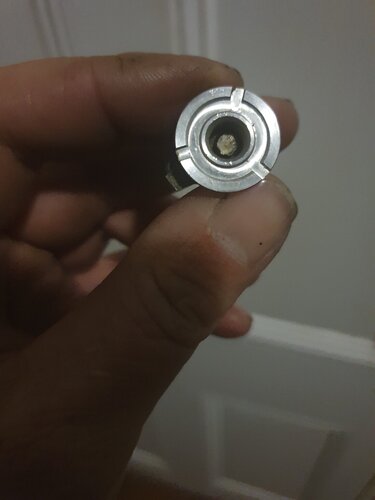
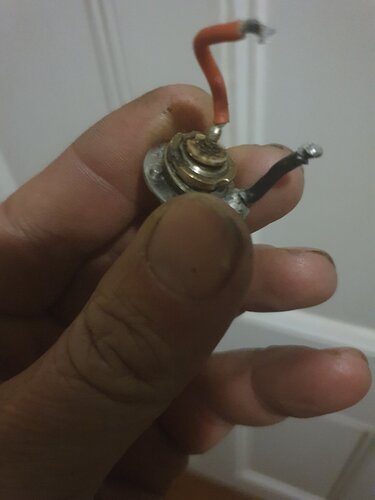
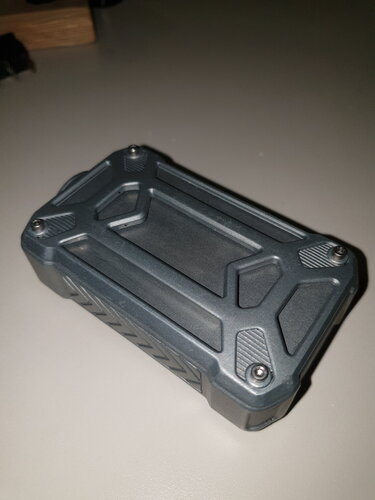
Adding some pics to show the "before" state of the mod
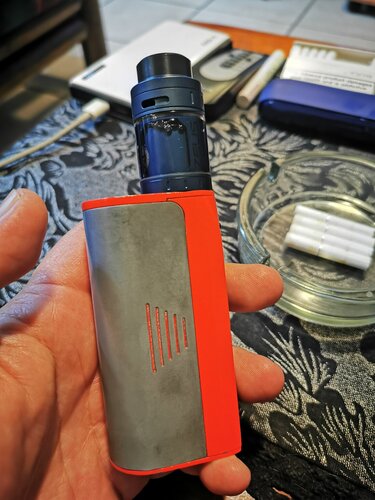
IMG_20210913_184221.jpg IMG_20210913_184242.jpg IMG_20210913_184255.jpg IMG_20210913_184318.jpg
 
Thanks, Also found the original thread of the mod now that I'm on the PC. Couldn't find anything on my cell. Seems like @Raindance refinished his one... Perhaps he can give some advice please?
Eisch, that zinc alloy is like our ex president. Nothing sticks to it. There are probably primers out there that would help but I lacked the motivation to put in the effort.

Regards
 
Eisch, that zinc alloy is like our ex president. Nothing sticks to it. There are probably primers out there that would help but I lacked the motivation to put in the effort.

Regards

Perhaps you can just help me with the part of getting the 510 out please? Got everything loose and out, but the 510 is proving to be difficult. Do I need to solder the wire loose?
 
It looks as if you're gonna have to desolder it, otherwise you going to have to mask it up
 
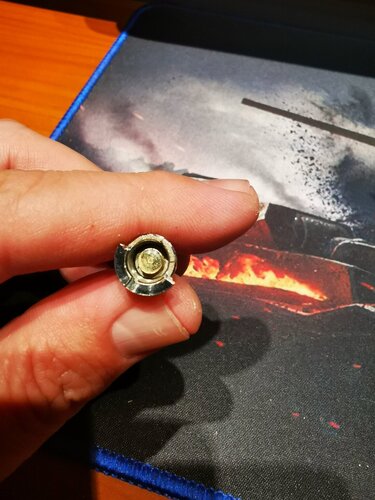
Okay.... So this part didn't go according to plan..... :facepalm:;(
Anyone know where I can buy 510 connectors? Are they like one size fits all for press-fit types?

IMG_20210924_194231.jpg
 
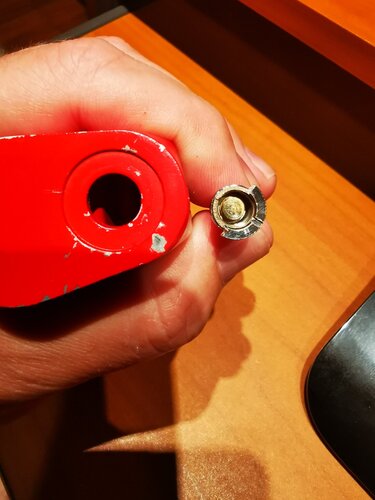
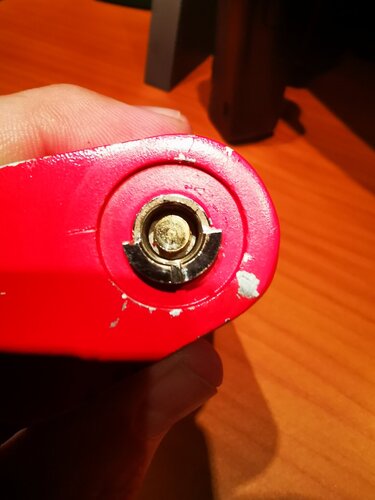
Little bugger just press-fits in. Seemed to come loose and then the edge just snapped on me. Just checked now, my old DNA 60's won't fit. Looks completely different. Ideally I'd buy two of these now so I have an identical one in case the same happens when I do the black mod. Also, all my acetone has evaporated since I last used the bottle, so I'll have to buy a bottle to test the paint removal capabilities.

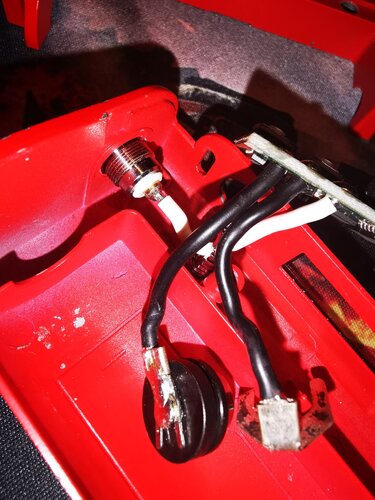
Anyway, here is what the 510 looks like

IMG_20210924_195532.jpg IMG_20210924_195602.jpg
 
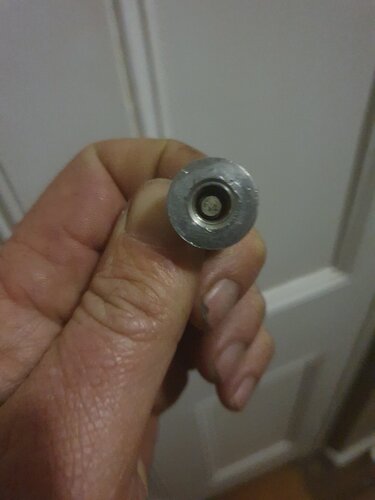
Ive got 2

1st one is press fitted, 2nd one has a nut on it.

Dont know if either will fit, but your welcome to them if you dont come right
20210924_200942.jpg 20210924_200953.jpg 20210924_201754.jpg 20210924_201801.jpg
 
Ive got 2

1st one is press fitted, 2nd one has a nut on it.

Dont know if either will fit, but your welcome to them if you dont come right
View attachment 240001 View attachment 240002 View attachment 240003 View attachment 240004

Thanks, will keep that in mind. I might have mistakenly called it press-fit. It does have a nut, but it was also jammed in quite damn well. Took quite a bit of power getting it out. I'll calculate the costs of the 510 and the spray paint (which has gotten ridiculously expensive) and see if it's really worth all the trouble. I know one of the brands of spray paint I use has a super undercoat that sticks like sh!t to lambs wool.
 
cCig Inn has had them in the past, but seem to be out of stock https://shop.eciginn.co.za/products/510-connector?_pos=1&_sid=6ad5fb6ec&_ss=r
or try;
https://www.bidorbuy.co.za/item/525...attery_Connector_for_Mech_Mechanical_Mod.html
or ... Ask in the forum classifieds ... someone may have a poked mod and or old 510 connector that they're prepared to let you have ...
failing all that ... I could possibly remove the inner part of your broken 510 adapter and turn another outer to replace your broken part as a last resort.

Thanks, but those are both 22mm 510's. Won't fit in my mod. Somewhere I must surely be able to purchase something like that. Been through all my usual vape shops' websites now though with no luck. The classifieds might be a good idea. Problem with my severe OCD is that I now want two 510's so that I can have both the Hohm mods I have identical again :facepalm:
 
As to it being Zinc and or a Zinc alloy ... Whilst I'm not aufait with your mod, I do know that there's not much that sticks to Zinc and it's alloys, and the better, (not perfect primers), are etch primers, which I wouldn't recommend using.
Why not strip the paint off and either leave it as raw metal, or buff it up, (to which @DarthBranMuffin is the man to speak to about prettifying) ...
Check the attached pic of a Mechman that's a Zinc alloy left bare after stripping off the chipped paint
20210924_211429.jpg
 
Thanks, but those are both 22mm 510's. Won't fit in my mod. Somewhere I must surely be able to purchase something like that. Been through all my usual vape shops' websites now though with no luck. The classifieds might be a good idea. Problem with my severe OCD is that I now want two 510's so that I can have both the Hohm mods I have identical again :facepalm:

You can machine down those 22mm 510's to fit the indentation in your mod perfectly, or even smaller to match your original one ... that's a minor concern ;)
 
As to it being Zinc and or a Zinc alloy ... Whilst I'm not aufait with your mod, I do know that there's not much that sticks to Zinc and it's alloys, and the better, (not perfect primers), are etch primers, which I wouldn't recommend using.
Why not strip the paint off and either leave it as raw metal, or buff it up, (to which @DarthBranMuffin is the man to speak to about prettifying) ...
Check the attached pic of a Mechman that's a Zinc alloy left bare after stripping off the chipped paint
View attachment 240007

The thought has occurred to me to just leave it bare, like my old tumbled aluminum Reos and just use a Scotchbrite pad on it now and then. I normally have sweaty hands and it does tend to start leaning uneven tones, or at least it did on my Reos, so they got the Scotchy once a month.

Didn't think of the part where it can be machined down. Would look better if it filled the whole cavity in my opinion, so a bit larger than the original. Just not a fan of that tightening nut. The spliced ring on the old one tightens much easier, seeing you won't reach in there with a spanner too easily (I know because my Molly V2 and Pulse has that nut and it's a pain in the ass to try and tighten). Wonder if the original's would fit and if they have the same thread....

Then of course there's the issue that I don't have a lathe and I don't think it would work like I always do softer materials by using a diamond file and the drill press, lol.

Truth be told, I was considering the etch primer. Also, calculating the costs of spray paint, new 26650 batteries that I was thinking of getting and these extra costs that crept in now, it might just be easier to buy two new mods. (yes, I like my mods in pairs, lol, and the black one's paint is not much better than this red one). It's also a schlep to charge the 26650's as they don't always make contact in my charger, so mostly I charge in the mod and the battery life sucks then. It seems to keep much longer when charged externally.

If I do continue with the project, I would have two unique mods though and something to keep me busy.
 
Don't get me started on the costs of restoration vs. replacement :facepalm: ... I'm a sentimentalist at heart, and loyal to my old mods, so I fix em' up making them unique in the process, and ... it's something to do as hobbies go with Covid / our illustrious CCC limiting other pursuits

As to leaving your mods bare ... if you buff them up good and proper, you end up with a hard "skin" on the material which will resist minor scuffing and tarnishing far better than raw metal, to which a monthly cleanup would more than suffice, (which you're probably doing with all your other mods anyway ;))

Then to the lathe requirement ... you could probably get away with using a drill to hold the 510 connector, and a file held against the thin lip to trim it to size ... as you'll probably only be taking off around a millimeter, it should go quickly, (assuming that you fill that cutout in your mod(s), which in my opinion would be more aesthetically pleasing than the current one(s) )

Finally ... most mods I've found, do not charge batteries fully, and I assume that's for safety and charge time reasons/ing, as the last 20% typically takes 80% of the charge time, as the charge current on Lithium cells is reduced progressively as the cell charge approaches 100%
 
Depending on what is actually under the paint once stripped, finding the right primer and painting it to new perfection will be hit and miss. Would suggest hydrodipping it.

If you want to leave it "unpainted" it is going to need a lot more attention due to tarnishing and oxidization, especially due to it being in contact with liquid. Option there is to clearcoat it at least if you want to leave it bare.

What size is that 510 connector, about same size as a Pico?
 
What size is that 510 connector, about same size as a Pico

Not 100% sure... My caliper's battery is dead and the manual ones are in some obscure place in the garage. The Pico does look more like it forms part of the top plate? Or am I missing something in your question? I'll check tomorrow once I'm actually awake and can scrutinise and measure with my old-man Clicks reading glasses :rolleyes:
 
I would respray the red part using rustoleum spray paint.(can)
And leave the door with the stripes as is (or touch up the red stripes) and polish the door and then clear coat.

The Mo's is already bare so strip and continue refinishing it. The 510 isn't that major. You can make it fit and the nut isn't that much of a hassle once in place. You're not going to remove it again soon.
Then I would clear coat the whole mod again and bake the finish on after curing the paint.
 
Then to the lathe requirement ... you could probably get away with using a drill to hold the 510 connector, and a file held against the thin lip to trim it to size ... as you'll probably only be taking off around a millimeter, it should go quickly, (assuming that you fill that cutout in your mod(s), which in my opinion would be more aesthetically pleasing than the current one(s) )

My biggest concern here is that the new 510 might be thicker that the old one and create a gap between the tank and mod. Let's hope someone has an old Hohm Slice lying around to strip for spares. In the meantime someone very kind has offered to send me one that also used to be red but is totally stripped of paint now. So I can play around with the finish on both casings and then just throw in the internals in the one that come out the best.
 
Last edited:
Back
Top