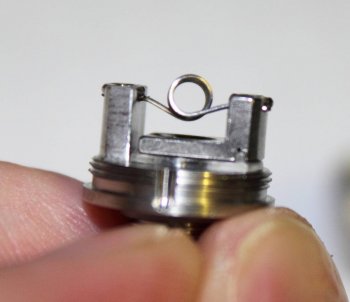
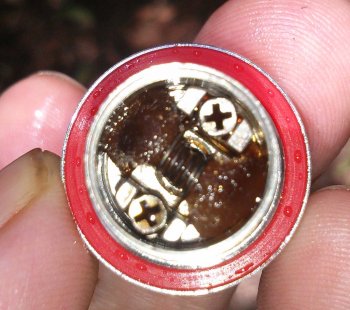
Kanger Subtank 22mm and Nano 18mm


It really does not get easier than this to build a coil :rock:

I'll just add that I used way less cotton than Rip. I've rewicked about 4 times now and find that less is better - not too little, but not too much (just touching the deck on each side) :)

With too much cotton it expands and blocks the juice channels leading to some dry hits :eek:
 
Last edited:
Ye I've had mine since Wednesday... I think... It's been solid, best thing i can say about it, is the power efficiency. I'm using the 0.5 ohm OCC coil at 15W, and its working remarkably well. Haven't fiddled with the RBA base. But I'm a bit skeptical, those wicking holes are mighty small.

Flavour and vapor are good on the OCC coil. Slightly more vapor than my modded Lemo, but slightly less flavour than the Lemo too. Guess its a trade off
There's nothing be to be sceptical about with regards to the juice holes on the RBA deck. It wicks very well. No dry hits in sight.
 
I'll add, its vastly better made than the Atlantis. IMHO, it looks a lot nicer. Them red o-rings :p
 
Ye I've had mine since Wednesday... I think... It's been solid, best thing i can say about it, is the power efficiency. I'm using the 0.5 ohm OCC coil at 15W, and its working remarkably well. Haven't fiddled with the RBA base. But I'm a bit skeptical, those wicking holes are mighty small.

Flavour and vapor are good on the OCC coil. Slightly more vapor than my modded Lemo, but slightly less flavour than the Lemo too. Guess its a trade off

I was just as skeptical of those mini teeny tiny juice channels, but even chain vaping this I get no dry hits - except when I "over-wicked" it, and even then it took a bit of work on my part ;)

I find the flavour on the SubTank quite a bit better than the Lemo, but I've been using the RBA base exclusively (haven't even tried it with a coil) :D
 
Thanks - these posts are very informative
Looks like a super tank

Does it fill the same way as the Lemo? (With a little screw at the base?)
And does one need one of those thin needle tip plastic bottles to fill it?
 
Thanks - these posts are very informative
Looks like a super tank

Does it fill the same way as the Lemo? (With a little screw at the base?)
And does one need one of those thin needle tip plastic bottles to fill it?
It fills exactly like the EVODs, just much wider, you could even fill it by pouring straight from the bottle with out having to hunt a dropper or a syringe ;)
 
Thanks - these posts are very informative
Looks like a super tank

Does it fill the same way as the Lemo? (With a little screw at the base?)
And does one need one of those thin needle tip plastic bottles to fill it?
To fill you remove the entire base with the coil/rba attached. No need for needle tip bottles. you can also replace coils or change coil on rba without emptying the tank.
 
Thanks - these posts are very informative
Looks like a super tank

Does it fill the same way as the Lemo? (With a little screw at the base?)
And does one need one of those thin needle tip plastic bottles to fill it?

No, and it's one of it's best features :rock:

It fills like every other Kanger Clearomizer. So you can get to the coil/RBA base without emptying the tank :D
 
Thanks guys, this really sounds like my kind of tank!
 
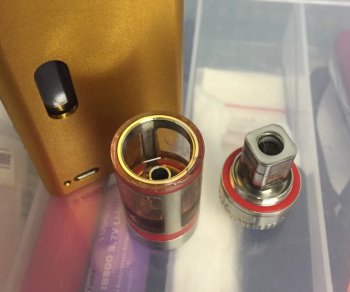
Here you go, popped mine open quick so you get a better idea of how much space we're talking about.

10962060_10205851143699283_1620646102_n.jpg
 
Thanks guys, this really sounds like my kind of tank!

It really would be a perfect fit for your "mindless vaping at the PC" requirement. I still love the Lemo, but the convenience and slightly improved flavour of the SubTank has edged out the Lemo as my favourite tank :D

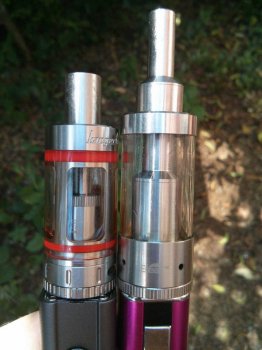
And the size is just fantastic...here is a comparison with the Lemo (which you have so you can compare) ;)

IMG_20150207_103558.jpg
 
Thanks @free3dom , i like the picture. Lol, i see the Lemo got demoted to the iStick and the Subtank got the spot on the mini Dragon

The subtank mini does look a bit smaller than the Lemo. I get about 4.5 ml into my lemo. Wonder how much the subtank takes. Looks like 3.5ml to me in that pic
 
Thanks @free3dom , i like the picture. Lol, i see the Lemo got demoted to the iStick and the Subtank got the spot on the mini Dragon

The subtank mini does look a bit smaller than the Lemo. I get about 4.5 ml into my lemo. Wonder how much the subtank takes. Looks like 3.5ml to me in that pic
The Subtank mini takes around 4.2ml
 
@Silver....yep, poor little Lemo has to be content on the iStick now :rolleyes:

As @Dubz said, the Subtank actually matches the Lemo for tank size too!

I can not praise this tank any more (or I'd have to get a job at KangerTech) but it really was instantly impressive to me :D

Here are a few more pics I took but never got around to posting (seems like a good time) ;)

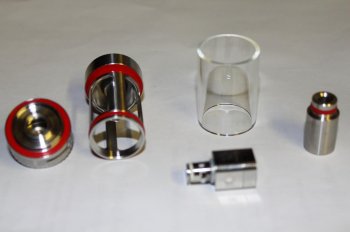
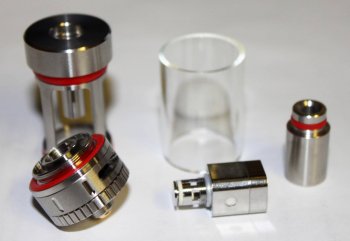
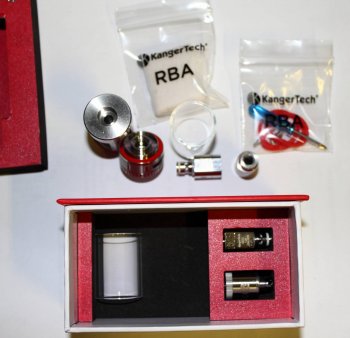
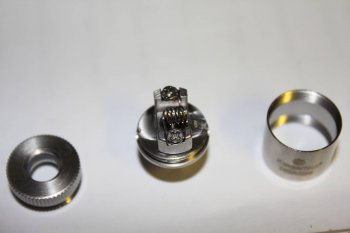
Disassembled
IMG_4897.JPG IMG_4898.JPG

Inside the box (it comes with so many extra goodies, including a spare glass for the tank)
IMG_4899.JPG

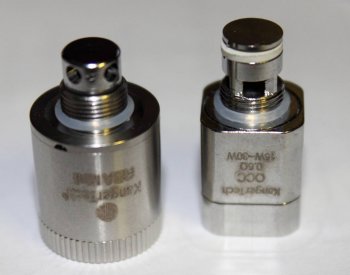
RBA Base vs Stock Coil
IMG_4900.JPG

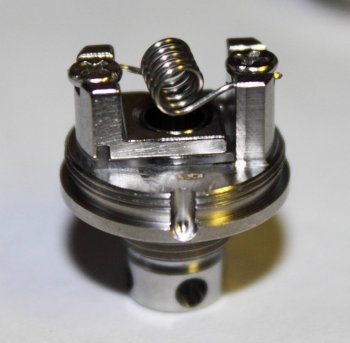
RBA Base with factory coil
IMG_4901.JPG IMG_4903.JPG
IMG_4904.JPG
 
Great photos @free3dom
Thanks

Nice they give a spare glass tank

And that factory fitted RBA coil looks really good!
 
Great photos @free3dom
Thanks

Nice they give a spare glass tank

And that factory fitted RBA coil looks really good!

It actually is a great factory coil...used it for an entire week before replacing it with my own - and I only replaced it because I wanted to have a go at rebuilding it :D

They even include a spare 0.5 Ohm factory RBA coil that you only need to re-attach to the RBA base. I skipped this to give my own 1.0 Ohm a try, and it's working beautifully :)

I have also been using their included Japanese Cotton for wicking and it is fantastic ;)
Never rebuilt before and tried on my rda base on the mini. First two oulls were insane, from there....... Burnt, what could I have done wrong
 
Never rebuilt before and tried on my rda base on the mini. First two oulls were insane, from there....... Burnt, what could I have done wrong
Either you have too much wick through your coil or too little. Too much will choke the wick meaning the juice cannot saturate your wick efficiently as the wick is too tight/compacted in your coil. If you have too little/too loose the juice between the coil and wick just burns.
 
Last edited:
Thanks lemme play around with it a bit
 
Never rebuilt before and tried on my rda base on the mini. First two oulls were insane, from there....... Burnt, what could I have done wrong

For me that was down to wicking. It really doesn't like too much wick because the juice channels are so small.

What I did was to cut the wick so that it touches the bottom of the base without having to be folded much, then primed it with juice and pressed it down. The cotton expands quite a bit so less is required and more will just block the channels.

Here is a pic of my current wick after a day of use...I used very little and you can see it expanded a lot but does not cover the juice channels - not a single dry hit so far, and I've been chain vaping :D

IMG_20150207_110944.jpg

Edit:
I'll also mention that even though Rip uses a lot of cotton in his build (video on previous page) he packs it in very lightly - this should work too, but I have not tested it.
 
Last edited:
Back
Top